
Eyewitness Testimonies in the Bible: Reliable and Confirmed #meditation #biblemeditation #miracle
CrowdStrike bricking – how to boot into Windows
Update 23 July 2024: CrowdStrike has published remediation guidance. It’s always better to follow guidance from the manufacturer, rather than some random dude on the internet. 😉 Note that CrowdStrike’s guidance will be particularly useful for those with large fleets to remediate. The guidance below remains useful for quick recovery for individual machines.
It’s a bad day for CrowdStrike. Machines are being bricked globally, due to a faulty CrowdStrike update. Here’s a recovery process. You’ll need physical access to this machine for this and it won’t be possible to do this at scale, sorry. I’m not sure to what extent this workaround disables CrowdStrike, so proceed with caution.
Power on the computer
Press F11 to enter recovery mode (on some machines, where the manufacturer has overriden this default, you may need to press F9 or F12)
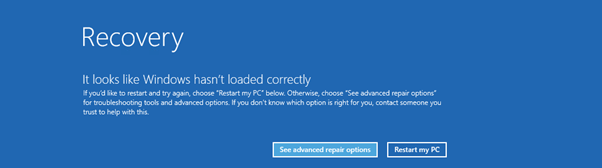
Choose advanced repair options
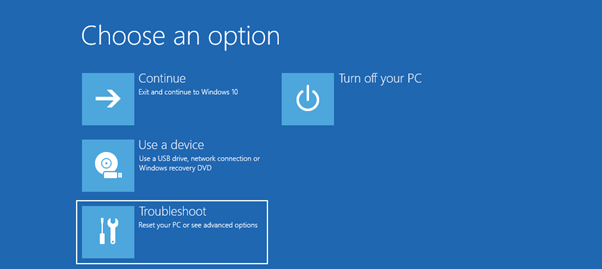
Choose troubleshoot
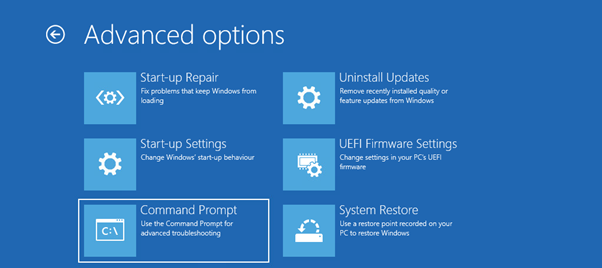
Choose Advanced options

Choose command prompt
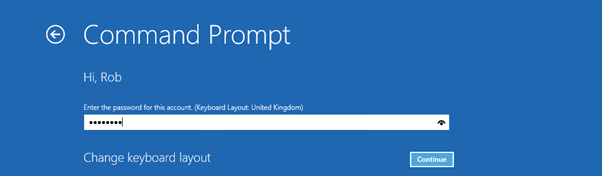
Choose account

Enter password
Enter commands:
del "C:\Windows\System32\drivers\CrowdStrike\C-00000291*.sys"
exit
Then choose continue

You should now boot into Windows successfully.
