1. Introduction
In my last “online privacy” article, I looked at how we can improve our privacy while browsing the web. So far, so good. But what about email? As it happens, email is problematic.
Growing from one of the oldest-established internet standards, email has changed very little from its inception. Email content is sent in plain text, just as it was on day one. Attachments are encoded to facilitate transmission, but any old email program can decode them.
Given the widespread use of email, we might wonder that there is no universally-agreed standard for transmitting messages securely. The big problem here is complexity. Email is used by people from all walks of life and all levels of computing ability. For universal acceptance, the barrier to entry must be kept very low (this is one reason why Dropbox is so successful – it’s easy). But security almost always increases complexity and decreases usability. We have options, but they all make email harder to use (even if that might be just slightly).
2. Simple but limited encryption: SecureGmail
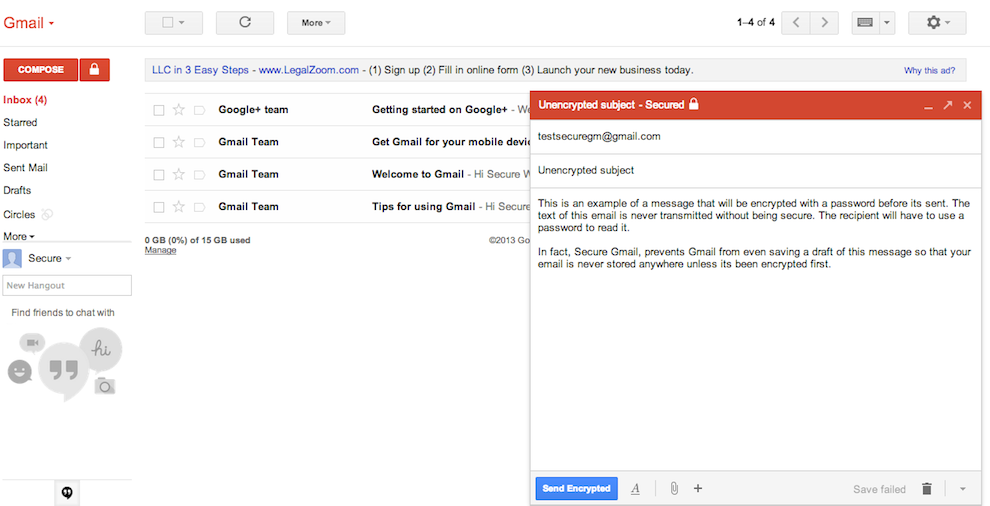
 I’ve recently come across a pretty simple option for encrypting email. Unfortunately simplicity comes with limitations. SecureGmail is an extension for the Chrome browser that enables encryption of email between Gmail users. So immediately you can see two limitations: firstly, the sender and recipient must both be using Gmail and secondly, they must both be using Chrome. You can’t use this to send a single email securely to all your contacts (unless they all happen to fit those criteria).
Also, SecureGmail does not encrypt attachments – just the text in the email. Still, you could zip the attachment, encrypting it with a password, and include that password in the secure part of the email.
A further limitation is that SecureGmail uses a single key to encrypt and decrypt the message. This differs from PGP encryption, where the sender uses a recipient’s “public key” to encrypt an email and the recipient uses a “private key” (known to no one else) to decrypt the message. PGP gives you a reasonably high degree of certainty that only the recipent can read the message, assuming the private key is kept safe (everything depends on this).
So there are some sacrifices to be made, in order to use SecureGmail. If you can live with that, it’s a great option – because it’s easy. Head over to SecureGmail and follow the instructions there.
3. Robust encryption: Enigmail
If you want to do this right, you have to use something like PGP encryption. I say “something like”, because although PGP is the standard more people have heard of, it is actually less common than the alternative GPG. Oh, and GPG is an implementation of the OpenPGP standard. Confusing, huh? PGP (“Pretty Good Privacy”) is proprietary and not free for commercial use. GPG (“Gnu Privacy Guard”) and OpenPGP were originally intended to provide a free, open source alternative to PGP. In fact GPG is more secure than PGP, since it uses a better encryption algorithm. Because it’s free and more secure than than PGP, I will focus here on GPG. Also, there are many different ways of skinning this cat, so I’ll just point you in a direction that’s free and one of the easiest ways of doing this. Note that the following instructions are for Windows.
3.1 Setting up your Enigmail environment
You’ll need:
Install Thunderbird. When installing Gpg4Win, you don’t need any of the optional extras, but you may install them if you wish. When you get to the “Define trustable root certificates” dialogue, you can select “Root certificate defined or skip configuration” and click “Next”.
If you’re using Firefox as your browser, make sure you right-click and save Enigmail, otherwise Firefox will try to install the extension. All other browsers will normally just download the file.
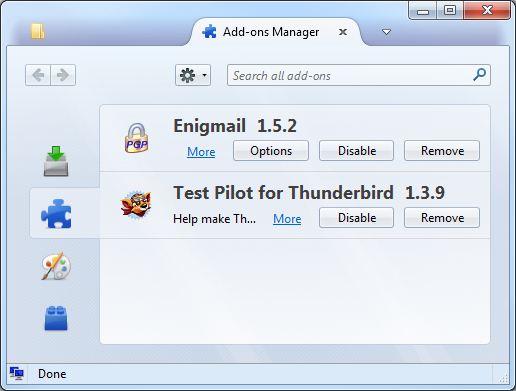
Run Thunderbird and click the menu (triple horizontal lines icon, top right), then Add-ons. Then click the cog icon (near the search box, top right) and “Install add-on from file”. Locate and install the Enigmail add-on you downloaded previously. You will need to restart Thunderbird to complete the installation. Then, if you’ve not already set up your email account in Thunderbird, do so now.
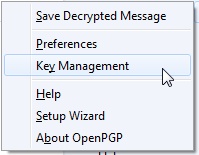
Go to Thunderbird’s menu –> OpenPGP

–> Key Management
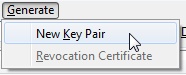
In the OpenPGP Key Management window, click Generate –> New Key Pair.
Choose and enter a secure passphrase. This should be hard for anyone else to guess. I tend to pick a line from a song. Yes, it takes a while to type, but it’s highly unlikely that anyone will ever crack it through brute force. Bear in mind though that if you forget the phrase, you’re stuck.
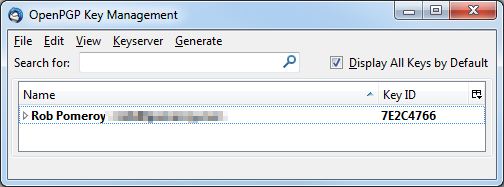
Back in the Key Management window, if you check the box “Display All Keys by Default”, you’ll see your new key along with its 8 character identifier.
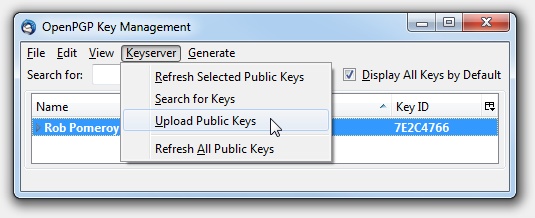
Next click the key, then Keyserver –> Upload Public Keys. This permanently publishes the “public” part of your key (which people use to encrypt messages to you). Accept the default keyserver when prompted.
3.2 Key exchange with Enigmail
In order to send and receive emails securely, both you and your correspondent must have a public/private key pair. Whoever you’re writing to, they’ll need to have gone through the steps above (or something similar). Once you’re ready, you need to pass to each other your public keys.
Sometimes this public/private thing confuses people. But it’s pretty easy to remember what to do with each key. Your public key – well that’s public. Give it away as much as you like. There’s no shame in it. 😉 Your private key? Guard it with your life. Hopefully you will have chosen a secure passphrase, which will make it difficult for anyone else to use your private key, but you don’t want to weaken your two-factor authentication at any time (something you have – the private key, and something you know – the passphrase) by letting go of the “something you have” part.
Anyway, you don’t really need to know or understand how this works. Just make sure you and your correspondent have both published your keys to a key server. Next, tell each other your key ids (remember the 8 character code generated with the key?) and/or email addresses. Import a public key like this:
Go to Thunderbird’s menu –> OpenPGP
–> Key Management
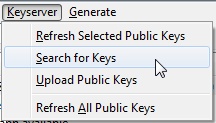
In the OpenPGP Key Management window, click Keyserver –> Search for Keys.
You can search by email address or by key id. If you’re searching by id, it must always start with “0x” (that just indicates that the key is in hexadecimal).
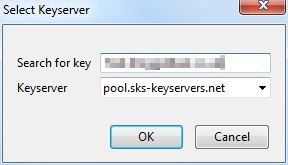
You should see your correspondent’s key in the next dialogue. Click “OK” to import it. This places your correspondent’s public key in a data store that is colloquially referred to as your “keyring”.
3.3 Sending encrypted email with Enigmail
You can only send encrypted email to someone whose public key is on your keyring. See the previous step for details. We use the public key to encrypt the contents of the email, meaning that only someone with access to the corresponding private key can decrypt and read the email. This gives you a high degree of certainty that no one other than your correspondent can see your message.
Compose your message in plain text. You can send in HTML, but it’s much harder to encrypt correctly.
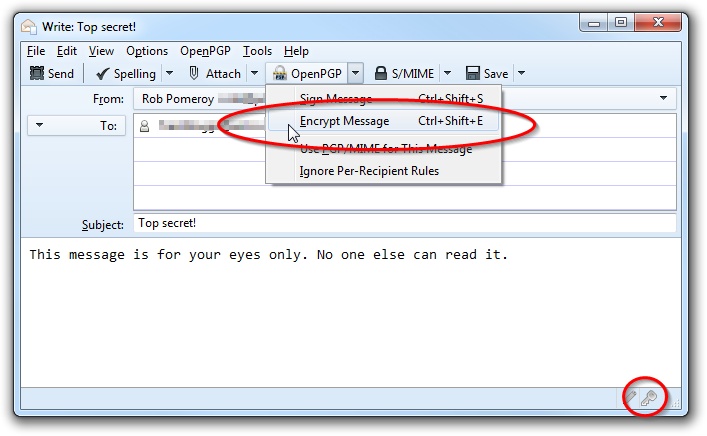
Remember that while the contents of the email will be encrypted, the subject will not be. Before sending it, you need to tell Thunderbird to encrypt the email. There are three easy ways of doing this.
- Click OpenPGP –> Encrypt Message.
- Press Ctrl-Shift-E.
- Click the key icon, bottom right.
Enigmail will search for the public key that corresponds to your recipient’s address. If you don’t have the correct public key on your keyring (or you’ve typed the address incorrectly or whatever), you will be warned that there was no match.

If you’ve forgotten to compose in plain text, you will be warned about the problems of using HTML.
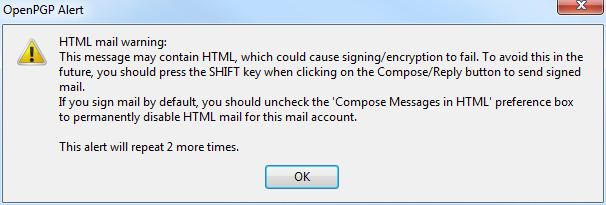
I would recommend configuring Thunderbird to use plain text by default, at least for your fellow users of encrypted email. In Account Settings under Composition & Addressing, just uncheck “Compose messages in HTML format”.
When your correspondent receives the encrypted message, it can only be read by using the correspondent’s private key. Until the message has been decrypted, it will look something like this:
-----BEGIN PGP MESSAGE-----

Charset: ISO-8859-1

Version: GnuPG v2.0.20 (MingW32)

Comment: Using GnuPG with Thunderbird - http://www.enigmail.net/
hQEMA/dOFDapHX5yAQf/YbYJz+vm2AnzWDn08sOP66gVVoCBh/qnbcAcdSYkCTA2
WjuWfV3ZSFVwV+lYyr/VqgcHl607a7KIJEQh251RSQEJmNg56gC/JYNtj9frhaIT
Ay46xhyz2Ebj8EjcvSX+wcUh8Qd/YPMqZDFB/wBNnA48JxkwuxXBU0AFLYw2Osc2
gvUttSZfN/Dn3Mq0fMxqr2s+YZA9qZebfzzjfVIfDWvbtqTFo1HhWKkuCqgPbYQ2
SuinDVtzlQRSTbbygvWVltd7miKsb19hZS9KQRda5XpaaWC3FHrLBeeUf9FvhIIq
kzF53oXv/Tp/fcbnujp5A4cyy8Bkw8RFi6xbQ9Baw4UBCwOnkycIVlt3QQEH+JKi
HB4VqC6i/N8sL7stR063yE0RYcIn18th+zDbZtTt2QlaSyzoCHwDqYo4R8o8VXAo
oe68jO2N9c/FyX7iSzYpKVKW26UL2SaWk0yd40Gae1XoEfHozZ8lmz7c4cO/ionU
81MYqcMdqdIg948OE6if2yb3Cl65p70jOQ/Ep6h9tw33Iu+ukj8r7MCPYRNPxIGh
EvrwktK0Ej1qbDP296i+C6QgJxsV9qDeGbPIs5q54Bni60qnMeSV1ttxit7bOgMF
xCQR3XbwXU1qeLvfWa1sdhqBq0zbEXxWeBT/9Gq3EJ8ca8JXeaTAV4Ry26oHL5Cf
ZrH+kIMrYo6g0Agg2dJ2AYjfvS2bDRoOsvlNoUQj8X+VIlyR9XqiLTnyEeanzL0f
79dH5Rfk0yPURl1pqOT6Dv5ioHyQjtJuF1qt+pO6NSbVwuE9xeoU4KhdmnMAkeIX
y7adNBCKr6zhpElhdkt1kfWDeW0mqyshYU/aetFDbW0l3XzIcQ==
=w5DD
-----END PGP MESSAGE-----
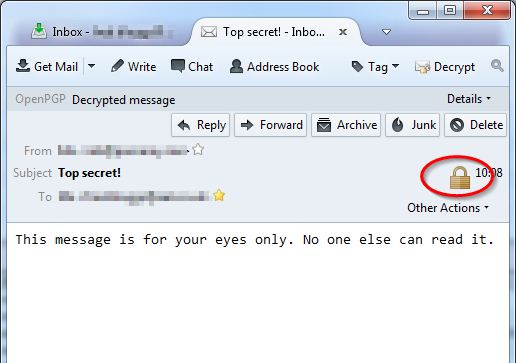
Following decryption, the content of the message will be visible as usual. A padlock icon indicates that this message was encrypted before transmission.
3.4 Enigmail – conclusion
So this is all you need, to send and receive email securely. Not even the mighty PRISM can unlock the treasures in your encrypted email. And this solution isn’t merely limited to users of Thunderbird. The Gpg4Win project referred to above has a plugin for Outlook, which covers the vast majority of corporate users.
All is not sweetness and light however. Due to security limitations of browsers, there isn’t really a solution for webmail users. And there aren’t any bulletproof solutions for mobile users. To start with, Apple’s terms of use are incompatible with open source (GPL) software, so GnuPG is automatically excluded. There will probably never be a solution for a non-jailbroken iPhone or iPad.
With Android, you do have some options, using Android Privacy Guard and K-9 Mail. The end user experience is not perfect though and you’re still left with a fundamental problem: you have to put your private key on your mobile device. The private key is the one thing you really don’t want to risk losing, so is this a good idea anyway?
Personally, I would say if the email is so sensitive that you need to encrypt it, you probably should wait to read it, until you have access to your desktop/laptop and your secure email environment. But then that decreases usability of encrypted email, which is the main reason this has not yet gained significant traction.
As you can see, there do remain some technical and social obstacles to overcome before we see encrypted email in widespread use. But as long as you understand its limitations, and if you care about keeping your email private, the GPG/Enigmail proposition is really very compelling.