Review: JOYO JA-03 Guitar Headphone Amplifier

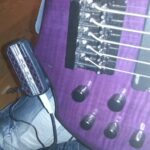
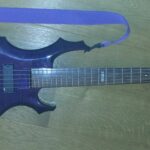
A couple of weeks ago, I picked up an ESP LTD F-155DX 5 string electric bass guitar. It was slightly bashed, but otherwise in great condition – in short, at only £200, a bargain. I love bargains.

There’s one small problem with electric instruments: they need amplification. And amplification can sometimes be a little… antisocial. In order to keep relations with Mrs Geek reasonably harmonious, I started looking around for a solution.

One of the problems was that I didn’t know exactly what I needed. In the past, I’ve come across micro amps, which have a built-in speaker but I wanted something even more compact, that could just drive a pair of headphones.

Eventually I stumbled across the well-reviewed Vox AmPlugs. Plug the device into the guitar, put your headphones into that, simple. At £32 though, I wondered if there might be something a bit cheaper. Since this was just going to be for quick practice sessions, I didn’t need the best that money can buy.

JOYO JA-03 guitar headphone amp
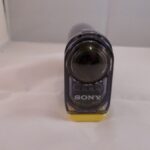
Casting my net slightly wider, I came across the JOYO JA-03 series of headphone amps. They look suspiciously like a clone of the AmPlug, but who knows, perhaps they’re made under licence. Anyway, the important point: they’re just a tenner. Sold!

There are a few different amps in the range, with different sounds – tube, metal and so on (see the full range on JOYO’s website). I plumped for “Acoustic“. I’d read good things about the sound of the ESP bass, so I wanted to hear it as clean as possible – and this better suits the style of music I’m going to be playing, anyway (i.e. not heavy metal).

JOYO JA-03 Acoustic in blister pack
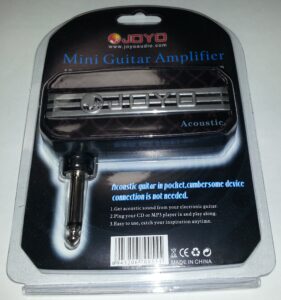
The amp arrived very quickly, well packaged in its blister pack. Happily this was the type of blister pack that is not sealed shut, so you can open it without having to cut the pack. Fewer blister-pack-related injuries – yay!

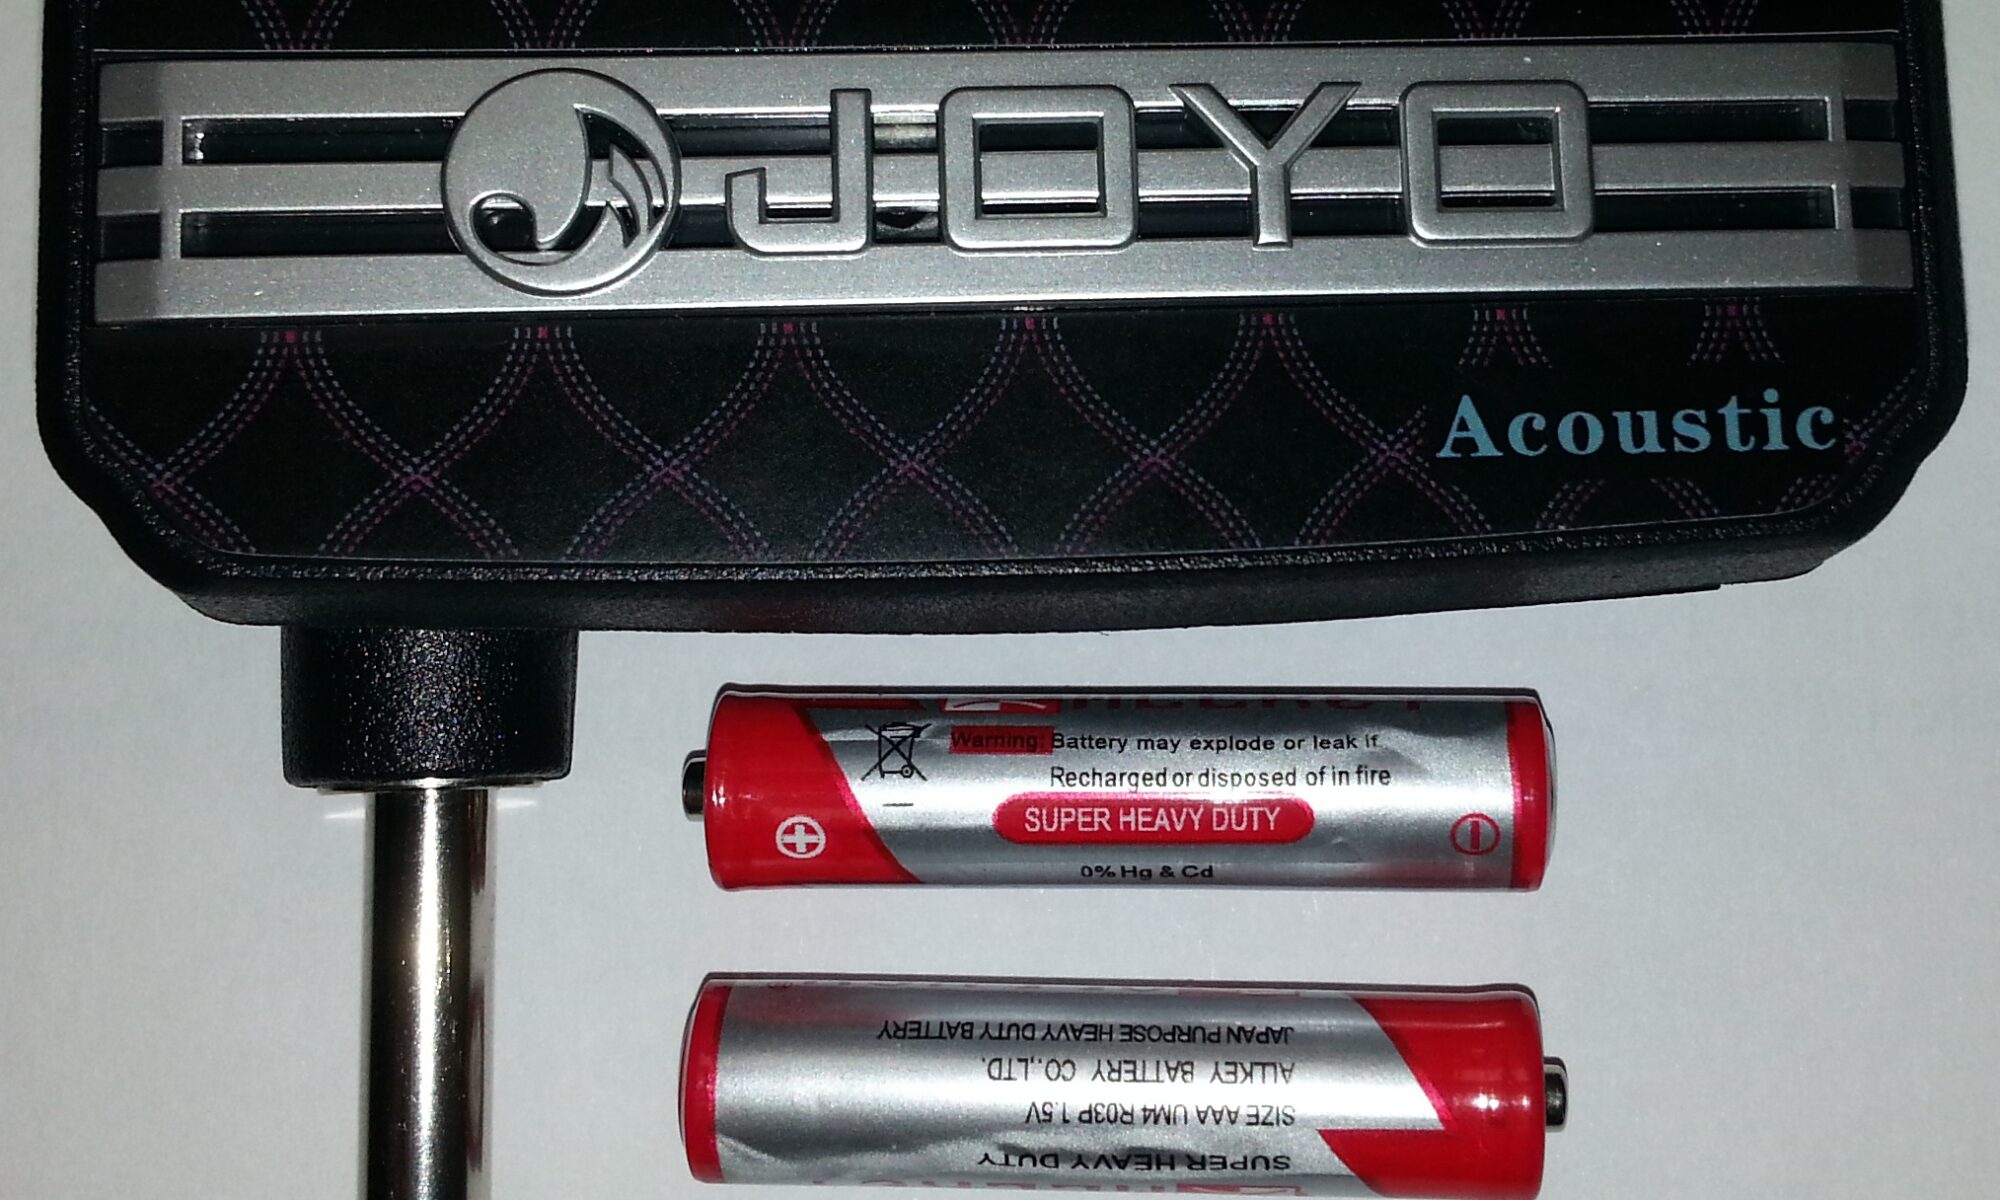
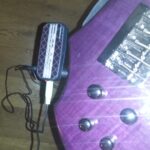
The JA-03 is powered by a pair of AAA batteries. Happily, the amp came with fresh batteries in the pack, so you’re good to go straight away.

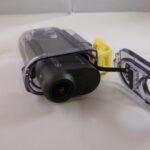
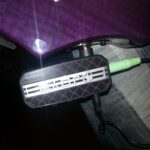
There’s not a lot to the device. The standard quarter inch jack is built in (no need for a separate lead – you plug it straight into your guitar). It has a 3.5mm socket for headphones and another 3.5mm socket for an auxiliary/line input. In this way, you can feed music through the amp and play along.

JOYO JA-03 controls
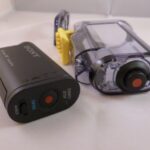
You get four controls: gain, tone, volume and power. The volume control affects the level of the input from your instrument. I expected the gain control would alter the volume of the auxiliary input, but not so. It’s hard to describe what this does – it doesn’t change the overall volume of any input; instead it makes it sound more like you’re playing through an amplifier. If you crank the gain control all the way up, you hear that characteristic hiss and the sound from your instrument is more like it is being played through a compressor – a little “thin”. I found I had the cleanest sound with gain turned right down.

The volume of the auxiliary input is not controlled by the JA-03. I plugged in my phone using a 3.5mm cable and then set the volume of the music on my phone. Using my phone’s volume control and the the volume mixer on the amp, I was able to find a perfect balance between the music I was playing and the output of the bass, very easily.

Skipping over the power control (which I trust requires no further comment!) the remaining control is the tone dial. This is a pretty low grade adjustment. I didn’t like the effect it had on the sound of my bass, so I left it in the neutral centre position.

With the mix right and all the tone adjustment coming from the excellent active pickup set on the ESP bass, I was frankly blown away. Not by my playing, I hasten to add, but by the convenience of the set up and the great sound I achieved through some fairly cheap and nasty in-ear headphones. For practice purposes, this is all you need.

I went one step further though, and connected the output of the JA-03 to my humble home stereo. With tunes coming from my phone, it was a joy to play along in my living room and Mrs Geek didn’t seem to mind at all. In fact the 9 year old twin junior Geeks loved the show (I know, the “hero worship” bubble will burst soon enough – let me have my moment of glory).

If you’re very fussy about the quality of your audio, you might want to look for something built with more expensive circuitry, but honestly at this price, you cannot beat this. Highly recommended. Pick one up from Amazon (or somewhere else if you prefer), today!

At the time of writing, the JA-03 can be yours for just £9.49.

[easyreview title=”Geek rating” icon=”geek” cat1title=”Ease of use” cat1detail=”Very, very straightforward.” cat1rating=”5″ cat2title=”Features” cat2detail=”It’s hard to think of anything else I’d add – maybe a distortion effect? But that’s just me being greedy.” cat2rating=”4.5″ cat3title=”Value for money” cat3detail=”Can’t be beaten. Full stop.” cat3rating=”5″ cat4title=”Build Quality” cat4detail=”Feels like it’s made from slightly brittle plastic. Not sure how well it would survive a serious bash in a soft case. Made from cheap materials as you’d expect at this price point. Otherwise it’s assembled well enough and feels solid.” cat4rating=”3.5″ summary=”I can’t tell you how delighted I am with this purchase – and the price delights most of all!”]

How-to: Overcome “critical temperature” problem with CloneZilla

processor fireIn case you don’t know, Clonezilla is an excellent (and free) disk/partition imaging tool. It’s essentially a customised Linux distribution. You boot from a CD and then follow a text-mode wizard to backup or restore images of hard drives or other storage devices. You can see the process in action in my Raspberry Pi SD card backup/restore article.

The process can be quite intensive for hard drives and processors. One of the things Clonezilla does is compresses the image of the drive to save space wherever you’re storing the image. Compressing a 2GB file is a big job for an older processor. I was finding with one of my older laptops that the processor was working so hard, it caused the temperature to rise at a point where it triggered a Linux “panic”. The system immediately halted with an error message about “critical temperature”, half way through making an image. So of course that image is not usable.

What’s supposed to happen in normal usage is that when the temperature rises dangerously, the operating system slows down the processor. This allows the machine to cool down (at the obvious expense of a performance penalty). I’m not sure if this is fixed in later versions of Clonezilla – there’s some talk of it in the mailing lists. I’m indebted to those mailing lists for some parts of workaround that follows.

One thing you can try is using the i486 version of Clonezilla. This assumes older processor hardware and so (I suspect) doesn’t make full use of your processor’s theoretical potential. Just select i486 architecture from the download page for the latest stable version.

As a belt-and-braces approach (and this is the method I’ve adopted), you can also issue commands that tell the Linux kernel to run the processor at a particular frequency. In my case, I’m telling an Intel Core i3-330M to run at 1.6GHz instead of the usual 2.13GHz.

You can do this as follows:

  1. Once you’re in the Clonezilla wizard, press Alt-F2, to access a login shell.
  2. Issue the command cpufreq-info. In my case, I saw the following, as well as some other information:
    analyzing CPU 0:
      driver: acpi-cpufreq
      CPUs which run at the same hardware frequency: 0
      CPUs which need to have their frequency coordinated by software: 0
      maximum transition latency: 10.0 us.
      hardware limits: 933 MHz - 2.13 GHz
      available frequency steps: 2.13 GHz, 2.00 GHz, 1.87 GHz, 1.73 GHz, 1.60 GHz, 1.47GHz, 1.33GHz, 1.20 GHz, 1.07 GHz, 933 MHz
    ...

    You may see more than one CPU listed – mine shows just the one (single CPU, dual core). Most importantly, this lists the frequencies to which you can set your processor clock.
  3. Pick a frequency from the list that’s lower than the maximum. E.g., if the list shows that the processor can run at a lower speed of 1.60 GHz, set the clock speed as follows:
    sudo cpufreq-set -c 0 -f 1.60GHz
    The -c 0 parameter refers to the CPU number, starting from 0. Repeat the command, changing this number, for each CPU.
  4. Press Alt-F1 to return to the Clonezilla wizard and continue with the cloning process.

This approach sets the clock speed just for this particular session, so normal service will be resumed upon reboot.

If this all sounds like too much hard work, you could try one of the good commercial solutions instead, such as Norton Ghost or Acronis True Image.

Burning processor image copyright © mhamzahkhan, licensed under Creative Commons. Used with permission.

Review: Sony HDRAS15 Sports Action Camcorder with Full HD and Wi-Fi

I am constantly on the look out for good action cameras. The action I shoot is quite specific in that I attach cameras to off-road vehicles and I insist on them being robust, easy to use but obviously able to capture quality images in all weathers. Audio is important to me to the extent that there must be sufficient sound quality to capture an old Land Rover engine.

Sony HDRAS15 Zeiss LensThe market leading GoPro range can be found wanting in many of these areas: the moment the sun goes in or you drive down an enclosed lane, the picture quality plummets. That and thinking of the extra case needed to make it waterproof and the poor sound, well it’s fair to say I’m not a GoPro fan.

So I read about this Sony Sport Camera and the fact it was running a Carl Zeiss lens and I was excited about the prospect of some high quality images. Perhaps I’d found a competitor to my current camera of choice the Drift Ghost HD?

Sony HDRAS15 FlimsyOut of the box I was immediately a little disappointed. Everything felt flimsy and light. The access panel to the camera’s inner workings is a really shoddy-feeling click-off panel. I was willing to forgive it this because after all, it did come with a snazzy looking waterproof case. The battery compartment was similarly fiddly and cumbersome and this camera was starting to me more like one of those cheap Chinese ones you pick up from eBay. I couldn’t help but hold it up to the HD Drift Ghost and wonder if I had paid a lot of money for a dead duck!

It uses what is now the standard (MicroSD memory cards) and can handle up to 32GB.

From some quick research, it had everything I expected from an action camera in this price range other than, weirdly, a colour screen. Instead Sony assumes the wireless connection to your mobile phone will be all you will ever need. I think that’s a big mistake. Action cameras should trade on simplicity and image quality and I’m not a fan of unnecessary bells and whistles that do little other than push up the prices.

So I read ‘Carl Zeiss’ on the side of the camera by the lens. Surely the pictures at least will be high quality?

Okay then, time for a short video demonstrating the footage this camera takes.

Sony HDRAS15 On of buttonWhat can I say after that? To be honest I cut my review short. It’s quite simply unfit for purpose and I returned it to Amazon for a refund. I really could not find one redeeming feature in this camera and apart from the poor case design, average sound, average visuals it simply didn’t work. The on/off switch through the case was rubbish and often wouldn’t toggle the power without some serious force. It was just a really bad user experience and something that I recommend you avoid. You would be much better off spending a little more for a Drift Ghost HD or even a little less and getting the Kodak PlaySport Zx5, both of which are superior in every single way.

I had high hopes for this camera and it’s not often I buy something that so bitterly disappoints. I’ve watched and read quite a few reviews that seem to make some lofty claims and I can only guess they are sockpuppet reviews from retailers because this camera is nothing short of useless. In fact since buying it and writing this review I notice the price is plummeting which tells you all you need to know really!

[easyreview title=”Dummy rating” icon=”dummy” cat1title=”Ease of use” cat1detail=”No screen to align the camera; on off button is hopeless.” cat1rating=”0.5″ cat2title=”Features” cat2detail=”I’ll credit it a 2 because of the features it claims it has. I didn’t get that far.” cat2rating=”2″ cat3title=”Value for money” cat3detail=”I found it unfit for purpose. Certainly expected a lot more for the money.” cat3rating=”1″ cat4title=”Build quality” cat4detail=”Everything about it felt cheap and shoddy” cat4rating=”0.5″ summary=”I’d spend a quarter of the price of this on an eBay special and get better quality .”]

How-to: Raspberry Pi tutorial part 3: Web & file hosting with Webmin & Virtualmin

[easyreview title=”Complexity rating” icon=”geek” cat1title=”Level of experience required, to follow this how-to.” cat1detail=”You’ll need to keep your wits about you!” cat1rating=”4″ overall=”false”]

Contents

Right, so our basic Raspberry Pi is set up and ready to go. You’ve got the Pi, you’ve got the case and you’ve got a decent SD card. What next? How about turning it into a low-powered file server and web host?

To do this, we’re going to install Webmin (a web-based server management application) and Virtualmin (a virtual hosting platform that sits on Webmin). This will leave us with a convenient graphical interface for managing the Pi and a full blown web hosting environment.

Prepare the Pi

I’ll assume for the purposes of this exercise, that we’re picking up from where we left off, from tutorials 1 and 2. That is, you have the Rasbian operating system installed on your Pi, and a backup to revert to if it all goes horribly wrong.

Next step: we need to install a few packages that Webmin and Virtualmin depend on, plus the services we’ll be managing. From a root SSH shell, issue the following commands:

apt-get update
apt-get -y upgrade
apt-get -y install apache2 apache2-suexec-custom libnet-ssleay-perl libauthen-pam-perl libio-pty-perl apt-show-versions samba bind9 webalizer locate mysql-server

Due to the Pi’s limited power, you may find these operations take a while. I’m installing locate for my own convenience – it’s handy for tracking down obscure files on your system. You can install PostgreSQL instead of MySQL if you prefer.

Install Webmin

Webmin-Logo-600

According to the official site:

Webmin is a web-based interface for system administration for Unix. Using any modern web browser, you can setup user accounts, Apache, DNS, file sharing and much more. Webmin removes the need to manually edit Unix configuration files like /etc/passwd, and lets you manage a system from the console or remotely…

When I install packages that I’ve downloaded (rather than directly through a package manager), I like to keep them in one place, so I can keep track of what’s installed. I’ve formed the habit of keeping these packages in a directory belonging to root. So, to get Webmin, whilst logged in as root:

cd
mkdir installed-packages
cd installed-packages
wget http://prdownloads.sourceforge.net/webadmin/webmin_1.660_all.deb

That last command downloads Webmin’s package. The version number will inevitably change – you can make sure you have the latest version by browsing to the official Webmin website and looking for the “Debian Package” link on the left hand side of the page.

Install Webmin with:

dpkg -i webmin_1.660_all.deb

Again, this is fairly intense for the Pi, so be patient! Once complete, you should be rewarded with a response like:

Webmin install complete. You can now login to https://my-pi:10000/
as root with your root password, or as any user who can use sudo
to run commands as root.

Connect to the relevant page with a web browser, accept the SSL certificate warning and you should see something like the following:

Webmin-Pi

For some reason when I logged in, it wouldn’t accept the root password. Webmin actually tracks the root password separately from the Linux password database. If like me you find you can’t log on as root, you can fix this by running the following command:

/usr/share/webmin/changepass.pl /etc/webmin root [new password]

Configure Apache

Apache logo

Earlier, we installed the apache2-suexec-custom module. This allows us to run Apache websites securely for multiple users, under a directory other than /var/www. Using your favourite text editor, load up the file /etc/apache2/suexec/www-data. Change the first line from /var/www to /home.

Enable some modules that Virtualmin will need, and restart Apache:

a2enmod suexec
a2enmod actions
service apache2 restart

If you see an error message “Could not reliably determine the server’s fully qualified domain name, using 127.0.1.1 for ServerName”, you can safely ignore this. It doesn’t matter, for the correct functioning of Virtualmin.

Install Virtualmin

Virtualmin-hosting-Logo

At the official site, you’ll read:

It is a Webmin module for managing multiple virtual hosts through a single interface, like Plesk or Cpanel. It supports the creation and management of Apache virtual hosts, BIND DNS domains, MySQL databases, and mailboxes and aliases with Sendmail or Postfix. It makes use of the existing Webmin modules for these servers, and so should work with any existing system configuration, rather than needing it’s [sic] own mail server, web server and so on.

You can install Virtualmin from within Webmin. Proceed like this:

  1. Log in to Webmin
  2. From the Virtualmin download page, find the link entitled “Virtualmin module in Webmin format”. Copy the link (it will end in “.wbm.gz”).
  3. In Webmin, go to Webmin–>Webmin Configuration–>Webmin Modules. Select the radio button next to “From ftp or http URL” and paste the link you copied into the field. Then click “Install Module”.
  4. Do the same for the link for the “Virtualmin theme in Webmin format”. You’ll find the necessary link on the Webmin site, called “Virtualmin theme in Webmin format (for FreeBSD, MacOS and Solaris)”. The link will end in “.wbt.gz”, this time.
  5. To activate this theme, go to Webmin–>Webmin Configuration–>Webmin Themes. From the drop-down box, choose “Virtualmin Framed Theme” and click “Change”. Ignore the “Post-Installation Wizard” for now, and hit F5 to refresh your browser and use the Virtualmin theme for Webmin. You should arrive at a screen like this:
    Virtualmin-PIW01
  6. Click Next, to arrive at the “Memory Use” screen. My guess is that for most cases, it would be best to answer “No” here (don’t pre-load Virtualmin). Click Next.
  7. The next choice is database servers. This is up to you, but I switch MySQL on and PostgreSQL off. Click Next.
  8. You’ll see a message “MySQL has been enabled, but cannot be used by Virtualmin. Use the MySQL Database module to fix the problem.”. Click the “MySQL Database” link.
  9. Enter your root username/password combination for MySQL (you will have been asked this when you installed MySQL via apt). After saving this, hit F5 to refresh and return to the Post Installation Wizard.
  10. Proceed through the wizard up to where we left off (just after database server selection).
  11. Leave the MySQL password unchanged and click Next.
  12. I would suggest setting MySQL memory usage to 256M and clicking Next.
  13. In the DNS config screen, check the box “Skip check for resolvability” and click Next.
  14. Set password storage mode to “Store plain-text passwords” and click Next.
  15. At the “All done” screen, click Next. We’re not all done, by the way!
  16. You’re now at the main Virtualmin screen. Click the “Re-check and refresh configuration” button.
    Virtualmin-PIW02
  17. You’ll see a complaint about DNS. Click the link “list of DNS servers”. Enter 127.0.0.1 as the first DNS server, make sure the hostname is a fully qualified domain name and click Save. Then hit F5 to go back to Virtualmin.
  18. Click the “Re-check and refresh configuration” button again.
  19. The next complaint is about email. I’m not planning to use the Pi as an email server, so we can just disable that Virtualmin module. Go to Virtualmin->Systems Settings->Features and Plugins. Uncheck the “Mail for domain” module, slick Save, then hit F5.
  20. If your screen now looks basically like this, you’re good to start hosting websites (using the “Create Virtual Server” link).
    Virtualmin-PIW03

Setting up virtual hosting is a big subject and beyond the scope of this tutorial, but that’s the basic platform in place. Have a read of the official Virtualmin documentation for pointers. If you happen to browse to your Raspberry Pi’s IP address or DNS name, you’ll be rewarded with a very simple test page:

Raspberry web server

Running a file server

With Webmin and Virtualmin up and running, you can now start creating file shares. How you approach this depends a bit on how you want to use the server. Probably (!) this will be a personal/hobby server. In that case, I would suggest creating a new virtual server for each user first. That creates all the initial Virtualmin linkage for hosting websites and databases. Then having done that, you can create a fileshare for the user(s) by browsing to Webmin->Servers->Samba Windows File Sharing.

Again, the specific details are best not discussed here, because there are so many possible different configurations. You are however ready to start customising your file/web server to your heart’s content. So now would be a perfect time to take a snapshot of your Pi, so you have a good restore point.

Happy hosting!

Review: Drift HD Ghost Action Camera

SEE THE UPDATE REVIEW OF THIS CAMERA AFTER 3 MONTHS OF USE

I’m going to start this review in an unusual place for me, with the packaging! Have you ever looked at a review and it starts with someone taking the product out of the box and you just think ‘Why? Not interested!” and then you fast forward? Yes, yes I know, I do the same. So at at the risk of boring you guys…

I picked this one up from Action Cameras UK and what a cool little box the Drift HD Ghost comes in. It’s designed so well to display the product and also to be used as for ongoing storage that I thought it merited a mention.

The Ghost is the updated incarnation of the Drift HD, which was already a pretty successful action camera in its own right. The big draw of the HD Ghost for me was the remote control unit.

Drift Ghost Camera and RemoteBoth the remote and the camera have a durable rubberised coating. If you’ve experimented with one of the cheap and cheerful ‘Chinese’ eBay action cameras, the jump in quality to the Ghost is very evident indeed, as is the price of course. It feels satisfyingly heavy giving me the impression of quality but perhaps it would be a little too weighty to be used as a helmet cam. Since I plan to mount this on a 4×4 and give it some abuse, that’s not an issue for me.

Now as is my Dummy remit, reading the manual before using the camera is not my style. My first test was to jump straight in. I mounted the HD Ghost on one of my VacMounts Pro series suction mounts (after all it’s more expensive than my usual cameras and I didn’t want to lose it) and went for a day’s green-laning in the Oldham and Holmfirth area. The weather was horrible, so perfect as a first test for something claiming to be an action camera.

Camera Mounting

One issue that irritated me about the HD Ghost was the way it mounted. The standard camera screw thread is located on what is in fact its side. To me it appeared to be the base so when I mounted it for the first section of testing, a laning day in Oldham, all the footage was on its side and I had to flip it in post-processing, which lost the effect of the 170 degree lens. The thread seems poorly located to me and I expect everyone to make a similar mistake the first time they use the camera. Okay, you can spin the lens around but the more you have to mess about with an action camera to set it up, the less I see it as an action camera.

Camera Lens and Waterproofing

Drift Ghost Fish Eye LensThe weather during this testing was horrible: driving rain and a dark brooding day. When I started watching my footage back the first thing I noticed was that all of my cameras with a traditional flat lens had collected beads of rain and a lot of the footage from them was useless. The Ghost HD has that fish eye lens in a glass dome and whilst rain did hit it and stick for a short while, the shape encouraged the rain to run off. The first gust of wind or bit of speed and the lens would clear again. Definitely score one for the Ghost. As for being waterproof, the weather was simply horrible all day long and short of being submerged I couldn’t have tested it any more thoroughly. The Drift Ghost came out with flying colours.

Battery life was comparable with any other camera I’ve used in the action area. I started with a fully charged battery and with frequent activation via the remote, the camera battery lasted about 3 hours. The remote unit lasted all day without any issues.

Drift Ghost RemoteWhilst we are on the subject of the remote, wow, what a feature that is! It flashes in different colours to indicate to the operator what mode the camera is operating in and what the camera is currently doing. The camera options to take single pictures or bursts of pictures (which you might use for stop motion photography?). I stuck with it in standard video mode because that works best for my kind of action photography. However I did test both modes and they worked perfectly and the images were of a good quality. I loved the fact that when the camera was recording, the remote flashed red and it gave me great control of the footage I was shooting and saved me hours in the editing room.

Sound Quality

When I did start editing the footage I noticed that the sound recorded by the Ghost was very subtle and of low amplitude. Within the sound recording options I found I was 2 clicks off the maximum setting but even cranking it up to full, the volume level was pretty low. It did however eliminate wind noise like no other camera I’ve used to date so the low volume can be fixed during editing.

To start my testing of the video quality I took the Ghost HD on a Green Lane day with my local Land Rover club during which I also filmed with some of my favourite Kodak Playsport ZX3 cameras (review here). The lens on the Kodak is superior to anything else I’ve used so straight away it had a lot to live up to. I also took some side-by-side sample shots so you could see how the cameras transitioned between light and dark conditions. I did also include my expensive Panasonic Bridge Camera in this test, which I would never mount on my bonnet for anything other than a test, but I thought it would set a bench mark for everything else!

Everything was testing using VacMounts’ professional quality mounting systems, which I have already reviewed and found to be quality kit at the right price.

I’d suggest you watch this short video because the results could come down very much to personal taste. The colours and quality from the Drift Ghost are what I would demand from a camera costing £250. That coupled with the genius remote system make it a major contender and something I am considering buying for myself (I had a demo unit for this review). My only issue is the way it handles anything other than perfect lighting situations. For use in woodland and overgrown lanes therefore the camera can be found lacking – in fact not as good my cheap and cheerful Kodak Playsports.

[easyreview title=”Dummy rating” icon=”dummy” cat1title=”Ease of use” cat1detail=”Its okay. Not too complex but the mounting angle is just plain weird.” cat1rating=”4″ cat2title=”Features” cat2detail=”Honestly can’t think what else it could have. Remote is genius, low light filming average.” cat2rating=”4″ cat3title=”Value for money” cat3detail=”Quite simply, it needs a better lens. for this money it should work in low light.” cat3rating=”2.5″ cat4title=”Build quality” cat4detail=”Its solid and robust and oozes quality.” cat4rating=”4.5″ summary=”It’s a cheaper more flexible Go-Pro with the same frailties but some nice bells & whistles.”]