Install Ubuntu from floppy + network; no CDROM

Ubuntu Logo This blog entry brings together instructions from various other source on the internet, for a particular scenario:

  • Compaq Evo N1015v laptop (“the Laptop”) – should work on many other machines though
  • CDROM drive is faulty – cannot boot or read from it
  • Network card/BIOS cannot natively boot from the network
  • Cannot boot from USB
  • The Laptop does however have a floppy drive
  • Windows is currently installed on the Laptop
  • Another Windows-based computer (“the PC”) is available and both machines are networked and connected to the internet

The objective was originally to have XBMC running on a now-defunct laptop. Unfortunately it transpired that the graphics card was too old and obsolete to be supported by XBMC. Nevertheless, we can still use the Laptop for many other purposes.

The steps

  1. Find out what network card is installed on the Laptop. In my case this was easy – within Windows, the device manager told me it was a Realtek RTL8139 something-or-other. Otherwise, Google can help.
  2. Still within Windows on the Laptop, use the gPXE ROM-o-matic to create a bootable floppy disk for this network card. Very easy. Select the most recent “production release” >here<. Choose the correct NIC type (in my case “rtl8139”) and click “Get Image”.
  3. Still within Windows on the Laptop, write that disk image to a floppy disk using RawWrite.
  4. Following the instructions on the Ubuntu documentation site, download the appropriate netboot files for your architechture and set up tftpd32 on the PC.
  5. With tftpd32 running on the PC, reboot the Laptop from the floppy (set BIOS to boot from floppy first). This should automatically boot into the Ubuntu installer – select “install” and proceed with Ubuntu installation over the internet. This will take a long time, even over a fast internet connection!
  6. If the installation is on an older machine, it would be worth selecting “Xubuntu desktop” (rather than “Ubuntu desktop”) at the software selection screen. This installs a leaner desktop system. After the installation is complete, run aptitude from the command line or Synaptic Package Manager from the desktop to choose any other software packages required.

Image copyright © Canonical Ltd. All rights acknowledged.

Tips for improving lithium-ion laptop battery life

Li-ion laptop battery 
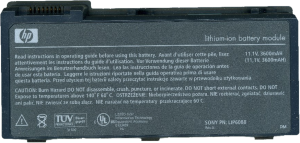
Replacement batteries for laptops can be quite expensive, so here are a few ideas to get the most out of your battery in terms of charge and overall life.

Background information

Most modern laptop batteries are of the lithium-ion (“li-ion”) variety. You can expect them to last two to four years if properly cared for. They will degrade over time, whether or not they are in use. They last best at a temperature of 15°C/59°F, although it is unlikely to be practical to use them at this temperature.

This is a chemical technology, which is under continual development, so it is entirely conceivable that a new li-ion battery for an old laptop will last much better than the original battery did. This and other factors make it fairly hard to predict how long your laptop will last on one charge. All you can do is to try and get the best out of your particular battery.

Did you know? Early li-ion notebook batteries were known to explode! Modern batteries have protection circuits built in which prevent the lithium ion converting into unstable lithium metal.

Power consumption tips

  • Reduce the brightness of your screen when running on batteries.
  • Use a blank screensaver, and set it to operate after a relatively short period of inactivity. Better still, switch off or hibernate your laptop if you won’t be using it for more than 5 minutes or so.
  • Set your power options (e.g. in Windows control panel) to minimize power consumption. This includes having hard drives power down as much as possible.
  • Switch off wireless networking, if you’re not using it.
  • Unplug all PCMCIA cards (or similar) and USB devices that you’re not using. Ditto optical drives (CDROM etc).
  • Certain specialist notebook graphics cards can be set to run “underclocked” at less than their full potential. This saves energy. Do this with caution though, because it can cause conflicts with certain graphics software.
  • Close all the programs you’re not using. This includes all the programs that run in the background, unused services in Windows, etc. Which services to stop is beyond the scope of this blog entry.
  • Certain sound chips have a power saving mode that can be activated via the control panel.

Caution when hot! It is inadvisable to use a li-ion battery when particularly hot. Heat can generally be a problem with laptops, so make sure that all the vents are clear, that the laptop is not sitting on a highly insulating material (e.g. sat on a duvet when used in bed!) and that all fans are operating as they should.

Battery life tips

  • Do not keep the laptop plugged in whilst the battery is installed; this keeps the battery on a permanent charge/ discharge cycle which will cause it to age rapidly. Instead remove the battery if you’re running on AC power.
  • If you’re going to store the battery or leave it unused for any length of time, discharge it first to about 40% capacity – never fully discharge a li-ion battery. Aim to store it at around 15°C/59°F (see above).
  • You do not need to discharge or charge a li-ion battery fully – they do not suffer from the “memory effect” experienced with nickel cadmium or nickel metal hydride rechargeables. So only discharge partially – avoid going below 20% capacity if you can.
  • When the battery is full or at over 95% charge, stop charging it!
  • Don’t bother buying old stock of batteries no matter how cheap, since they will have degraded for the above reasons.

Remember to recycle. Li-ion batteries should be recycled wherever possible. Your council may have suitable local facilities.

For everything you could possibly want to know about batteries in general, visit the Battery University!

Photo based on battery image copyright © photomartimages, licensed under Creative Commons. Used with permission.

Linux on a Toshiba Portege 3300CT

3300 
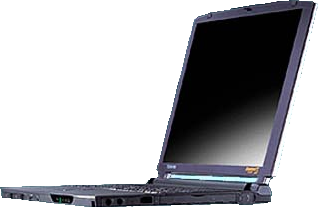
A colleague at work passed an old laptop to the department – the intention being that we put it with the other Waste Electrical and Electronic Equipment for disposal. It’s an old Toshiba Portégé 3300CT which would originally have been supplied with Windows 95 but which was now running Windows 98. “Running” like a three-legged dog. It’s a sweet little laptop though and I couldn’t quite bring myself to consign it to the scrap heap, particularly when it seemed to be fully functional. “It needs Linux!” I thought to myself.

I’ve installed Linux on a few older machines, to drag a bit more life out of them. VectorLinux has been my distribution of choice in the past, but on this occasion I really struggled to get it to install. There were a few problems:

  • The laptop has limited ports and no docking station. We’re stuck with PCMCIA, a single USB 1 port, a modem, a proprietary floppy drive port and not much else.
  • There is an external PCMCIA CD-ROM drive. Eventually I discovered that you can boot from this if you hold down “C” during startup. Unfortunately driver support for this CD-ROM drive is limited. During the VectorLinux install, it could boot from the CD but subsequently could not find the CD in the installation process.
  • It is possible to boot from floppies. Tracking down a floppy-initiated install for VectorLinux is a challenge, but I found that some of the archived Slackware distributions have a three-disk set floppy boot process that loads sufficient drivers to enable installation to continue from an ISO image stored on the existing Windows partition.
  • Unfortunately, the VectorLinux install didn’t seem to recognise any of the PCMCIA or USB network cards I threw at the laptop. I searched for manually installable drivers (and indeed found some – source code only) but the Linux environment was unable to make the drivers.

In my wrangling with VectorLinux, I removed as much bloat as possible from Windows 98. Having installed a USB network card I was able to transfer an ISO image for the install onto the Windows partition. I then shrank this using FIPS (you have to restart in DOS mode). VectorLinux is able to install from an ISO image on the hard drive, once you’ve got the kernel and ram disk loaded up.

Because VL didn’t recognise any network card, I started to cast my eye wider – tried booting from a Knoppix Live CD (no dice) and finally settled on attempting a Debian install. I’ve had good results with Debian in the past, particularly with hardware support, but I didn’t consider it to start with because I think of it more as a “full blown” distribution – not necessarily one best suited to older, slower hardware.

To give Debian “room to breathe”, I thought it best to place the ISO image (for CD 1) on a partition more or less on its own. To do this, I removed the hard drive from the laptop (a bit of a fiddly job, but do-able). I popped it into a USB hard drive caddy and then used another PC to clear out and defrag the Windows partition and copy across the ISO, Linux and initrd images. Having done that, I attached the USB caddy to a laptop, booted the laptop with a GParted CD and resized the Windows partition leaving just a little bit more space than the ISO required. That done, I returned the laptop drive to its normal location.

Using a Windows 98 boot floppy (DOS wouldn’t work since the parition was FAT32) I copied loadlin and the Windows 98 “system files” onto the hard drive – it could now be booted from again.

Finally, I booted from the hard drive and issued the command “loadlin vmlinuz /dev/ram rw initrd=initrd.gz”. The installer fired up, found my ISO image and most importantly recognised my USB network card. The system is now fully installed and up and running.

I’m not quite sure what I’m going to use it for – possibly as a network monitoring system or for some web development testing work. For sure, it’s not going in the bin – just yet.

Feel free to comment if you would like me to expand on any of the points above.

Image copyright © Inverse Net. All rights acknowledged.