How-to: Laravel 5.1 tutorial; part 1 – installation

It’s been quite a while since we’ve posted anything about Laravel. We’re strictly hobbyist developers here and in web development it’s almost impossible to keep up with the rate of change unless you’re a full time developer (and even then, it’s not easy). This pace of change of course means trouble not only for small-time developers like us, but also for enterprise users who favour stability over bleeding-edge features.

So the recent announcement is timely, that Laravel 5.1 is the first version to offer long term support (LTS). LTS in this case means two years of bug fixes and three years of security updates (as opposed to six months and one year respectively for other releases). And for us, this means that although our version 4 tutorials quickly became obsolete, our version 5 tutorials should have a chance of remaining relevant for the next three years. So we hope this new series will be useful for you, our readers.

Without further ado, let’s dive in.

Prerequisites

These days there’s a phenomenal number of ways to get up and running with a server – Vagrant, Puppet, Chef, Ansible and so on. For the purposes of this tutorial I’m going to assume the most basic requirements:

  • Apache web server (other web servers will work, but we won’t explicitly deal with them)
  • Shell access to the server (preferably SSH)
  • Root access to install Composer globally (not essential)
  • Git must be installed in your environment.
  • PHP >= 5.5.9
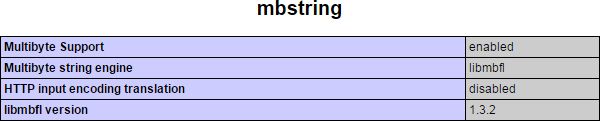
  • OpenSSL PHP Extension (probably compiled in to your PHP installation – check with phpinfo();)
    OpenSSL
  • Mbstring PHP Extension
    MBString
  • Tokenizer PHP Extension
    Tokenizer

Install Composer

Composer is an integral part of Laravel these days. It’s used for managing dependencies – external libraries and the like, used by projects. It is also used to install Laravel. While logged in as root, to make Composer available globally, do:


curl -sS https://getcomposer.org/installer | php -- --install-dir=/usr/local/bin
ln -s /usr/local/bin/composer.phar /usr/local/bin/composer

The official Composer documentation suggests using mv composer.phar composer, but if you use a symbolic link instead, upgrading Composer is as simple as running curl -sS https://getcomposer.org/installer | php -- --install-dir=/usr/local/bin again.

Install Laravel

There are different ways of approaching this, but the approach I prefer (for its simplicity) is as follows. To install Laravel in the directory that will house your web project (e.g. if that’s under /var/www), enter:

composer create-project laravel/laravel /var/www/new.website.name

There will be a lot of activity in the console as all Laravel’s various components are installed. The new website directory contains a folder “public” and it’s to this you need to direct your web server. So for example, with Apache, create a new configuration file /etc/apache2/sites-available/new.website.name.conf:

<VirtualHost *:80>
ServerName new.website.name
DocumentRoot "/var/www/new.website.name/public"
<Directory "/var/www/new.website.name/public">
allow from all
Options +Indexes
</Directory>
</VirtualHost>

Again, for Apache, enable the new website (e.g.):

a2ensite new.website.name

If you’re using a control panel (CPanel, Plesk, VirtualMin, etc.) your steps will vary. When you then browse to your new site, you should see something like this:

Laravel 5

Configuration

There’s lots you can configure, but here are some basics.

  • Make sure the storage and the bootstrap/cache directories are writeable by the web server. E.g.:
    chown -R www-data:www-data /var/www/new.website.name/storage
    chown -R www-data:www-data /var/www/new.website.name/bootstrap/cache
    find /var/www/new.website.name/storage -type f -exec chmod ug+rw {} \;
    find /var/www/new.website.name/storage -type d -exec chmod ug+rwx {} \;
    find /var/www/new.website.name/bootstrap/cache -type f -exec chmod ug+rw {} \;
    find /var/www/new.website.name/bootstrap/cache -type d -exec chmod ug+rwx {} \;
  • In config/app.php set your time zone (e.g.):
    'timezone' => 'Europe/London',
  • And locale (e.g.):
    'locale' => 'en_GB',

Pretty straightforward stuff really.

Review: Visionaire Vehicle Tracker and Monitoring

Having put hours and hours of work, not to mention thousands of pounds, into my Land Rover Defender, I was dismayed and concerned to learn it is now the most stolen car in the UK!

It seems the very design and nature of a Defender, the thing that makes it so attractive to the enthusiast, is the exact same quality that now attracts some very well organised thieves. It’s like a great big Meccano set. It holds it’s value like no other vehicle and is soon going end of life. All that seems to have exacerbated the problem to a level where if you don’t take measures to protect your Land Rover, you might as well leave it in the street with the engine running.

If someone is coming to get your Defender it’s almost certain they will have visited once before and will have a good idea of what security you have fitted. They may even tamper with it in advance, to make subsequent theft easier. It’s simple to search the various UK forums for advice and security gear and magic ‘theft proof’ devices are numerous and varied with devotees claiming theirs is the one to have.

Here’s a little secret though: none of these precautions work. None of them make your car theft-proof. At best they delay the thief a few minutes; at worst they give you a level of confidence wholly unjustified by the device. With bolt cutters or an angle grinder or if your Defender is very posh, a low loader, none of the devices are going to help you for long. The simple and sad fact is, if they want it, they are having it. So where does that leave you?

I think the concept of a vehicle tracker is relatively old news. I’d guess that you would think them the domain of your supercar owners with expensive installation and yearly costs. As technology and communications have progressed however, that’s no longer the case.

It’s surprisingly simple and pretty damn cost effective and is largely based around mobile phone technology. I know there are many on the market but let me show you one that seems to tick all the boxes.

Land Rover TrackerI’ve installed the £299  Visionaire system from Carrotech – a tiny GPS device with a mobile sim. What first attracted me was the low cost of purchase and very low cost of ongoing use, especially when compared to the popular skytag. But it was only when I started to play with the very user-friendly Internet interface that I realised the true power and convenience of this system.

Tracker rulesOnce installed (buried very deeply somewhere in your Defender’s soul, with its own backup power) the device monitors and records details of every journey you make. Using simple drop down menu options you can then ask the device to advise you either by email or text if anything specific happens. The list is long but things like the battery being disconnected, the car leaving your home address or even predetermined speeds being exceeded can all be recorded and trigger an action. Email and GPS is the first avenue for this messaging but if that fails for any reason then the system will text you details. All this for just £72 a year! Yep just £72. Rather pleasantly I found that when I told my Insurance Company I had this tracker  installed my premium went down by £25 so in theory to have my Defender monitored 24 hours a day, 365 days a year whether I’m in the country or not, it’s costing me £47.

Tracker map for Land Rovers

For me the purpose is to recover my car if it were ever stolen but I can immediately see how you might want to install this in the car if you have kids who have just learnt to drive and want to ‘borrow daddy’s car’ for the evening! If that isn’t enough to have you ordering this brilliant little device already, wait until you see what else it does. It actively monitors where the car has been and overlays that on a combination of OS and/or satellite maps. The tracker software records it all and although I’m not sure how long the data is retained, I was able to check a route from a year ago quite easily – and see my average speed, how fast I drove at what time etc., etc. Okay, maybe that’s a little ‘big brother’ but still a feature I quite liked!

I’m sure I’ve only scratched the service of what the system can offer. Given the possible uses and at an initial purchase price that’s not much more than the cost of a good service, can you afford not to fit a tracker?

I know various insurance companies are offering a similar feature. In exchange for a cheaper insurance policy for young drivers, their driving style is monitored using a device like this. I’m not sure that I like the idea of some faceless corporation monitoring whether my darling daughters are tearing round the streets – but I’ll tell you what – Daddy sure would like to know!!

[easyreview title=”Dummy rating” icon=”dummy” cat1title=”Ease of use” cat1detail=”Once it’s installed it’s all drop menu stuff. Simplicity itself.” cat1rating=”4″ cat2title=”Features” cat2detail=”I honestly can’t think of anything else I’d like it to record.” cat2rating=”5″ cat3title=”Value for money” cat3detail=”This is one of the cheapest trackers on the market and it’s worked faultlessly for 18 months.” cat3rating=”5″ cat4title=”Build Quality” cat4detail=”Tiny and designed to be buried in your car body. Feels very light and dare I say cheap but I’m not sure it need be anything else” cat4rating=”4.0″ summary=”I’m incredibly impressed with this tracker. Keep an eye on the kids, protect your cherished car. It will do either or both, brilliantly.”]