From CodeIgniter to Laravel | part 4: managing databases

UPDATE: I have re-written this article for the new Laravel 4. You’ll find the updated article over at Geek & Dummy.

Contents


AVZ DatabaseFor almost all my previous web design, I’ve used phpMyAdmin to administer the databases. I speak SQL, so that has never been a big deal. But Laravel comes with some excellent tools for administering your databases more intelligently and (most importantly!) with less effort. Migrations offer version control for your application’s database. For each version change, you create a “migration” which provides details on the changes to make and how to roll back those changes. Once you’ve got the hang of it, I reckon you’ll barely touch phpMyAdmin again.

Configuration

So let’s assume that I’m creating a new website about ducks. When I created the virtual host, Virtualmin also created my “ducks” database. I’m going to create a MySQL user with the same name, with full permission to access the new database. Here’s how I do that from a root SSH login:

echo "GRANT ALL ON ducks.* TO 'ducks'@localhost IDENTIFIED BY 'newpassword';" | mysql -p
Enter password:[root MySQL password]

This creates a new MySQL user, “ducks” and gives it all privileges associated to the database in question. Next we need to tell Laravel about these credentials. The important lines in the file application/config/database.php are:

<?php
return array(

//...

	'default' => 'mysql',

	'connections' => array(

//...

		'mysql' => array(
			'driver'   => 'mysql',
			'host'     => '127.0.0.1',
			'database' => 'ducks',
			'username' => 'ducks',
			'password' => 'newpassword',
			'charset'  => 'utf8',
			'prefix'   => '',
		),

//...

	),

//...

);

Initialise Migrations

The migration environment must be initialised for this application. We do this using Laravel’s command line interface, Artisan. From an SSH login:

php artisan migrate:install
Migration table created successfully.

This creates a new table, laravel_migrations, which will be used to track changes to your database schema (i.e. structure), going forwards.

My ducks application will have a single table to start with, called “ducks” [Note: it is significant that we’re using a plural word here; I recommend you follow suit]. This table does not yet exist; we will create it using a migration. To kick this off, use the following Artisan command:

php artisan migrate:make create_ducks_table
Great! New migration created!

This will create a new file named something like “2013_04_15_085356_create_ducks_table.php”. If, like me, you’re developing remotely, you’ll need to pull this new file into your development environment. In NetBeans, for example, right-click the migrations folder, click “download” and follow the wizard.

You can deduce from the naming of the file that migrations are effectively time-stamped. This is where the life of your applications database begins. The migrations file will look a bit like this:

<?php

class Create_Ducks_Table {

	/**
	 * Make changes to the database.
	 *
	 * @return void
	 */
	public function up()
	{
		//
	}

	/**
	 * Revert the changes to the database.
	 *
	 * @return void
	 */
	public function down()
	{
		//
	}

}&#91;/php&#93;

As you can probably guess, in the "up" function, you enter the code necessary to create the new table (to move "up" a migration) and in the "down" function, you do the reverse (to move "down" or to roll back a migration).

<h1>Create first table</h1>

Your first migration will probably be to create a table (unless you have already created or imported tables via some other method).  Naturally, Laravel has a class for this purpose, the <a href="http://laravel.com/docs/database/schema" target="_blank">Schema class</a>.  Here's how you can use it, in your newly-created migrations php file:

[php]<?php

class Create_Ducks_Table {

	/**
	 * Make changes to the database.
	 *
	 * @return void
	 */
	public function up()
	{
		Schema::create('ducks', function($table) {
				$table->increments('id');              // auto-incrementing primary key
				$table->string('name', 255);           // varchar field; length 255 characters
				$table->date('birthdate')->nullable(); // can be empty
				$table->boolean('can_fly')->default(TRUE);
				$table->integer('children')->unsigned();
				$table->text('biography');
				$table->timestamps(); // special created_at and updated_at timestamp fields
		});	
	}

	/**
	 * Revert the changes to the database.
	 *
	 * @return void
	 */
	public function down()
	{
		Schema::drop('ducks');
	}

}

To run the migration (i.e. to create the table), do the following at your SSH login:

php artisan migrate
Migrated: application/2013_04_15_085356_create_ducks_table

That creates the table, as described. And if you need to roll back:

php artisan migrate:rollback
Rolled back: application/2013_04_15_085356_create_ducks_table

This removes the table.

By examining the Schema class documentation, you’ll see how you can use future migrations to add or remove fields, create indexes, etc. In my next tutorial, I’ll have a look at using databases in your application.

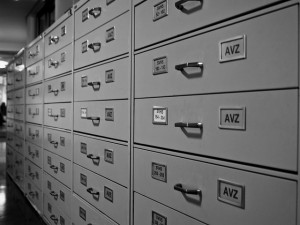
AVZ Database image copyright © adesigna, licensed under Creative Commons. Used with permission.

From CodeIgniter to Laravel | part 3: installing external libraries

UPDATE: I have re-written this article for the new Laravel 4. You’ll find the updated article over at Geek & Dummy.

Contents


LibraryAs a fan of CodeIgniter, I was very pleased when the Sparks project came on the scene, offering a relatively easy way to integrate third-party libraries/classes into your project. Laravel has a similar and arguably more feature-rich analog in Bundles. With a bit of luck, the third-party library you require has already been converted to a Laravel bundle, making installation a snip.

Let’s say, for example, we’re going to build a web-scraping application. The first two libraries I’d consider adding to the project would be the Requests HTTP library and the PHP Simple HTML DOM Parser.

From an SSH login, at the root of your project, issue the following command:

php artisan bundle:install requests phpsimplehtmldom

You should be greeted with the following results:

Fetching [requests]...done! Bundle installed.
Fetching [phpsimplehtmldom]...done! Bundle installed.

The file application/bundles.php will probably contain code along the following lines:

<?php

/*
 &#91;...various comments...&#93;
*/

return array(

	'docs' => array('handles' => 'docs'),

);

Register the new libraries like this:

return array(

	'docs' => array('handles' => 'docs'),
	'requests' => array('auto' => TRUE),
	'phpsimplehtmldom' => array('auto' => TRUE),

);

And use like this:

		$HDM = IoC::resolve('HtmlDomParser'); // Give us a hook into the library; Requests doesn't need this

		// Request the HTML page
		//$headers = array('Accept' => 'application/html');
		$headers = array();
		//$options = array('auth' => array('user', 'pass'));
		$options = array();
		$request = Requests::get('http://some.domain/some/page', $headers, $options);
		if($request->status_code != 200) {
			// Handle error retrieving page
		}

		$dom = $HDM::str_get_html($request->body);

		// Options
		$options = $dom->find('#somediv option');
		foreach($options as $option) {
			echo $option->value.' | '.$option->innertext."<br />";
		}

There’s a lot more to this IoC thing than meets the eye. To be frank, it’s above my head. I’m also not convinced I fully understand registering bundles. But, like CodeIgniter, learning is a process of immersion in the framework. I’m pretty sure than in a couple of years I’ll laugh at the code above. So all I ask is please be gentle in the comments. 😉

Library image copyright © Janne Moren, licensed under Creative Commons. Used with permission.

From CodeIgniter to Laravel | part 2: orientation

UPDATE: I have re-written this article for the new Laravel 4. You’ll find the updated article over at Geek & Dummy.

Contents


Signpost at North Point, Barbados, Feb.1998I’ve used CodeIgniter for many years, but I have always, I confess, proceeded knowing just enough to get by. So forgive me if my approach seems a little clunky. I have never, for example, used CodeIgniter’s routes. I like my web application files nicely categorised into Model, View, Controller, Library and, if absolutely necessary, Helper.

Controllers

So for now, I want to carry on using Controllers, if that’s okay with you. Controllers are stored under application/controllers. Sound familiar?

Here’s a sample controller:

<?php

// application/controllers/news.php
class News_Controller extends Base_Controller {

	public function action_index() {
		echo "News index page.";
	}

	public function action_item($item) {
		echo "News item $item.";
	}

}
?>

In CodeIgniter, that’s all you would have needed to do, due to automatic routing. In Laravel, you need also to add the following to application/routes.php:

Route::controller('news');

To view these pages, you just visit yourdomain/news (/index is implied) and yourdomain/news/item/x (where x will probably refer to a specific news item, possibly by data id).

Note the naming of the functions – action_item, etc. The part after the underscore represents a “method” or page of your web site. Laravel’s routing magic makes sure you get the correct function. If you’re creating a RESTful API, you can use additional function names beginning get_, post_, etc. Check the Laravel documentation for more.

Views

Views are pretty straightforward and similar to CodeIgniter. Place them in application/views. Extending the example above, our controller could now look like this:

<?php

// application/controllers/new.php
class News_Controller extends Base_Controller {

	public function action_index() {
		echo "News index page.";
	}

	public function action_item($id) {
		$data = array('id' => $id);
		return View::make('results', $data);
	}

}

?>

Note that data can also be passed through to a view like this:

	public function action_item($id) {
		return View::make('item', $data)
		    ->with('id' => $id);
	}

And then your view (application/views/item.php) could be like this:

<h1>News flash</h1>
<p>This is news item <?php echo $id; ?>.</p>

Obviously your real views will be more syntactically complete.

Models

Models are created under application/models. Unlike CodeIgniter, Laravel comes with its own object relational mapper. In case you’ve not encountered the concept before, an ORM gives you a convenient way of dealing with database tables as objects, rather than merely thinking in terms of SQL queries. CodeIgniter has plenty of ORMs, by the way, it just doesn’t ship with one as standard.

Laravel’s built-in ORM is called “Eloquent”. If you choose to use it (there are others available), when creating a model, you extend the Eloquent class. Eloquent makes some assumptions:

  • Each table contains a primary key called id.
  • Each Eloquent model is named in the singular, while the corresponding table is named in the plural. E.g. table name “newsItems”; Eloquent model name “newsItem”.

You can override this behaviour if you like, it just makes things a bit more convenient in many cases.

Example model application/models/newsItem.php:

<?php
class NewsItem extends Eloquent {

}

(You can omit the closing ?> tag.)

Because the Eloquent class already contains a lot of methods, you do not necessarily need to do more than this. In your controllers, you could for example now do this:

$items = NewsItem::all();

foreach ($items as $item) {
  // Do stuff here
}

This is barely scratching the surface. Head on over to the official Laravel documentation for much more on all this.

Signposts image copyright © Andrea_44, licensed under Creative Commons. Used with permission.

From CodeIgniter to Laravel | part 1: installation

UPDATE: I have re-written this article for the new Laravel 4. You’ll find the updated article over at Geek & Dummy.

Contents


Laravel logoIn my final “how-to” guide on self-hosted web design, I gave a special mention to a relatively new PHP framework, Laravel. I’m very familiar with CodeIgniter, but due to some of its limitations (including concerns over licensing, going forward), many developers have been moving to Laravel. Laravel has been on my “must try it out” list for some time. In this article, I’ll take you through initial installation and some of the issues I faced.

Prerequisites

Since this “how-to” follows my DIY web hosting series, I’m going to assume we’re starting with a similar setup: a virtual web site powered by Apache and PHP on Linux. Other environments work too. See the Laravel documentation for more details.

Installation

The Laravel setup guide is a little unclear about the correct location for its files. Here’s what I’ve found to work. This guide is for Laravel 3.2, but I suspect it will also hold true for later versions in due course. (At the time of writing, 4.0 is still in beta.)

If you’ve created a virtual web site with Virtualmin, you’ll have a new public_html directory at, for example, /home/fred.bloggs/domains/my.funky.site/public_html. Change to the directory above public_html (e.g. /home/fred.bloggs/domains/my.funky.site and proceed as follows, from an SSH login. Make sure you perform these steps as the web site owner (e.g. su fred.bloggs):

wget http://laravel.com/download -O laravel.zip
unzip laravel
rm laravel.zip
mv laravel-laravel-*/* .
mv laravel-laravel-*/.[gt]* .
rmdir laravel-laravel-*
mv public/* public_html/
mv public/.h* public_html/
rmdir public
chmod -R ug+w storage/views

If you read the Laravel installation instructions linearly, you’ll see that you need to make a change to application/config/application.php. It contains a line like:

'key' => 'YourSecretKeyGoesHere!',

The recommendation is that you insert 32+ random characters in place of YourSecretKeyGoesHere!. There’s another way of doing this, if (and only if) the key field is blank. Laravel comes with a CLI (command line interface) called Artisan. If you issue the command php artisan key:generate, a random key will be generated for you automatically and inserted into the file.

To remove “index.php” from your URLs, edit that same file (application/config/application.php). Find the line 'index' => 'index.php', and change it to 'index' => '',. Laravel comes with a .htaccess file in the public directory, which contains the necessary Apache magic to make this all work.

Having done the above, fire up your web browser and point it at your new site. You should arrive at a default introductory Laravel page:

laravel_default

Other frameworks

Now would be a good time put to put Twitter’s Bootstrap and jQuery in place, if you’re planning to use them. Check the download URLs are current before you do this:


wget http://twitter.github.com/bootstrap/assets/bootstrap.zip
unzip bootstrap
rm bootstrap.zip
mv bootstrap/css/* public_html/css/
mv bootstrap/js/* public_html/js/
mv bootstrap/img/* public_html/img/
rm -rf bootstrap
cd public_html/js
wget http://code.jquery.com/jquery-1.9.1.min.js

Configure your development environment

I use NetBeans for development. If you don’t already have a preferred IDE (integrated development environment), I recommend you check it out. Another favourite is Eclipse. You could use an ordinary text editor, but then you’d be missing out on a lot of things that can make your coding more comfortable and efficient.

Having installed Laravel and the other frameworks on my web server, next I use NetBeans to pull the code across to my development environment. Before you do this, still in your SSH shell, you may wish to delete some of the typical directories that Virtualmin creates but which you don’t really need:

rmdir cgi-bin/ homes/

In the NetBeans “New Project” wizard, select the option “PHP Application from Remote Server”. In the remote configuration, ensure that you choose as your “upload directory”, the directory above public_html, since that contains the private (non-web-accessible) Laravel directories, which we will also be playing with.

Once the code has copied across, you’ll want to exclude a couple of Virtualmin-generated directories from further synchronisation. In the project’s properties, go to “Ignored folders”. Add there /logs and /public_html/stats.

Where next

I’m slowly writing additional tutorials, while I take time to learn the framework. See the contents list above for other posts in this series. I also recommend you check out Dayle Rees’ tutorials. Happy coding!