

In my development workflow (DevOps and scripting, mainly – I’m a security practitioner, not a programmer) I frequently switch between Windows and WSL. I work a lot with Ansible, and I love the fact that with WSL, I can enable full Ansible linting support in Visual Studio Code. The problem is that there are known cross-OS filesystem performance issues with WSL 2. At the moment, Microsoft recommends that if you require “Performance across OS file systems“, you should use WSL 1. Yuck.
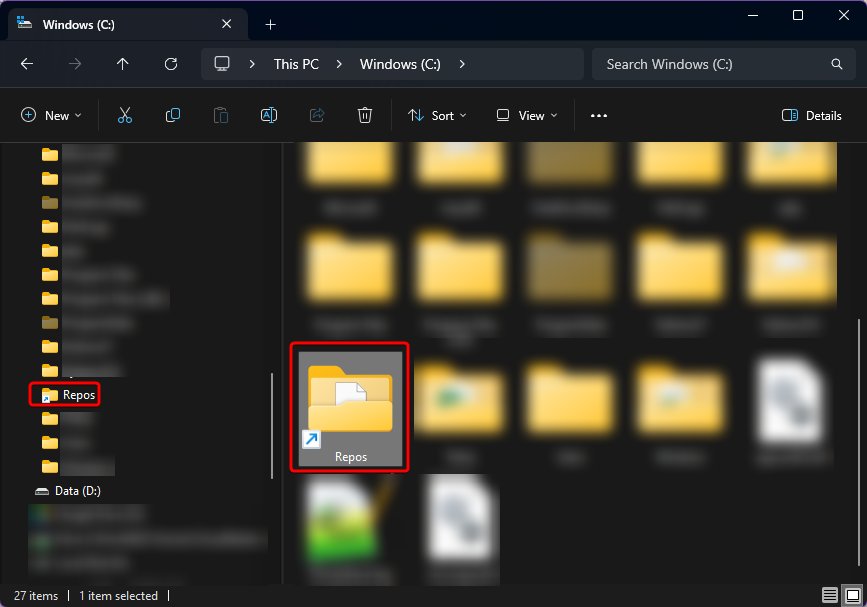
What I want to do is to have a folder on my Windows hard drive, C:\Repos, that contains all the repositories I use. I want that same folder to be available in WSL as the directory /repos. Network file shares are out of the question, because, performance. (Have you tried git operations on a CIFS share? Ugh.)
The old way – share from Windows to WSL
Until this week, I’d been sharing the Windows directory into WSL distros using /etc/fstab and automount options. Fstab contained this line:
C:/Repos /repos drvfs uid=1000,gid=1000,umask=22 0 0And /etc/wsl.conf:
[automount]
options="metadata,umask=0033"
But with this setup, every so often WSL filesystem operations would grind to a halt and I’d need to terminate and restart the distro. It could be minutes or days before the problem resurfaced.
The Windows Subsystem for Linux September 2023 update, currently available only for Windows Insider builds, was supposed to fix some of the issues. I tried it. The fixes broke Docker and didn’t improve filesystem performance sufficiently. Even after a Docker upgrade (the Docker folks in collaboration with the WSL team), port mapping remained broken.
The new way – share from WSL to Windows
So let’s fix this once and for all. Maybe the WSL filesystem perfomance issues will go away one day, but I need to get on with my work today, not at some unspecified point in the future. I also don’t like running insider builds, and neither did my endpoint protection software. (That’s another story.) In the meantime, we need to move the files into WSL, where the performance issues disappear. It’s cross-OS access that causes the problems.
Now I know about \\wsl.localhost, but unfortunately this confuses some of the programs I use day-to-day, including some VS Code plugins. I really need all Windows programs to believe and act like the files are on my hard drive.
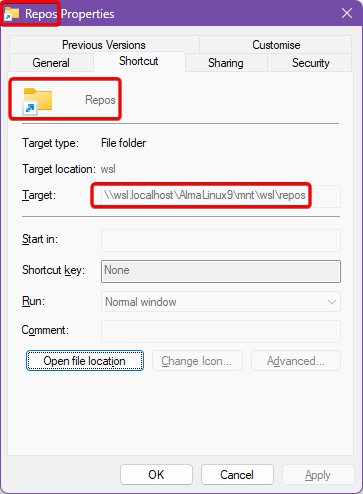
After much pulling together of information from dark, dusty corners of the internet, I discovered that, with the latest versions of Windows, you can create symbolic links to the WSL filesystem. So the files move into WSL (as /repos) and we create a symbolic link to that directory at C:\Repos. This can be as simple as uttering the following PowerShell incantation:
New-Item -ItemType SymbolicLink -Path "C:\Repos" -Target "\\wsl.localhost\AlmaLinux9\repos"
This should be fairly self-explanatory. In my case, I’m actually mapping to /mnt/wsl/repos, for reasons I’ll explain in the next section.
I have two VS Code workspaces – one for working directly in Windows, and the other for working in remote WSL mode. The Windows workspace points to C:\Repos and the WSL workspace points to /repos. When I restarted both workspaces after making these changes and moving the files into WSL, VS Code saw no difference. The files were still available, as before. But remote WSL operations now ran quicker.
Bonus: share folder with multiple distros
Ah, but what if you need the same folder to be available in more than one distribution? The same /repos folder in AlmaLinux, Oracle Linux and Ubuntu? Not network mapped? Is that even possible?
Absolutely it is. It’s possible through the expedient of mounting an additional virtual hard disk, which becomes available to all distros. This freaks me out slightly, because – what about file system locking? Deadlocks? Race conditions? Okay, calm down Rob, just exercise the discipline of only opening files within one distro at a time. You got this.
Create yourself a new VHDX file. I store mine in roughly the same place WSL stores all its VHDX files:
$DiskSize = 10GB
$DiskName = "Repos.vhdx"
$VhdxDirectory = Join-Path -Path $Env:LOCALAPPDATA -ChildPath "wsl"
if (!(Test-Path -Path $VhdxDirectory)) {
    New-Item -Path $VhdxDirectory -ItemType Directory
}
$DiskPath = Join-Path -Path $VhdxDirectory -ChildPath $DiskName
New-VHD -Path $DiskPath -SizeBytes $DiskSize -Dynamic
This gives you a raw, unformatted virtual hard drive at C:\Users\rob\AppData\Local\wsl\Repos.vhdx. Mount it within WSL. From the PowerShell session used above:
wsl --mount --vhd $DiskPath --bare
Now inside one of your distros, you’ll have a new drive, ready to be formatted to ext4. Easy enough to work out which device is the new drive – sort by timestamp:
ls -1t /dev/sd* | head -n 1
You’ll get something like /dev/sdd. Initialise this disk in WSL:
sudo mkfs -t ext4 /dev/sdd
(Do check you’re working with the correct drive – don’t just copy and paste!)
Back in the PowerShell session, we unmount the bare drive and remount it. WSL will automatically detect that the disk now contains a single ext4 partition and will mount that under /mnt/wsl – in all distros, mind you.
wsl --unmount $DiskPath
wsl --mount --vhd $DiskPath --name repos
The drive will now be mounted at /mnt/wsl/repos. If necessary, move any files into this location and create a new symlink at /repos. In WSL:
shopt -s dotglob
sudo mv /repos/* /mnt/wsl/repos
sudo rmdir /repos
sudo ln -s /mnt/wsl/repos /repos
(shopt here ensures the move includes any hidden files with names begining ‘.‘.)
When sharing this directory into Windows, you need to use the full path /mnt/wsl/repos, not the symlink /repos. But otherwise it works the same as before.
This mount will not persist across reboots, so create a scheduled task to do this, that will run on log on.
