Introduction

As you may know from other articles here, I have a Synology DS214Play NAS, and I’m a big fan. It can do so much for so little money. Well, today I’m going to show you a new trick – it will work for most Synology models.
There are a few different ways of remotely connecting to and controlling computers on your home network. LogMeIn used to be a big favourite, until they discontinued the free version. TeamViewer is really the next best thing, but I find it pretty slow and erratic in operation. It’s also not free for commercial use, whereas the system I describe here is completely free.
Many people extol the virtues of VNC, but it does have a big drawback in terms of security, with various parts of the communication being transmitted unencrypted over the network. That’s obviously a bit of a no-no.
The solution is to set up a secure SSH tunnel first. Don’t worry if you don’t know what that means. Just think about this metaphor: imagine you had your own private tunnel, from your home to your office, with locked gates at either end. There are no other exits from this tunnel. So no one can peek into it to see what traffic (cars) is coming and going. An SSH tunnel is quite like that. You pass your VNC “traffic” (data) through this tunnel and it is then inaccessible to any prying eyes.
Assumptions
This guide assumes the following things:
- You have a Synology NAS, with users and file storage already configured.
- You have at home a Windows computer that is left switched on and connected to your home network while you’re off-site.
- Your home PC has a static IP address (or a DHCP reservation).
- You have some means of knowing your home’s IP address. In my case, my ISP has given me a static IP address, but you can use something like noip.com if you’re on a dynamic address. (Full instructions are available at that link.)
- You can redirect ports on your home router and ideally add firewall rules.
- You are able to use vi/vim. Sorry, but that knowledge is really beyond the scope of this tutorial, and you do need to use vi to edit config files on your NAS.
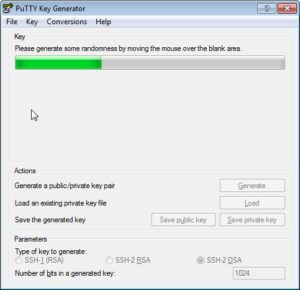
- You have a public/private key pair. If you’re not sure what that means, read this.
Install VNC
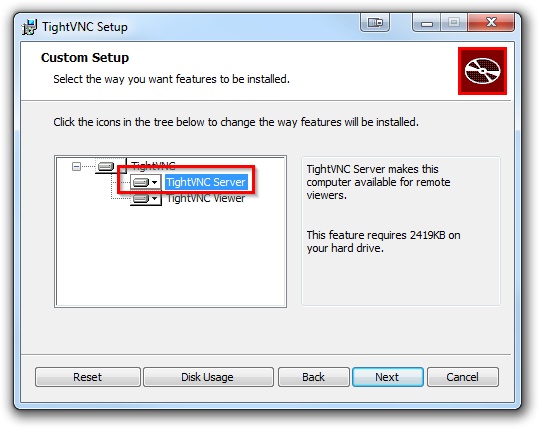
There are a few different implementations of VNC. I prefer TightVNC for various reasons – in particular it has a built-in file transfer module.
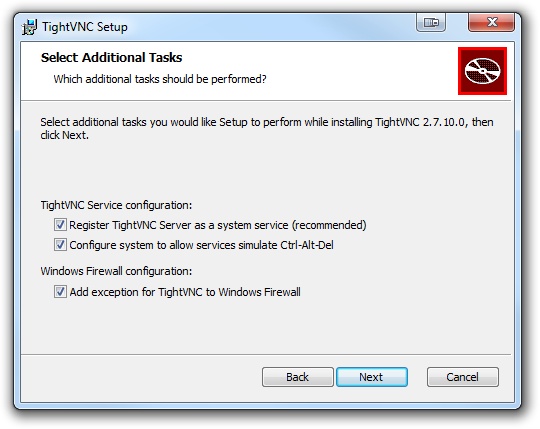
When installing TightVNC on your home PC, make sure you enable at least the “TightVNC Server” option.
Check all the boxes in the “Select Additional Tasks” window.
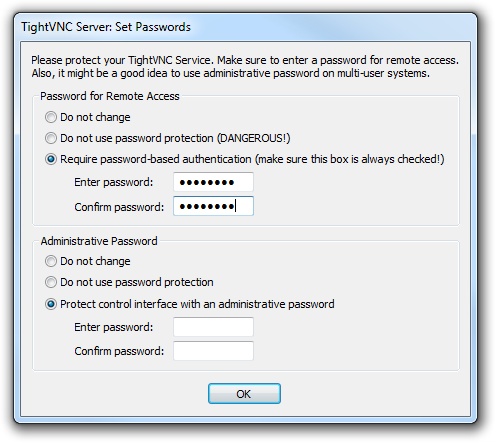
You will be prompted to create “Remote Access” and “Administrative” passwords. You should definitely set the remote access password, otherwise anyone with access to your home network (e.g. someone who might have cracked your wireless password) could easily gain access to your PC.
At work, you’ll just need to install the viewer component.
Configure Synology SSH server
Within Synology DiskStation Manager, enable the SSH server. In DSM 5, this option is found at Control Panel > System > Terminal & SNMP > Terminal.
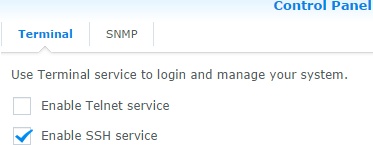
I urge you not to enable Telnet, unless you really understand the risks.
Next, login to your NAS as root, using SSH. Normally I would use PuTTY for this purpose.
You’ll be creating an SSH tunnel using your normal day-to-day Synology user. (You don’t normally connect using admin do you? Do you?!) Use vi to edit /etc/passwd. Find the line with your user name and change /sbin/nologin to /bin/sh. E.g.:
rob:x:1026:100:Rob:/var/services/homes/rob:/bin/sh
Save the changes.
As part of this process, we are going to make it impossible for root to log in. This is a security advantage. Instead if you need root permissions, you’ll log in as an ordinary user and use “su” to escalate privileges. su doesn’t work by default. You need to add setuid to the busybox binary. If you don’t know what that means, don’t worry. If you do know what this means and it causes you concern, let me just say that according to my tests, busybox has been built in a way that does not allow users to bypass security via the setuid flag. So, run this command:
chmod 4755 /bin/busybox
Please don’t proceed until you’ve done this bit, otherwise you can lock root out of your NAS.
Next, we need to edit the configuration of SSH. We have to uncomment some lines (that normally being with #) and change the default values. So use vi to edit /etc/ssh/sshd_config. The values you need to change should end up looking like this, with no # at the start of the lines:
AllowTcpForwarding yes

LoginGraceTime 5m

MaxAuthTries 6

PubkeyAuthentication yes

AuthorizedKeysFile     .ssh/authorized_keys
In brief these changes do the following, line by line:
- Allow using SSH to go from the SSH server (the NAS box) to another machine (e.g. your home PC)
- If you foul up your login password loads of times, restrict further attempts for 5 minutes.
- Give you 6 attempts before forcing you to wait to retry your logon.
- Allow authentication using a public/private key pair (which can enable password-less logons).
- Point the SSH daemon to the location of the list of authorized keys – this is relative to an individual user’s home directory.
Having saved these changes, you can force SSH to load the new configuration by uttering the following somewhat convoluted and slightly OCD incantation (OCD, because I hate leaving empty nohup.out files all over the place). We use nohup, because nine times out of ten this stops your SSH connection from dropping while the SSH daemon reloads:
nohup kill -HUP `cat /var/run/sshd.pid`; rm nohup.out &
SSH keys
You need to have a public/private SSH key pair. I’ve written about creating these elsewhere. Make sure you keep your private key safely protected. This is particularly important if, like me, you use an empty key phrase, enabling you to log on without a password.
In your home directory on the Synology server, create (if it doesn’t already exist) a directory, “.ssh”. You may need to enable the display of hidden files/folders, if you’re doing this from Windows.
Within the .ssh directory, create a new file “authorized_keys”, and paste in your public key. The file will then normally have contents similar to this:
ssh-rsa AAAAB3NzaC1yc2EAAAABJQAAAQEArLX5FlwhHJankhIoZcsIEgmHkOtsSR6eJINGgb4N3/4XQAHpmYPhlAy6Hg2hH8VqNLXgkVia+yMDaDOFQKXX6Ue+hOQt7Q5zB3W1NgVCsyIn9JBu3u6R8rDPBma248DhQ3yfac1iEZWa+3BrHaIM2dLVGu99C5z3Kh1NhDB83xetq08bHayzv39wuwZUZOohDzsCK29ZaEYU9ZctN/RZR4rW7A7odJbbgqG82IZXhUhiam2utpjszLJ+sMOw6z7tcpgnF5CLDys2xvE6ekLjEPA2b9KkrU6e+ILXM85s7/HP9aTkTwFyyBcPAvmO7i0xYyotu58DKf++nM2ZtpNBPQ== Rob's SSH key
This is all on a single line. For RSA keys, the line must begin ssh-rsa.
SSH is very fussy about file permissions. Log in to the NAS as root and then su to your normal user (e.g. su rob). Make sure permissions for these files are set correctly with the following commands:
chmod 755 ~

chmod 700 ~/.ssh

chmod 600 ~/.ssh/authorized_keys
If you encounter any errors at this point, make sure you fix them before proceeding. Now test your SSH login. If it works and you can also su to root, you can now safely set the final two settings in sshd_config:
PermitRootLogin no

PasswordAuthentication no
The effect of these:
- Disallow direct logging in by root.
- Disallow ordinary password-based logging in.
Reload SSH with nohup kill -HUP `cat /var/run/sshd.pid`; rm nohup.out & as before.
Setting up your router
There are so many routers out there that I can’t really help you out with this one. You will need to port forward a port number of your choosing to port 22 on your Synology NAS. If you’re not sure where to start, Port Forward is probably the most helpful resource on the Internet.
I used a high-numbered port on the outer edge of my router. I.e. I forwarded port 53268 to port 22 (SSH). This is only very mild protection, but it does reduce the number of script kiddie attacks. To put that in context, while I was testing this process I just forwarded the normal port 22 to port 22. Within 2 minutes, my NAS was emailing me about failed login attempts. Using a high-numbered port makes most of this noise go away.
To go one better however, I also used my router’s firewall to prevent unknown IP addresses from connecting to SSH. Since I’m only ever doing this from work, I can safely limit this to the IP range of my work’s leased line. This means it’s highly unlikely anyone will ever be able to brute force their way into my SSH connection, if I ever carelessly leave password-based logins enabled.
Create a PuTTY configuration
I recommend creating a PuTTY configuration using PuTTY’s interface. This is the easiest way of setting all the options that will later be used by plink in my batch script. plink is the stripped down command-line interface for PuTTY.
Within this configuration, you need to set:
- Connection type: SSH
- Hostname and port: your home external IP address (or DNS name) and the port you’ve forwarded through your router, preferably a non-standard port number.
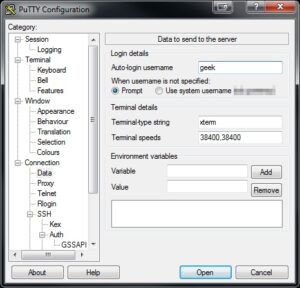
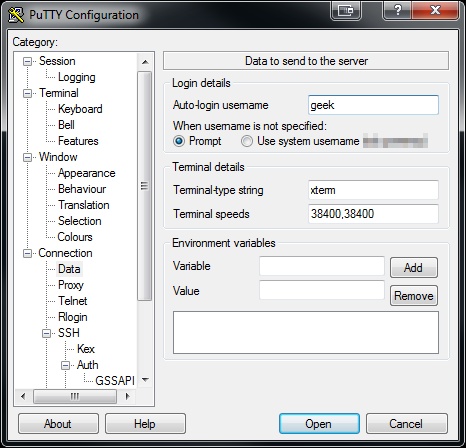
- Connection > Data > Auto-login username: Put your Synology user name here.
- Connection > SSH > Auth > Private key file for identification: here put the path to the location of your private key on your work machine, from where you’ll be initiating the connection back to home.
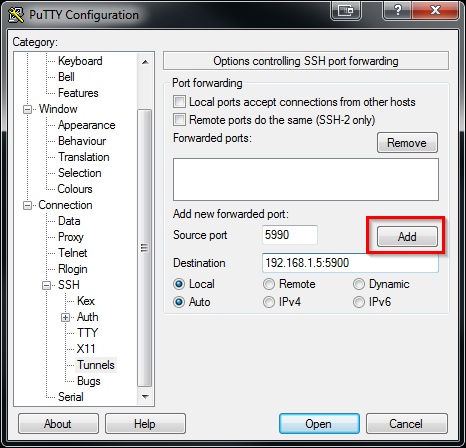
- Connection > SSH > Tunnels: This bears some explanation. When you run VNC viewer on your work machine, you’ll connect to a port on your work machine. PuTTY forwards this then through the SSH tunnel. So here you need to choose a random “source port” (not the normal VNC port, if you’re also running VNC server on your work machine). This is the port that’s opened on your work machine. Then in the destination, put the LAN address of your home PC and add the normal VNC port. Like this:
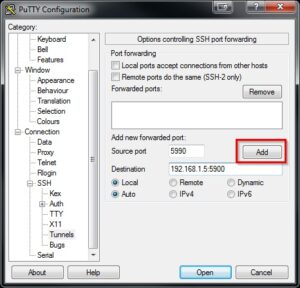
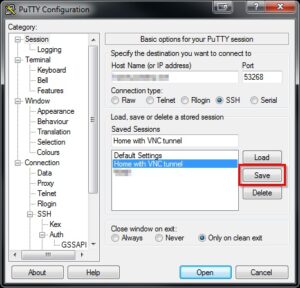
Make sure you click Add. - Finally, go back to Session, type a name in the “Saved Session” field and click “Save”. You will then be able to use this configuration with plink for a fully-automatic login and creation of the SSH tunnel.

Now would be a good time to fire up this connection and check that you can login okay, without any password prompts or errors.
Using username "rob".

Authenticating with public key "Rob's SSH key"
BusyBox v1.16.1 (2014-05-29 11:29:12 CST) built-in shell (ash)
Enter ‘help’ for a list of built-in commands.
RobNAS1>
Making VNC connection
I would suggest keeping your PuTTY session open while you’re setting up and testing your VNC connection through the tunnel. This is really the easy bit, but there a couple of heffalump pits, which I’ll now warn you about. So, assuming your VNC server is running on your home PC and your SSH tunnel is up, let’s now configure the VNC viewer at the work end. Those heffalump pits:
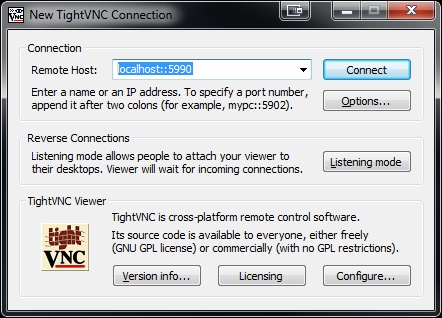
- When you’re entering the “Remote Host”, you need to specify “localhost” or “127.0.0.1”. You’re connecting to the port on your work machine. Don’t enter your work machine’s LAN ip address – PuTTY is not listening on the LAN interface, just on the local loopback interface.
- You need to specify the random port you chose when configuring tunnel forwarding (5990 in my case) and you need to separate that from “localhost” with double colons. A single colon is used for a different purpose, so don’t get tripped up by this subtle semantic difference.
If you have a working VNC session at this point, congratulations! That’s the hard work out of the way.
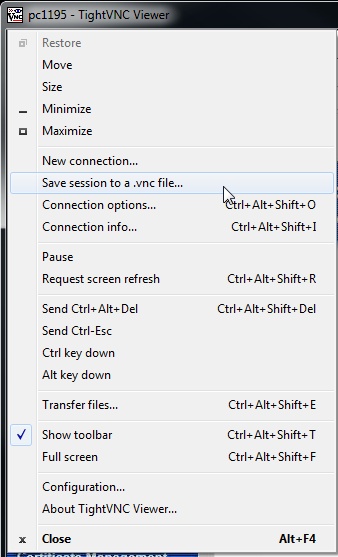
It would be nice to automate the whole connection process. While you have your VNC session established, it is worth saving a VNC configuration file, so you can use this in a batch script. Click the VNC logo in the top left of the VNC session, then “Save session to a .vnc file”. You have the option to store the VNC password in this file, which I’ve chosen to do.
Before saving the session, you might want to tweak some optimization settings. This will really vary depending on your preferences and the speed of your connection. On this subject, this page is worth a read. I found I had the best results when using Tight encoding, with best compression (9), JPEG quality 4 and Allow CopyRect.
One batch script to rule them all
To automate the entire process, bringing up the tunnel and connecting via VNC, you might like to amend the following batch script to fit your own environment:
@echo off
start /min "SSH tunnel home" "C:\Program Files (x86)\PuTTY\plink.exe" -N -batch -load "Home with VNC tunnel"
REM Use ping to pause for 2 seconds while connection establishes
ping -n 2 localhost > NUL
"C:\Batch scripts\HomePC.vnc"
I suggest creating a shortcut to this batch file in your Start menu and setting its properties such that it starts minimised. While your SSH tunnel is up, you will have a PuTTY icon on your task bar. Don’t forget to close this after you close VNC, to terminate the tunnel link. An alternative approach is to use the free tool MyEnTunnel to ensure your SSH tunnel is always running in the background if that’s what you want. I’ll leave that up to you.
DSM Upgrades
After a DSM upgrade, you may find that your SSH config resets and you can no longer use VNC remotely. In that eventuality, log into your NAS via your LAN (as admin) and change the config back as above. You’ll also probably need to chmod busybox again.
root locked out of SSH?
For the first time in my experience, during May 2015, a DSM upgrade reset the suid bit on Busybox (meaning no more su), but didn’t reset the PermitRootLogin setting. That meant that root could not log in via SSH. Nor could you change to root (using su). If you find yourself in this position, follow these remedial steps:
- Go to Control Panel > Terminal & SNMP
- Check the “Enable Telnet service” box.
- Click “Apply”.
- Log in as root, using Telnet. You can either use PuTTY (selecting Telnet/port 23 instead of SSH/port 22) or a built-in Telnet client.
- At the prompt, enter
chmod 4755 /bin/busybox. - Go to Control Panel > Terminal & SNMP
- Uncheck the “Enable Telnet service” box.
- Click “Apply”.
Do make sure you complete the whole process; leaving Telnet enabled is a security risk, partly because passwords are sent in plain text, which is a Very Bad Thing.
Conclusion
So, what do you think? Better than LogMeIn/TeamViewer? Personally I prefer it, because I’m no longer tied to a third party service. There are obvious drawbacks (it’s harder to set up for a start! and if you firewall your incoming SSH connection, you can’t use this from absolutely anywhere on the Internet) but I like it for its benefits, including what I consider to be superior security.
Anyway, I hope you find this useful. Until next time.
Subway Tunnel image copyright © Jösé, licensed under Creative Commons. Used with permission.