
As you may know, here at Geek & Dummy, we’re building up a free library of sound effects, which you’re welcome to use in your own projects. For the best results you really need to use decent quality recording equipment – a microphone attached to your computer will just pick up lots of unwanted noise. We’ve achieved really great results with the Tascam DR-05, which for the price (about £80) packs an amazing sound quality into an easily pocketable format. It helps to pair this with a decent SD card – see our recent MicroSD card head-to-head to see what’s the best value for money in that department.
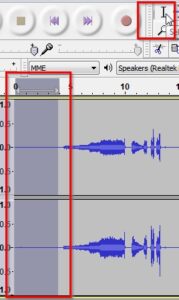
- When recording, make sure your audio sample contains about 2 seconds of ambient noise. This enables us to profile the ambient noise before we remove it from the sample.
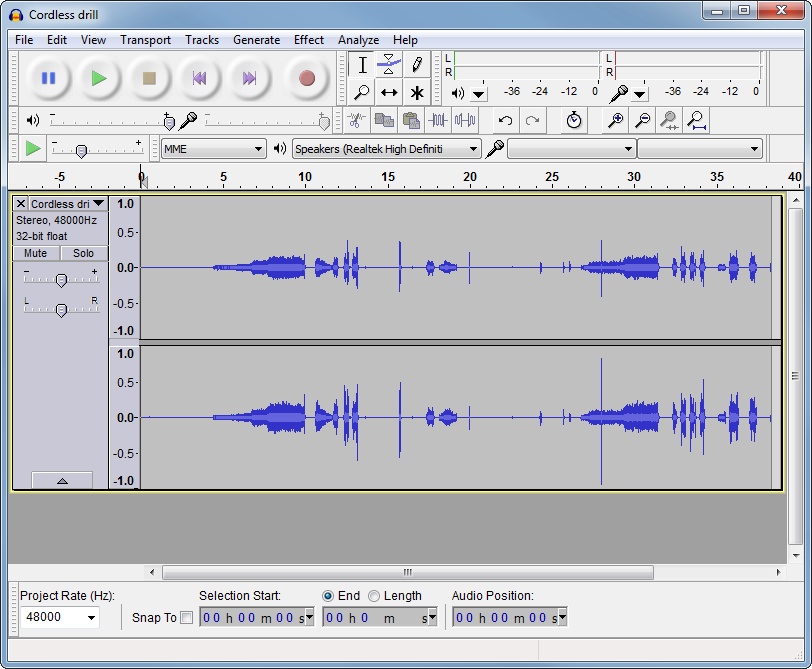
- Run Audacity. If you don’t have this incredible (but dull-looking!) free software, pick it up here.
- Open the sample (File –> Open).
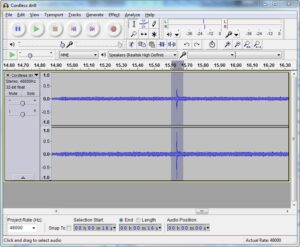
- Using the selection tool, select your couple of seconds of ambient noise – this “silence” should look virtually flat in the display.
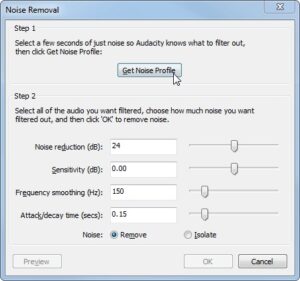
- On the menu, choose Effect –> Noise Removal.
- Click “Get Noise Profile”.
- Press Ctrl-A to select the whole sample.
- On the menu, choose Effect –> Noise Removal again.
- This time, click OK. The default settings are probably okay, though you can play with them to achieve different results.
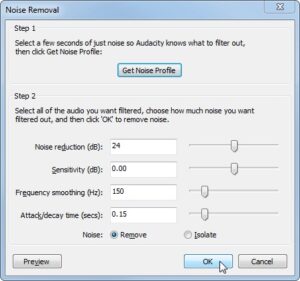
- Listen to the sound sample. Sometimes noise removal can result in artificial sounding samples. If that’s the case, you can take a noise profile from a different quiet section of the sample and try again, or try with different parameters.
- You can now remove silent sections of the audio as required. You can either select the sections and press the delete key, or use the Truncate Silence feature in Audacity (Effect –> Truncate Silence) to do it automatically. Use the zoom tool for precision removal of short sections of silence.

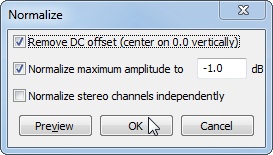
- We “normalize” the sample to take it to the maximum volume possible without causing distortion. Before normalizing, you may want to find and delete any unwanted loud sections from the sample, in order to improve the effect of normalization.
- To normalize the sample, ensure it is all either selected or deselected. Then choose Effect –> Normalize. Again there are some configurable settings here.
- Listen to the sample again to make sure you’re happy with the results. All changes can be undone with Ctrl-Z.
