How-to: Clean up audio and remove noise with Audacity

As you may know, here at Geek & Dummy, we’re building up a free library of sound effects, which you’re welcome to use in your own projects. For the best results you really need to use decent quality recording equipment – a microphone attached to your computer will just pick up lots of unwanted noise. We’ve achieved really great results with the Tascam DR-05, which for the price (about £80) packs an amazing sound quality into an easily pocketable format. It helps to pair this with a decent SD card – see our recent MicroSD card head-to-head to see what’s the best value for money in that department.

  1. When recording, make sure your audio sample contains about 2 seconds of ambient noise. This enables us to profile the ambient noise before we remove it from the sample.
  2. Run Audacity. If you don’t have this incredible (but dull-looking!) free software, pick it up here.
  3. Open the sample (File –> Open).
    Cleaning audio 01
  4. Using the selection tool, select your couple of seconds of ambient noise – this “silence” should look virtually flat in the display.
    Cleaning audio 02
  5. On the menu, choose Effect –> Noise Removal.
  6. Click “Get Noise Profile”.
    Cleaning audio 03
  7. Press Ctrl-A to select the whole sample.
  8. On the menu, choose Effect –> Noise Removal again.
  9. This time, click OK. The default settings are probably okay, though you can play with them to achieve different results.
    Cleaning audio 04
  10. Listen to the sound sample. Sometimes noise removal can result in artificial sounding samples. If that’s the case, you can take a noise profile from a different quiet section of the sample and try again, or try with different parameters.
  11. You can now remove silent sections of the audio as required. You can either select the sections and press the delete key, or use the Truncate Silence feature in Audacity (Effect –> Truncate Silence) to do it automatically. Use the zoom tool for precision removal of short sections of silence.
    Cleaning audio 05
  12. We “normalize” the sample to take it to the maximum volume possible without causing distortion. Before normalizing, you may want to find and delete any unwanted loud sections from the sample, in order to improve the effect of normalization.
    Cleaning audio 06
  13. To normalize the sample, ensure it is all either selected or deselected. Then choose Effect –> Normalize. Again there are some configurable settings here.
    Cleaning audio 07
  14. Listen to the sample again to make sure you’re happy with the results. All changes can be undone with Ctrl-Z.

How-to: Using WhatsApp on a Windows PC

TelegramUPDATE 2: WhatsApp has finally bowed to pressure and created a web interface for desktop usage.

UPDATE: We’ve been blown away recently by new-instant-messenger-on-the-block, Telegram. Unlike WhatsApp, it’s free forever. It’s more secure than WhatsApp, it has desktop apps, chats are synchronised across all devices (at least the normal chats not marked as “secret” anyway) and best of all, it’s not owned by Facebook. Find out more here.

WhatsApp logoWow, so this is a popular search on Google! And sadly, most of the results you find are riddled with either viruses, bad advice or broken English.

As you almost certainly know if you’ve found this page, WhatsApp is a massively popular (over 7 million downloads on Android alone) app for instant messaging. Its distinguishing feature is that it relies on a user’s mobile phone number, rather than any dedicated username/password combination. The idea is that you use it as a drop-in replacement for SMS and MMS messaging. You can also use it instead of your favourite instant messaging client, on the basis that almost everyone has a mobile phone number these days.

Linking the product to a mobile phone number is also one of this product’s weaknesses – you may want to use WhatsApp from your desktop PC or laptop, but WhatsApp doesn’t provide PC (or Mac) software. The good news is that it can be done! The bad news is this process depends on you having a Google account – sorry, Apple/iOS users. The REALLY bad news is that you can’t link a single mobile phone number on two different devices. Because WhatsApp associates to a mobile phone number, this means that you can’t synchronise your chats across more than one device. If you try to link two different devices to the same mobile number, one of the devices will disconnect and you’ll be greeted with the following message:

I don't want to reverify!
I don’t want to reverify!

So this piece of information can’t be stressed enough: you can’t run WhatsApp in two places simultaneously using the same mobile phone number. If you want the convenience of being able to input messages via your computer, you need to look at some form of remote control program for your mobile device (VNC, for example). That’s beyond the scope of this How-to.

The remainder of this guide assumes you’re going to be associating your mobile phone number to WhatsApp and using it only on your PC. If that’s what you want to do – good news! It’s entirely possible.

BlueStacks Android Emulator

The easiest way to get started is to install the BlueStacks Android emulator. BlueStacks is in beta at the moment and free to use. We imagine this will change at some point in the future. There will still be other possibilities, but one of the beauties of BlueStacks is its simplicity.

It’s worth mentioning at this point that whenever you’re going to emulate one operating system on another, you’re well advised to ensure your computer is up to the job. I’m using an Acer Veriton M6610G which is more than up to the job. (It has since been replaced with the M6630G series – very competent and expandable PCs.)

Visit the BlueStacks web site and download and install the emulator. We’re doing this on a Windows PC, but I suspect it would also work on a Mac. (Any Mac users out there that have an Android phone? I suppose it could happen…)

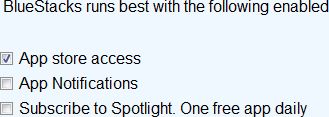
During the installation, you’ll be presented with a set of three options – App store access, App Notifications, and Spotlight. I’d suggest you only select the first of these. The installation can take a fair few minutes.

BlueStacks options

If you’re prompted to update your graphics drivers, you’ll need to allow this, for BlueStacks to run. As always, make sure System Restore is working, in case something goes wrong when installing the drivers.

Set up BlueStacks

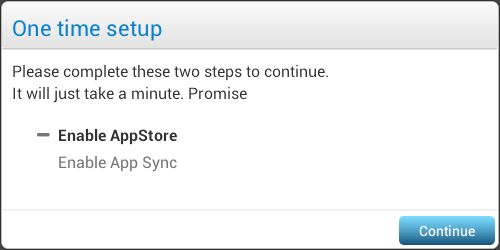
When you first load BlueStacks, you’ll be taken though a setup wizard. Click “Continue”:

BlueStacks setup step 01

You need to connect BlueStacks to a Google Account for two reasons: first, to download the app from the Google Play Store. Secondly, so you have access to your address book. It’s best to link BlueStacks to an existing Google account, so you have the benefit of your Google address book. Choose “Existing”:

BlueStacks setup step 02

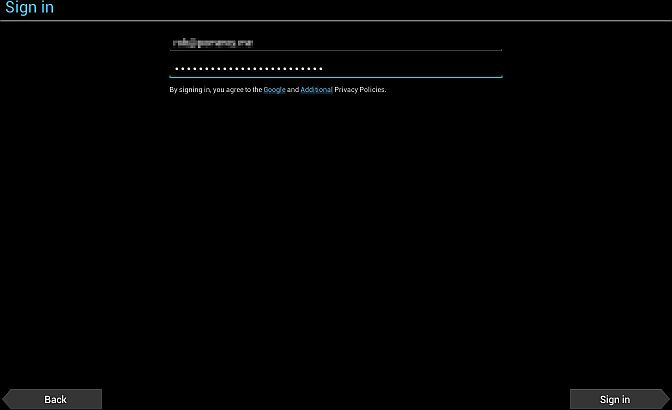
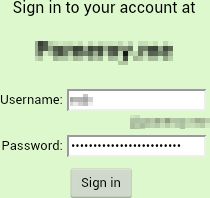
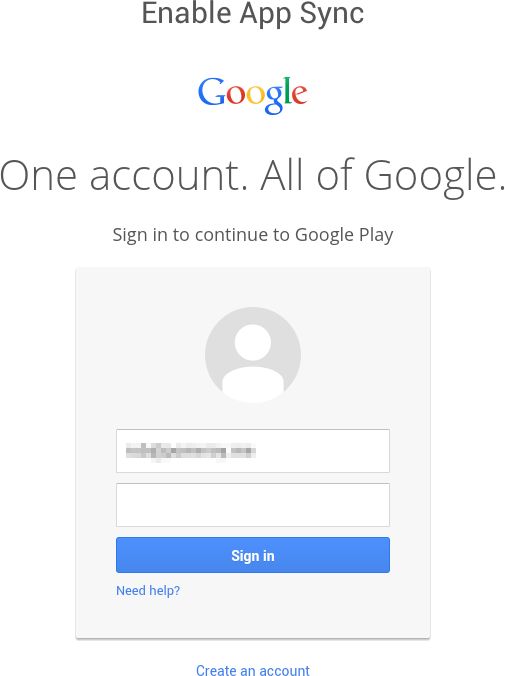
Enter your Google credentials and click “Sign in”:

BlueStacks setup step 03

If, like me, you use Google’s two-factor authentication, you’ll now be taken through a web-based login process (still within the BlueStacks emulator). Click “Next”:

BlueStacks setup step 04

Re-enter your credentials and click “Sign in”:

BlueStacks setup step 05

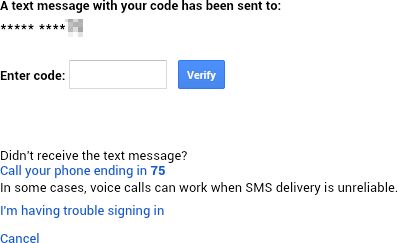
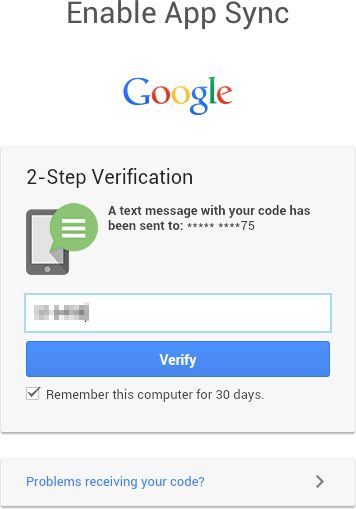
Again, this is only if you’ve enabled two-factor authentication (which you should, by the way). A code will be sent to your mobile phone number. Enter it here and click “Verify”:

BlueStacks setup step 06

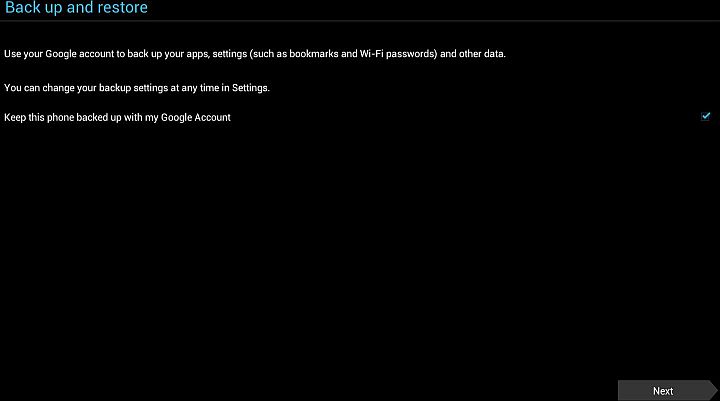
The “Back up and restore” section – what you choose here is up to you. Click “Next”:

BlueStacks setup step 07

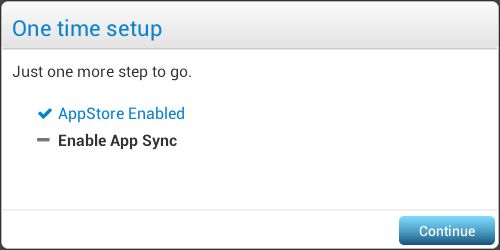
You’ll be taken back to the BlueStacks wizard. Click “Continue”:

BlueStacks setup step 08

Re-enter your Google account details (yawn):

BlueStacks setup step 09

Do you want your password to be remembered? Your choice:

BlueStacks setup step 10

Again, leap through the two-step verification hoop if it applies to you:

BlueStacks setup step 11

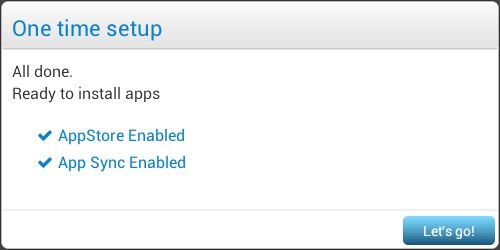
The Google Play store will now be available. Click “Let’s go!”:

BlueStacks setup step 12

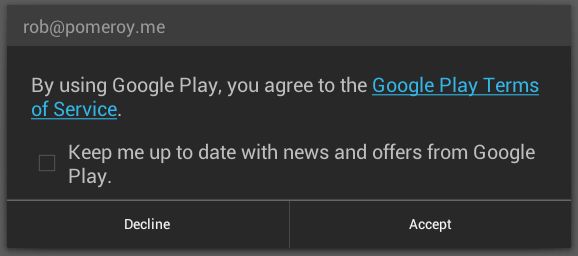
Finally, accept the Terms of Service. I suggest leaving the “opt-in” unchecked:

BlueStacks setup step 13

Installing WhatsApp

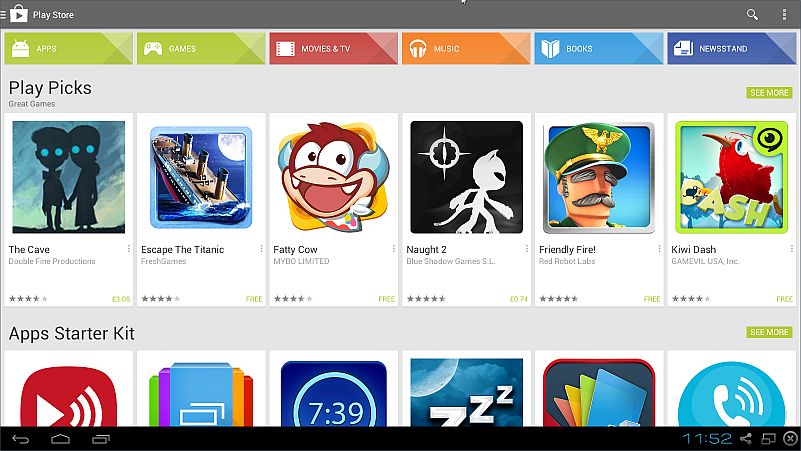
Immediately after setting up BlueStacks, you’ll be taken to the Play Store:

Install WhatsApp step 01

From there, search for WhatsApp:

Install WhatsApp step 02

Click “Install”:

Install WhatsApp step 03

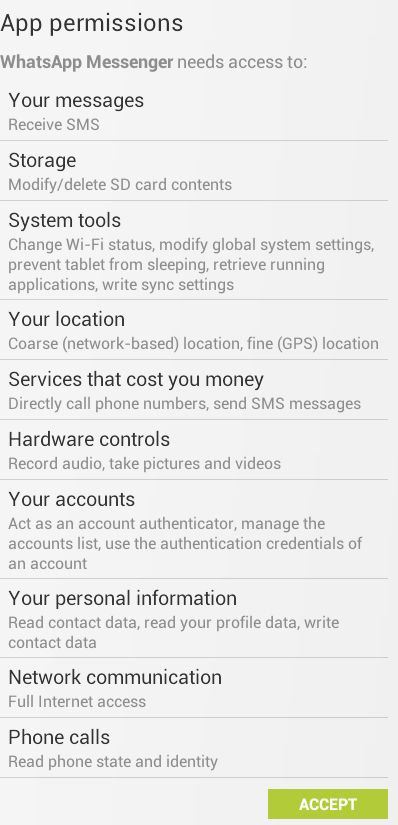
Accept the permissions:

Install WhatsApp step 04

WhatsApp will now install:

Install WhatsApp step 05

Once installed, click “Open”:

Install WhatsApp step 06

Agree to the WhatsApp terms:

Install WhatsApp step 07

Enter the mobile number that you’re going to link to this installation of WhatsApp (remember, one mobile phone number per device) and click “OK”:

Install WhatsApp step 08

Double-check and click “OK”:

Install WhatsApp step 09

WhatsApp tries to send and detect an SMS. The SMS message will go to your phone of course, not BlueStacks, so this detection will fail (you’ll need to wait for this):

Install WhatsApp step 10

Instead, click “Call me” and be ready to enter the verification code:

Install WhatsApp step 11

An automated message will tell you the code you need to enter into WhatsApp on BlueStacks:

Install WhatsApp step 12

Verify your profile:

Install WhatsApp step 13

WhatsApp will spend some time initialising:

Install WhatsApp step 14

Once it’s done, the “Continue” button appears. Click it:

Install WhatsApp step 15

That’s it; you’re in. From now on, you can run WhatsApp from the Home screen:

Run WhatsApp from Home screen

You should see your list of contacts from your Google address book:

Browse contacts

If you have any chat history from using WhatsApp on a different device, this will not be pulled across to BlueStacks – history is not saved on WhatsApps’ servers.

So there we are; it has its limitations, but if you’re happy to use WhatsApp on your computer instead of your phone or tablet, this is probably the easiest way to do it. Having said that, I will personally carry on using WhatsApp on my Galaxy Note phone or tablet, both of which I’m more likely to have with me than my computer!

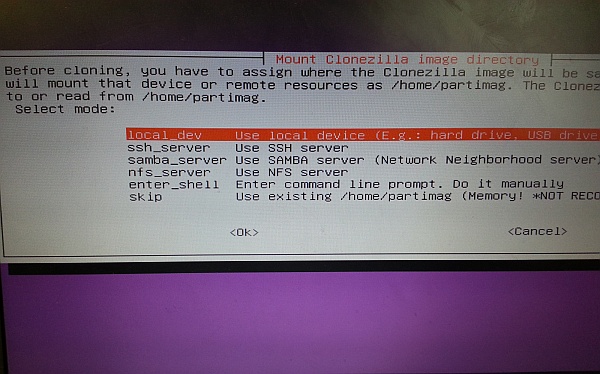
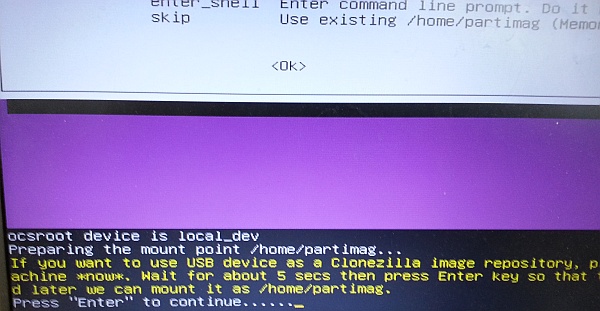
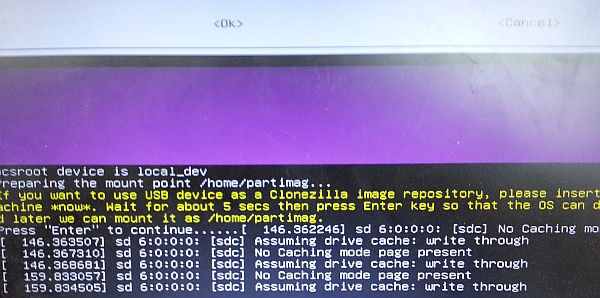
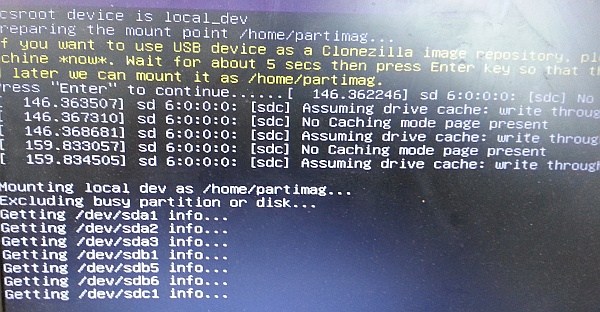
How-to: Overcome “critical temperature” problem with CloneZilla

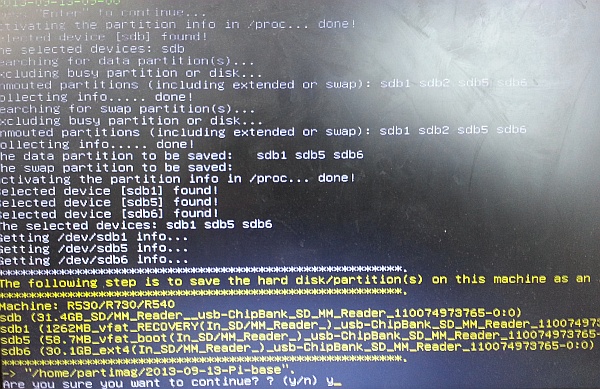
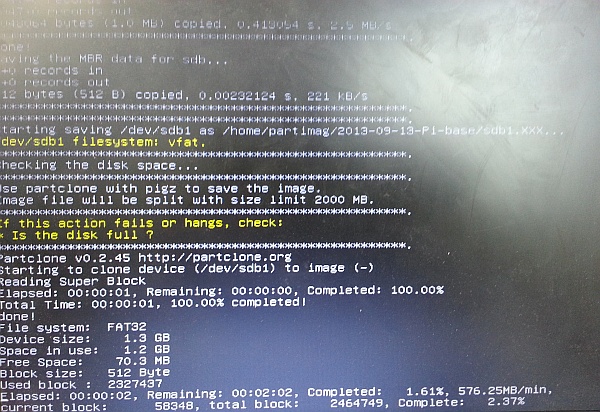
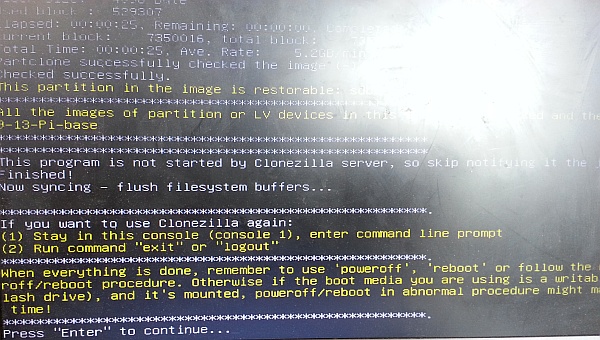
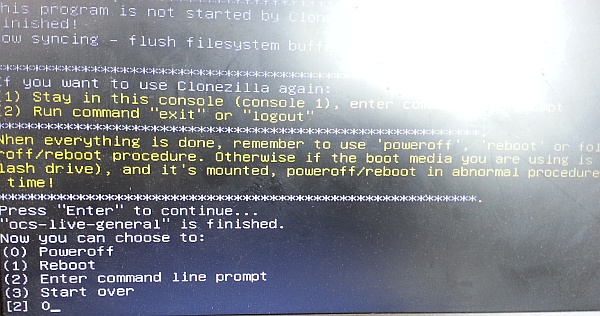
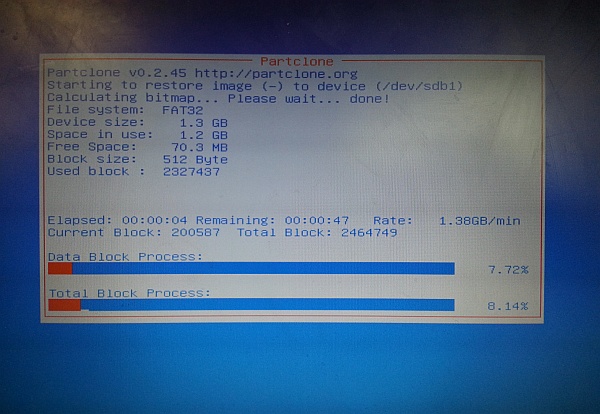
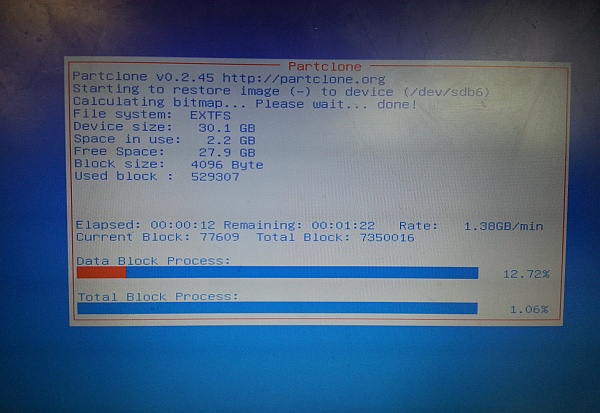
processor fireIn case you don’t know, Clonezilla is an excellent (and free) disk/partition imaging tool. It’s essentially a customised Linux distribution. You boot from a CD and then follow a text-mode wizard to backup or restore images of hard drives or other storage devices. You can see the process in action in my Raspberry Pi SD card backup/restore article.

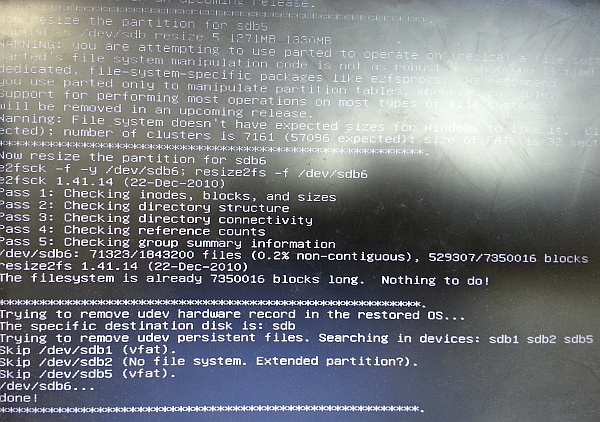
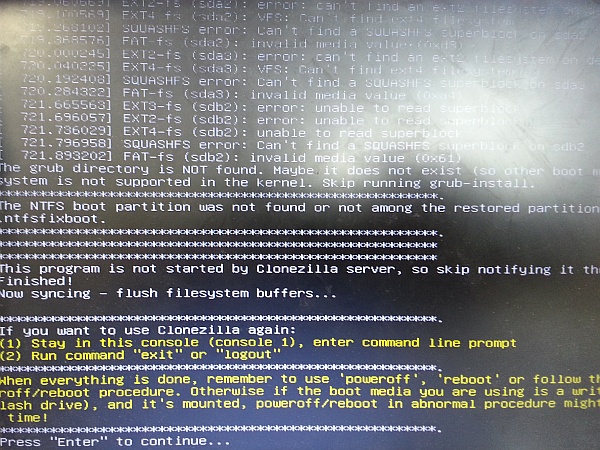
The process can be quite intensive for hard drives and processors. One of the things Clonezilla does is compresses the image of the drive to save space wherever you’re storing the image. Compressing a 2GB file is a big job for an older processor. I was finding with one of my older laptops that the processor was working so hard, it caused the temperature to rise at a point where it triggered a Linux “panic”. The system immediately halted with an error message about “critical temperature”, half way through making an image. So of course that image is not usable.

What’s supposed to happen in normal usage is that when the temperature rises dangerously, the operating system slows down the processor. This allows the machine to cool down (at the obvious expense of a performance penalty). I’m not sure if this is fixed in later versions of Clonezilla – there’s some talk of it in the mailing lists. I’m indebted to those mailing lists for some parts of workaround that follows.

One thing you can try is using the i486 version of Clonezilla. This assumes older processor hardware and so (I suspect) doesn’t make full use of your processor’s theoretical potential. Just select i486 architecture from the download page for the latest stable version.

As a belt-and-braces approach (and this is the method I’ve adopted), you can also issue commands that tell the Linux kernel to run the processor at a particular frequency. In my case, I’m telling an Intel Core i3-330M to run at 1.6GHz instead of the usual 2.13GHz.

You can do this as follows:

  1. Once you’re in the Clonezilla wizard, press Alt-F2, to access a login shell.
  2. Issue the command cpufreq-info. In my case, I saw the following, as well as some other information:
    analyzing CPU 0:
      driver: acpi-cpufreq
      CPUs which run at the same hardware frequency: 0
      CPUs which need to have their frequency coordinated by software: 0
      maximum transition latency: 10.0 us.
      hardware limits: 933 MHz - 2.13 GHz
      available frequency steps: 2.13 GHz, 2.00 GHz, 1.87 GHz, 1.73 GHz, 1.60 GHz, 1.47GHz, 1.33GHz, 1.20 GHz, 1.07 GHz, 933 MHz
    ...

    You may see more than one CPU listed – mine shows just the one (single CPU, dual core). Most importantly, this lists the frequencies to which you can set your processor clock.
  3. Pick a frequency from the list that’s lower than the maximum. E.g., if the list shows that the processor can run at a lower speed of 1.60 GHz, set the clock speed as follows:
    sudo cpufreq-set -c 0 -f 1.60GHz
    The -c 0 parameter refers to the CPU number, starting from 0. Repeat the command, changing this number, for each CPU.
  4. Press Alt-F1 to return to the Clonezilla wizard and continue with the cloning process.

This approach sets the clock speed just for this particular session, so normal service will be resumed upon reboot.

If this all sounds like too much hard work, you could try one of the good commercial solutions instead, such as Norton Ghost or Acronis True Image.

Burning processor image copyright © mhamzahkhan, licensed under Creative Commons. Used with permission.

How-to: Resolve Problems with the iOS 7 upgrade

iOS 7 UpgradeSo I assume you are like every other iPhone fanboy and girl and have been eagerly awaiting the iOS 7 update… Are you also like me and have watched and heard your friends merrily upgrading? Okay, complaining about slow downloads, having to free up memory before starting the upgrade and general niggles but on the whole, after persevering, the upgrade goes ahead?

iOS 7 No UpdateAre you? Is that you? Or are you like me and your iPhone 5 refuses to even see the upgrade let alone download it.

Okay, let’s see if we can help!

Let’s start with what I’ve tried to get past this problem. First though, before you start tinkering it’s vital that you back up your iPhone so you at least have somewhere to go back to if it all goes horribly wrong!

Back to my problem. After waiting for an hour, my phone was still not able to find the update. I made the assumption that there was some software fault in the phone so a hard reset might clear it. Hold down the home button and the lock button for 10 seconds and your iPhone will do a hard reset. When your iPhone powers back up – can you now see the update waiting to download? Nope, neither could I.

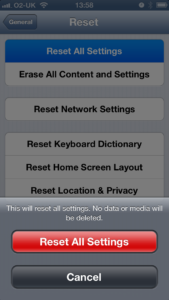
iphone Reset All SettingsSo, what do we do next? I’ve got my backup so let’s try the reset options. First Reset All Settings. In theory this should just reset your phone settings and not touch your data and media. Very straightforward; it removes all my little customisations (booo!!!) and unfortunately when I go back to the Software Update screen, still no update!

Right time to get serious, Erase All Content and Settings and then upgrade to iOS 7 before restoring my backup – can’t fail, right?

I select this option and it gives me the impression that it is doing the upgrade but then appears to ‘freeze’ when powering back up. I say “freeze”. I gave it an hour and the flamin’ thing stubbornly refused to switch back on and continually displayed the swirling symbol. I assumed it had frozen and did another hard reset and the phone came back on, obviously not having deleted the content.

Right, it’s time to consult with Geek, who after laughing at the iPhone fanboy, suggested I connect to iTunes via my PC and try the reset or direct upgrade options via iTunes. Sounds like a plan.

On connecting to my PC and clicking on the iPhone icon everything starts happening and iTunes immediately prompts me to upgrade to iOS 7. Brilliant, easy peasy……………….

So after 10 minutes of Apple jiggery-pokery my iPhone comes back to life running iOS 7 – minus all of my data, apps and everything else I loved!!! Arrgghhhh!!!!

Okay, don’t panic, I did my backup before, right? Navigate to the backup section in iTunes and hey presto………………… Oops! no sign of it. In fact a message saying I have never backed up to the cloud! Now you can imagine my panic. That’s 2 years of customization and info. Sack iOS 7 now, that was the least of my worries.

But then it occurred to me, maybe because it was still attached to my PC it wasn’t even looking at the cloud. Back to basics then. Unplug the iPhone; in Settings–>General, select the option Erase All Content and Settings then wait nervously. 7 agonizing minutes later, the iPhone powers back up and prompts me that it is a new phone and would I like restore my last saved backup from this morning? Oh thank goodness!!!!

So in a nutshell, if you are having the kind of problems I have had here you need to make a backup to iCloud, connect your iPhone to a PC to get access to it and update it but then disconnect and Erase all data before restoring from your original backup. Brilliant, thanks a lot Apple, that#s 6 hours of my life I’m never getting back!

I’m still struggling to understand exactly what the issue might have been with my iPhone 5. The only thing I can think of is that it was a specific batch from a specific provider. Mine was one of the very first to be released and was on the O2 network. Ah well, all’s well that ends well.

How-to: Raspberry Pi tutorial part 2: SD card backup/restore

[easyreview title=”Complexity rating” icon=”geek” cat1title=”Level of experience required, to follow this how-to.” cat1detail=”This is wizard-driven. Very simple. You’ll need to be able to burn a CD, nothing more taxing than that.” cat1rating=”1″ overall=”false”]

Contents

In my last Raspberry Pi tutorial (the first in this series), I mentioned that we can take a snapshot of the Raspberry Pi’s SD card at any time. This will give us a “restore point”, so we can skip a few installation steps if we want to wipe the Pi and start again. Quite a few Raspberry Pi projects will require that we start with a working installation of Raspbian so that’s the snapshot I’m going to take. You can of course take a snapshot whenever you like. If you’ve honed and polished your Rasbmc box, it would make sense to take a snapshot in case it becomes horribly corrupted at some point or melts.

There are many different ways of skinning this cat (or squashing this ‘berry), but my preferred method is the tried and tested customised Linux distribution, Clonezilla. I’ve been using CloneZilla personally and professionally for years and persuaded many colleagues of its merits (besides the obvious, that it’s free). It can be a bit intimidating with all the options it presents. If this is your first experience of CloneZilla, following this tutorial will also give you a gentle introduction to this powerful toolkit.

What you’ll need

  • A copy of Clonezilla, burned to disc.
  • A computer (desktop or laptop) configured to boot from CD.
  • An external hard drive, with enough space to store the image (you’ll only need a few gigabytes spare).
  • A USB reader for your SD card. You can buy one here.

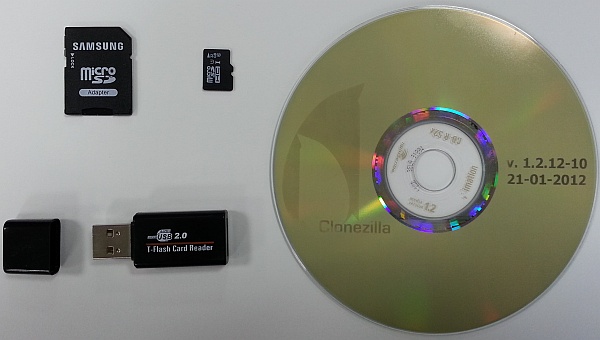
Some of your Clonezilla kit

Take a snapshot

  1. Power down your Pi, with the command halt, shutdown or poweroff.
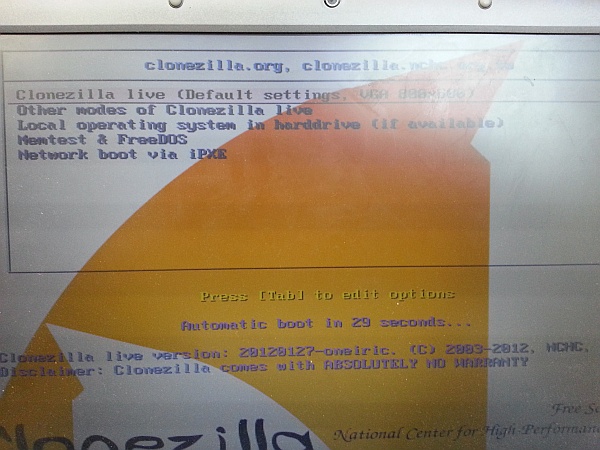
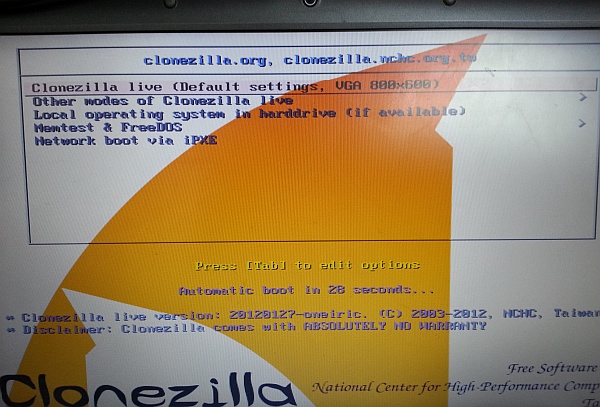
  2. Boot your PC from the Clonezilla disc. You will arrive at a simple menu/boot screen. It will boot automatically within 30 seconds – you can hit enter at any time, to proceed.
    Snapshot step 01
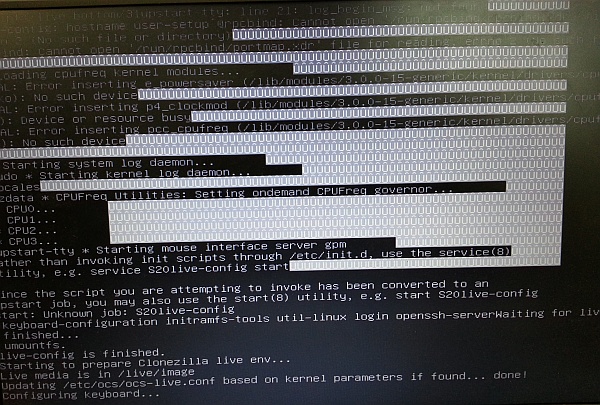
  3. You’ll be treated to rows and rows of gibberish while Clonezilla boots up.
    Snapshot step 02
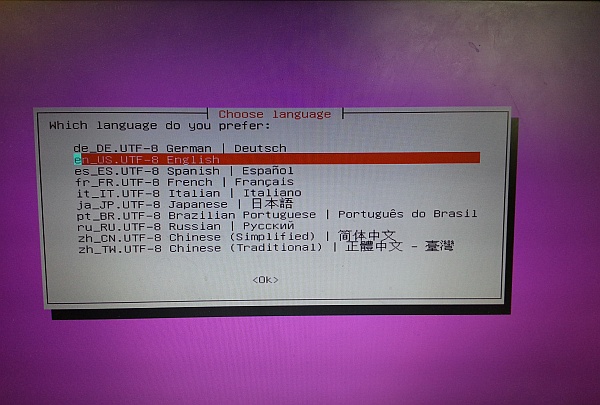
  4. Choose your language and keyboard setting.
    Snapshot step 03
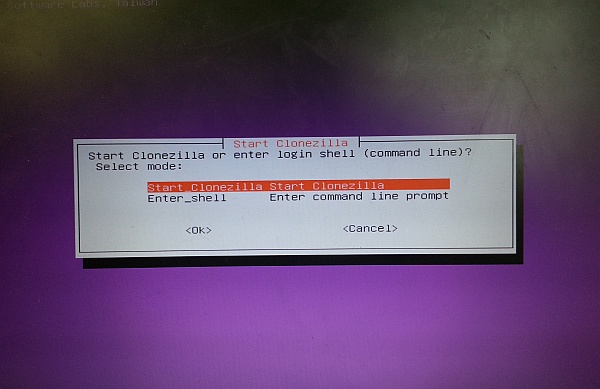
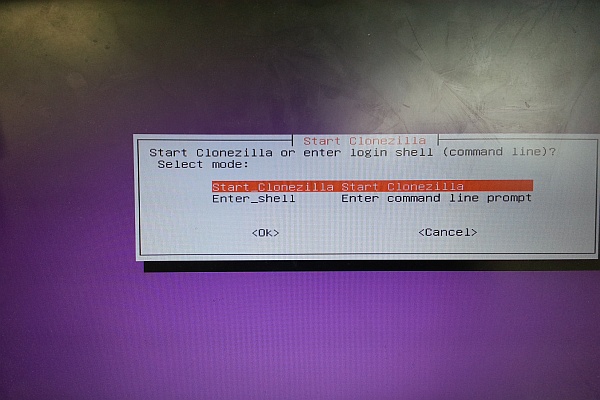
  5. Hit enter to start Clonezilla (yeah, you thought it had already started, didn’t you).
    Snapshot step 04
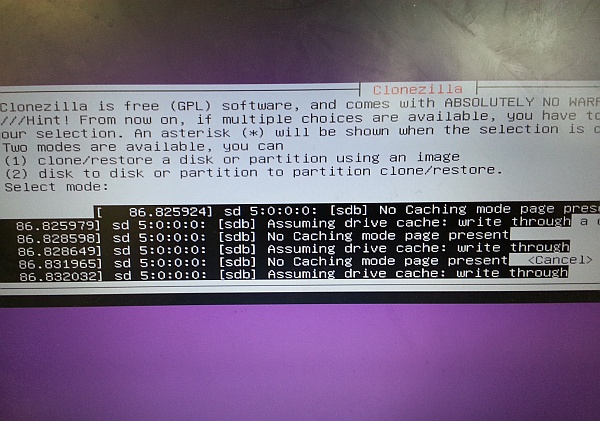
  6. Insert your Raspberry Pi’s card, in its reader.
    Snapshot step 05
  7. Choose “local_dev”.
    Snapshot step 06
  8. A screen prompt will tell you to insert your external hard drive.
    Snapshot step 07
  9. Insert the external drive and then wait for 5 seconds or so.
    Snapshot step 08
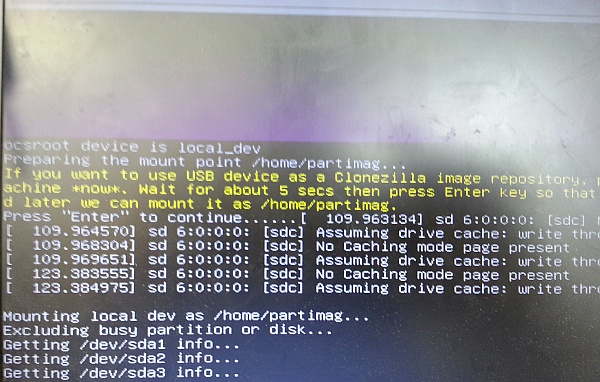
  10. A few lines will indicate that Clonezilla has registered the presence of the drive.
    Snapshot step 09
  11. Hit enter and Clonezilla will mount the various partitions now available to it.
    Snapshot step 10
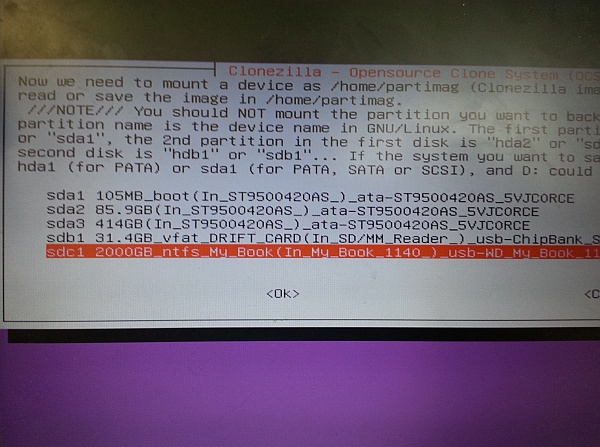
  12. Select the external hard drive as the drive to which we’re copying the snapshot (in my case, the largest partition on the list).
    Snapshot step 11
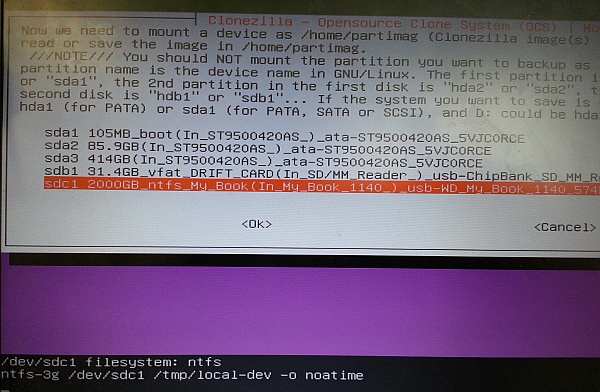
  13. Hit enter. If the drive wasn’t cleanly dismounted before (oopsie), Clonezilla will check and fix as required.
    Snapshot step 12
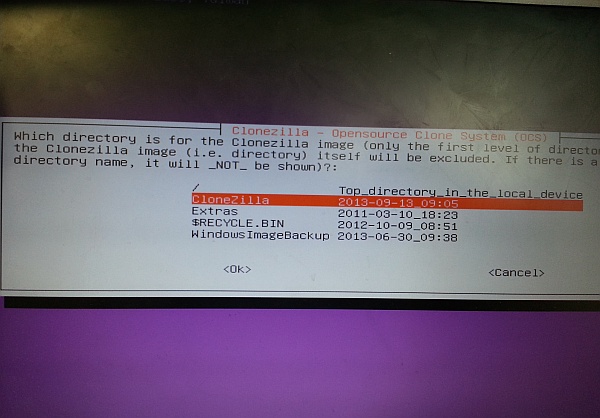
  14. Choose a directory to store the SD card image and hit enter.
    Snapshot step 13
  15. Clonezilla will spit some more gibberish at you. Ignore it and hit enter.
    Snapshot step 14
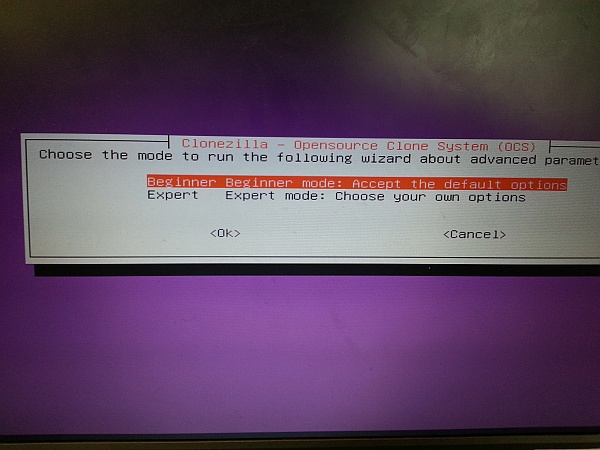
  16. Though it makes me feel a little silly, choose Beginner mode.
    Snapshot step 15
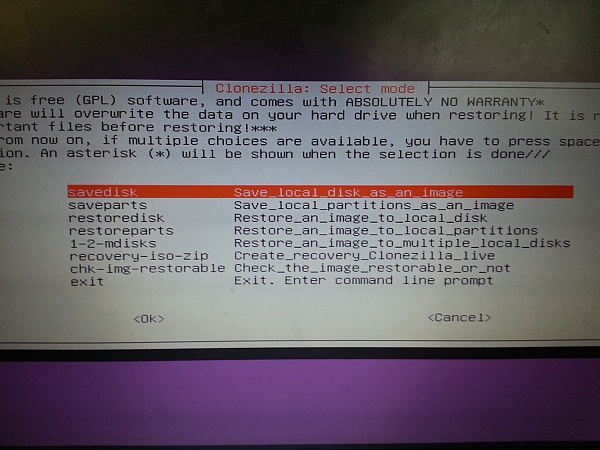
  17. Choose “savedisk”.
    Snapshot step 16
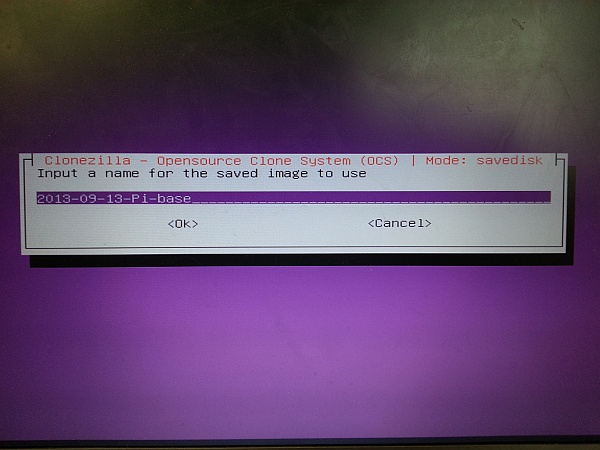
  18. Give your disk image a meaningful name.
    Snapshot step 17
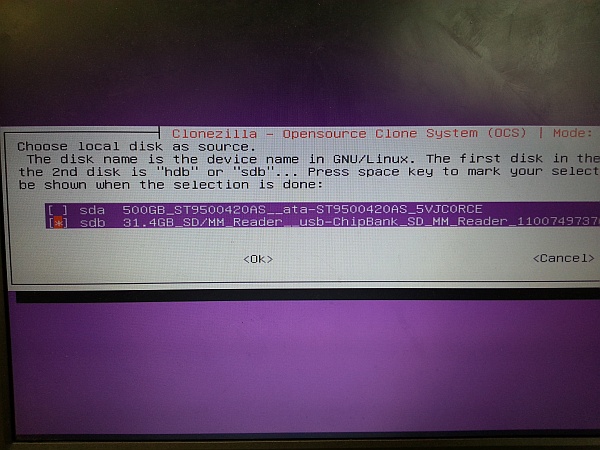
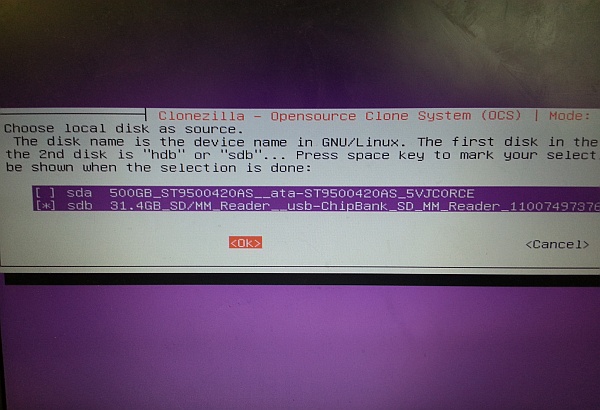
  19. Select the SD card, to save the image. You use cursor keys and the space bar here.
    Snapshot step 18
  20. Select Ok to continue.
    Snapshot step 19
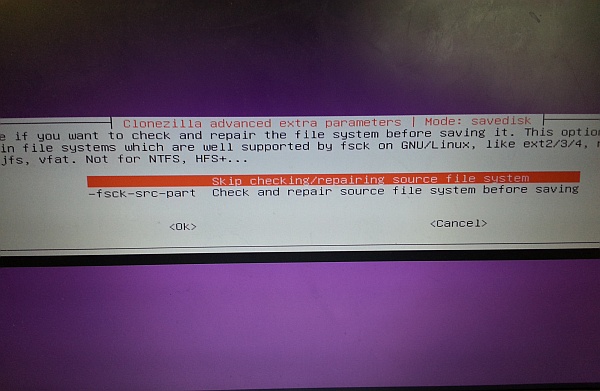
  21. If you’re confident your SD card is in good shape, you can skip checking it.
    Snapshot step 20
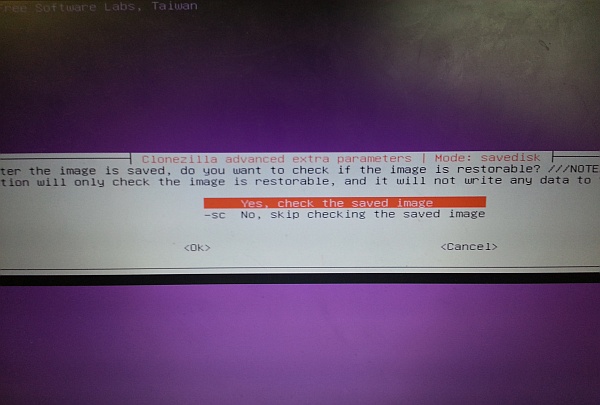
  22. I’d recommend checking the saved image though. It doesn’t take long and gives you peace of mind that you should be able to restore from this image.
    Snapshot step 21
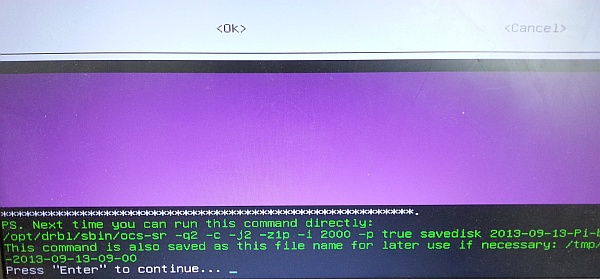
  23. Clonezilla will helpfully point out that you can do all this from the command line (yeah, right).
    Snapshot step 22
  24. Press Y and enter to continue.
    Snapshot step 23
  25. Shouldn’t take too long.
    Snapshot step 24
  26. When it’s all done, it’ll report progress. Press enter.
    Snapshot step 25
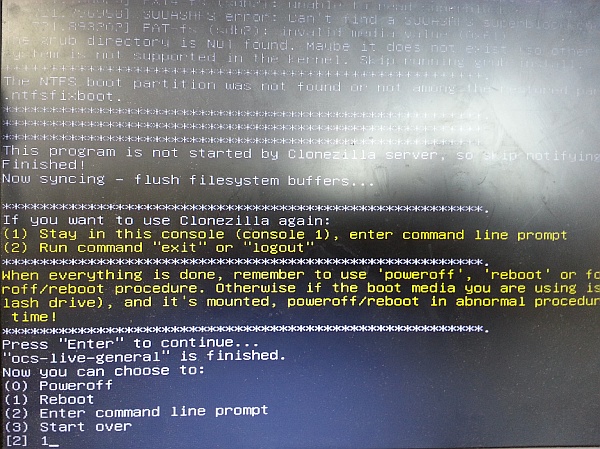
  27. Enter 0 to power off (or whatever you prefer) followed by enter.
    Snapshot step 26
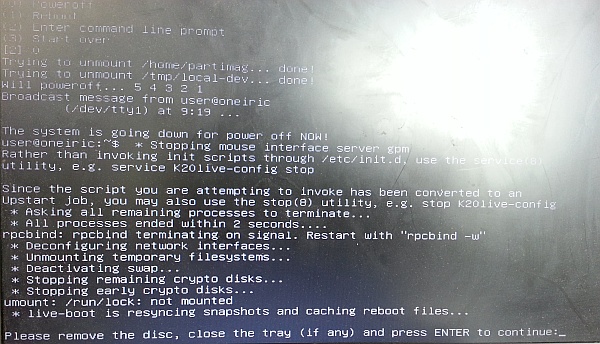
  28. Clonezilla will eject the disc. Hit enter to carry on.
    Snapshot step 27

You should now have an image (consisting of several files) on your external hard drive, which you can later use for restoration. Job done.

Restore a snapshot

In this scenario, we’re starting with everything powered off, ready to begin.

  1. Boot your PC from the Clonezilla disc. You will arrive at a simple menu/boot screen. It will boot automatically within 30 seconds – you can hit enter at any time, to proceed.
    Restore step 01
  2. I’ve got to say, this screen full of strange foreign characters is pretty unnerving. But don’t worry. It’ll pass.
    Restore step 02
  3. Choose your language.
    Restore step 03
  4. I’ve never found I’ve had keyboard problems, even though I use a UK keyboard…
    Restore step 04
  5. Hit enter to begin.
    Restore step 05
  6. Insert the SD card/reader. Some nonsense will appear on screen. Don’t worry – just hit enter.
    Restore step 06
  7. Select “local_dev” and hit enter.
    Restore step 07
  8. Insert your external hard drive and wait 5 seconds or so for it to be recognised.
    Restore step 08
  9. It’ll detect the drive – hit enter.
    Restore step 09
  10. Next, it will mount your various partitions.
    Restore step 10
  11. You may have a few…
    Restore step 11
  12. Choose the external drive from the list then hit enter.
    Restore step 12
  13. Clonezilla will check the drive.
    Restore step 13
  14. Choose the directory where your saved image is stored and hit enter.
    Restore step 14
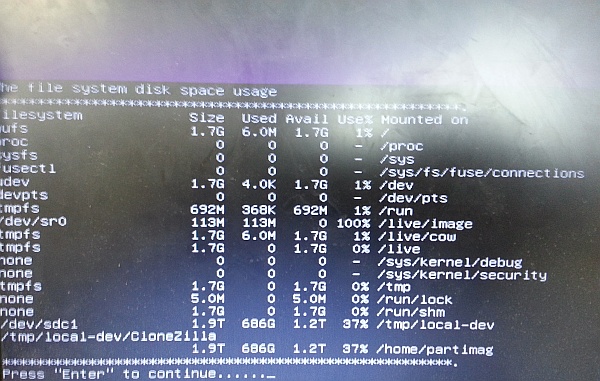
  15. Clonezilla will give you an overview of its file systems. You will be thrilled. Hit enter.
    Restore step 15
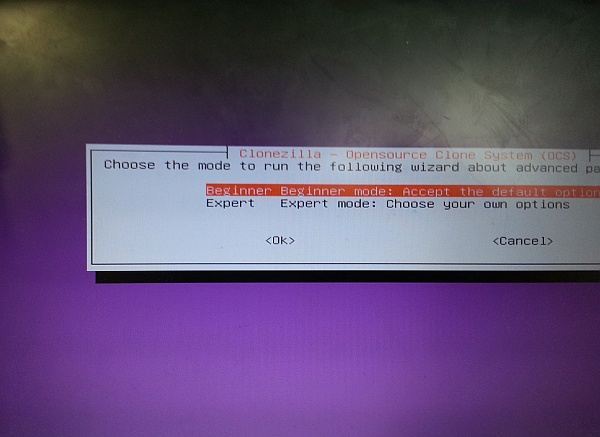
  16. Choose “Beginner”, no matter how patronised you may feel.
    Restore step 16
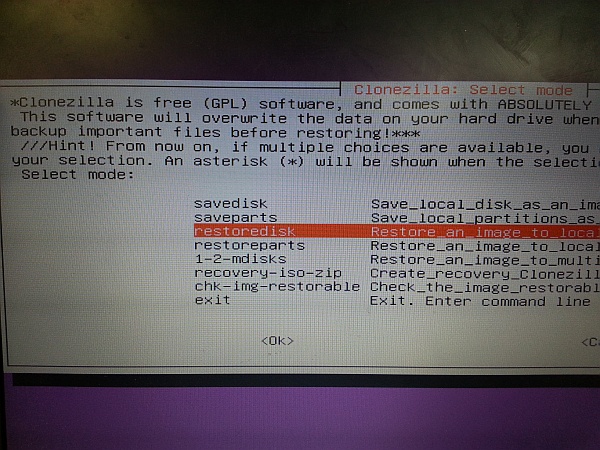
  17. Choose “restoredisk”.
    Restore step 17
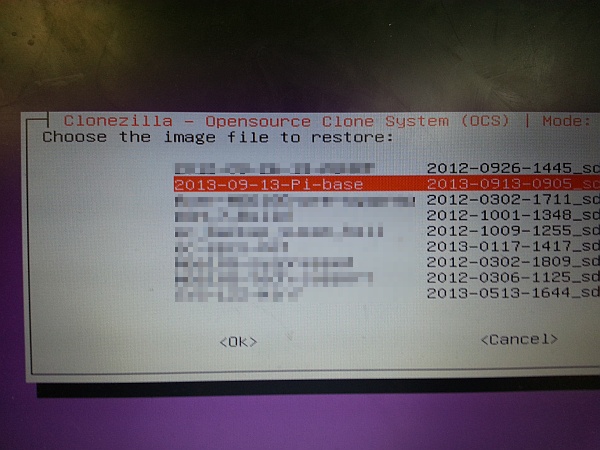
  18. Select the previously saved image.
    Restore step 18
  19. Choose the SD card. Hit enter.
    Restore step 19
  20. Clonezilla reckons you really want to do this at the command line. Hit enter.
    Restore step 20
  21. This is a destructive operation and will wipe your SD card. Press Y then enter.
    Restore step 21
  22. Clonezilla doesn’t trust your judgment. Hit Y and enter again.
    Restore step 22
  23. There are two partitions to restore to this card. You’ll get a progress report for each restoration.
    Restore step 23
    Restore step 24
  24. Clonezilla will let you know once it’s done.
    Restore step 25
  25. Press enter to continue.
    Restore step 26
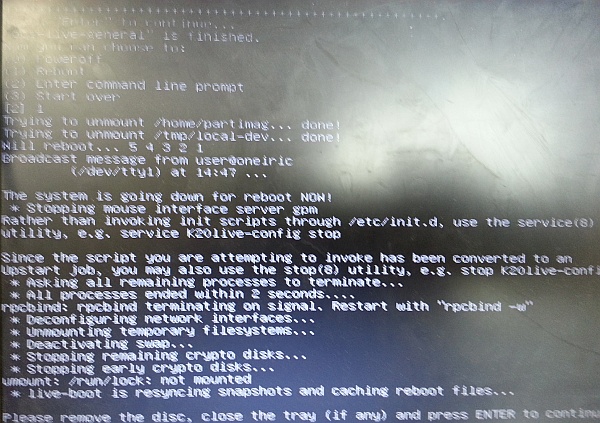
  26. Choose 1 to reboot (or whatever you prefer) then hit enter.
    Restore step 27
  27. Once the CD is ejected, you can also disconnect the SD card and hard drive. Hit enter.
    Restore step 28
  28. Witness the majesty of the Linux death rattle.
    Restore step 29

If all went well, you can now install this SD card back in your Pi, boot up and continue.

How-to: Raspberry Pi tutorial part 1: Getting started

[easyreview title=”Complexity rating” icon=”geek” cat1title=”Level of experience required, to follow this how-to.” cat1detail=”The geek factor is quite high here, but this process is not particularly taxing.” cat1rating=”2.5″ overall=”false”]

Contents

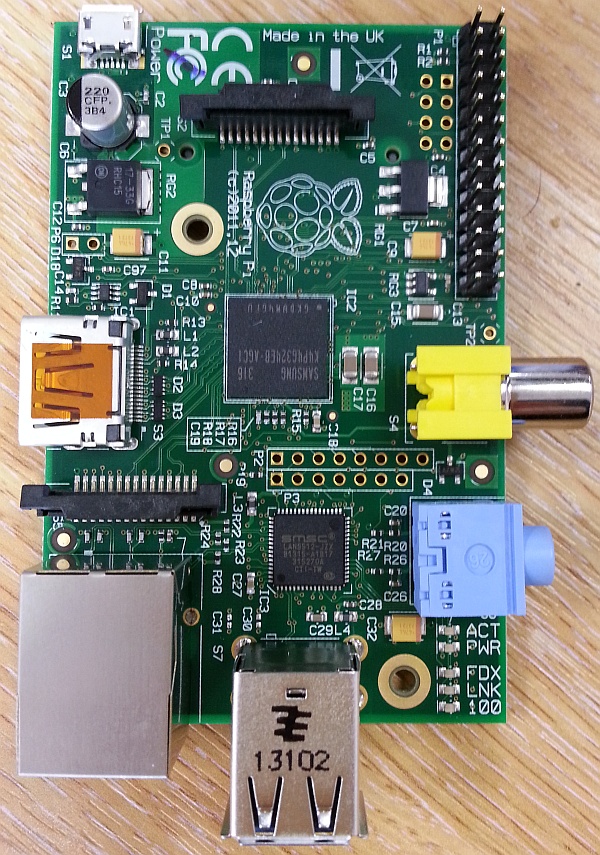
In the line of my work, I’ve recently had cause to become better acquainted with every geek’s favourite cheap computer, the Raspberry Pi. At the time of writing, you can pick up a Pi for an extremely reasonable £30, but the first thing I discovered was that this is only half the story. For a workable system, you need all the necessary cables, some storage and a case. Here’s my shopping list:

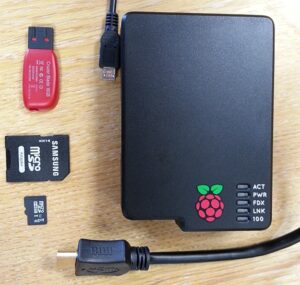
The Pi plus extra bits, in all their glory

So my total is £69.95 – over twice the price of buying just the Pi. But still pretty cheap, considering. You’ll also need a USB mouse/keyboard for initial input. I’m going to run my Pi headless (no screen or input devices needed, just a network connection), so I’m borrowing my Microsoft Natural wireless desktop for this purpose, which the Pi detected without issue.

Hardware installation

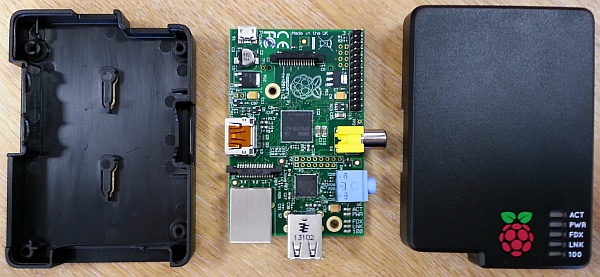
This may well be the easiest hardware installation you ever perform. The case has a couple of punch outs that you need to remove for the model B Pi. I forgot to photograph them I’m afraid, but it will be obvious – when you try and put the Pi in the case, it won’t fit without these pieces removed (e.g. for the ethernet port).

Pi and case

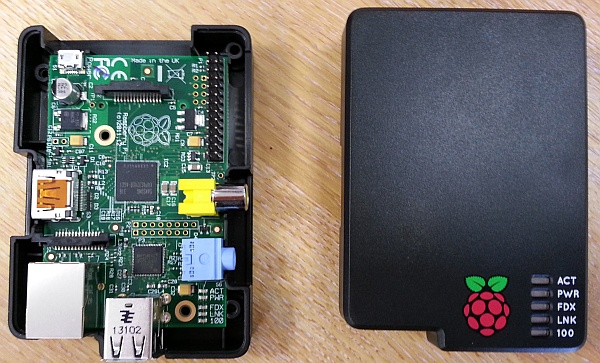
Put the Pi in the case.

Pi case installation

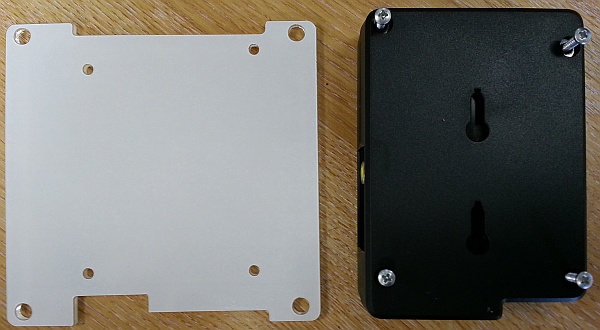
Put the case together and fasten the screws. Make sure you put the VESA mount between the screws and the case, if you’re going to monitor-mount the Pi.

Pi case and VESA mount

That’s it.

What to do, what to do…

There are lots of potential uses for your Pi. It has limited processing power and memory but apart from that, the only real limit is your imagination. I have no imagination to speak of, so I’m going to do what I do with every other gadget: put Linux on it and set it up as a home web/file server. I’ll cover the web/file server setup in a subsequent tutorial.

Here’s the plan:

  • Install Rasbian (a Pi-centric version of the venerable Debian GNU/Linux distribution).
  • Set up Webmin/Virtualmin for management of the server/web sites.
  • Install OwnCloud and create my own Dropbox replacement.
  • Experiment with using the Pi as a remote desktop client or thin/fat terminal.

In the process, I’m looking for any major issues or gotchas – things you might want to be aware of if you’re thinking of getting into Pis in a big way.

Prepare the SD card

For this step, you’ll need an SD card reader. If you don’t have a laptop/computer with a built-in reader, you can buy an external reader here. Note: my laptop’s built-in card reader was not supported by the SD Formatter program (see below) so I used an external reader.

  1. From the SD Association’s official website, download and install the SD Formatter.
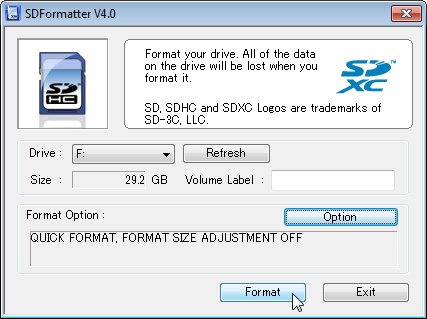
  2. Format the SD card using SD Formatter:
    SD Formatter
  3. Download NOOBS (“New Out of Box Software” – chortle) from the official Raspberry Pi website. This file is currently over 1GB. I tried the direct download and it was pretty slow, so I’d recommend using the torrent if you’re so equipped. NOOBS gives us a choice of different operating systems to install on the Pi.
    NOOBS
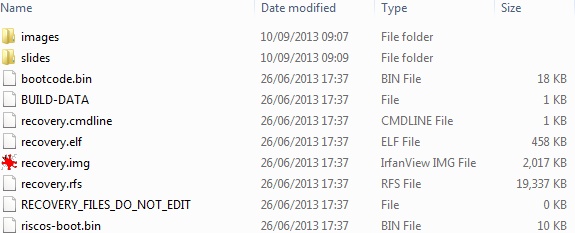
  4. Extract the contents of the NOOBS zip file onto the newly formatted SD card.
    NOOBS files

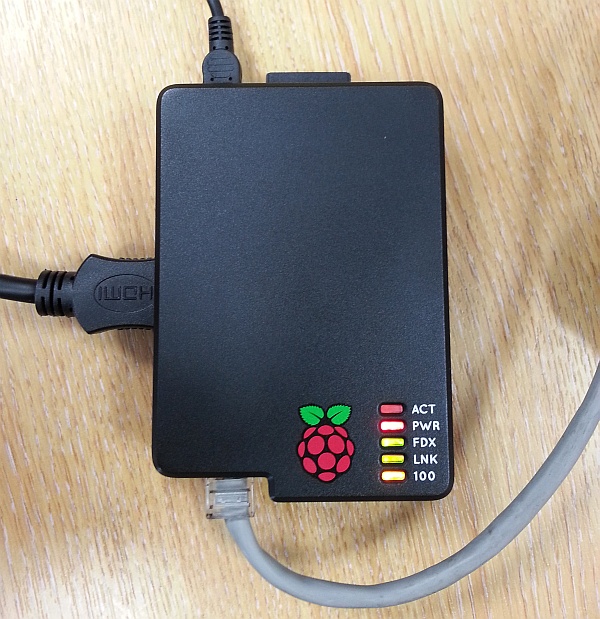
Whack the SD card into the Pi and connect everything up (power last of all, since there’s no power switch). If at this point you don’t see any output, the chances are that your SD card has not been recognised. I’m using a Class 10, but I’ve read that some people have had problems with Class 10 cards and better results with Class 6. If your card is recognised, you should be rewarded with a few pretty lights when powered up.

Pi plumbed in

Install and configure Raspbian

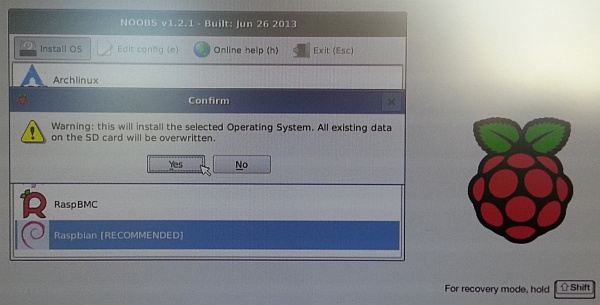
At the NOOBS screen, choose Rasbian and click Install OS, then Yes. Go grab yourself a quick coffee.

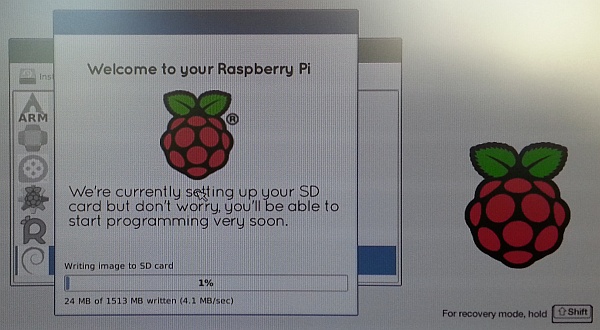
Raspbian installation

The install will take a few minutes (the speed of your SD card is a factor here). Once it’s done, you’ll see a message “Image applied successfully”. Click Okay to reboot the Pi with your new OS.

Raspbian installation progress

raspi-config will launch with some initial setup options. I’ll work through them one by one.

raspi-config

  1. Expand the filesystem: You can skip this, because this option isn’t needed for NOOBS-based installations. Otherwise, this ensures you’re using the whole of the SD card.
  2. Change the password for the “pi” user. The default password is “raspberry”. Improve on that.
  3. Enable/disable boot to desktop: I’m not planning to use a desktop system with this Pi. X Windows is such a resource hog that we definitely want to set this to “No”. Of course if you want to use the Pi as a desktop system, you’ll select “Yes” here.
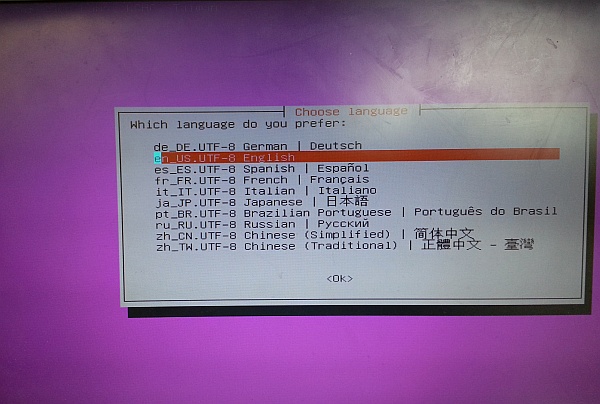
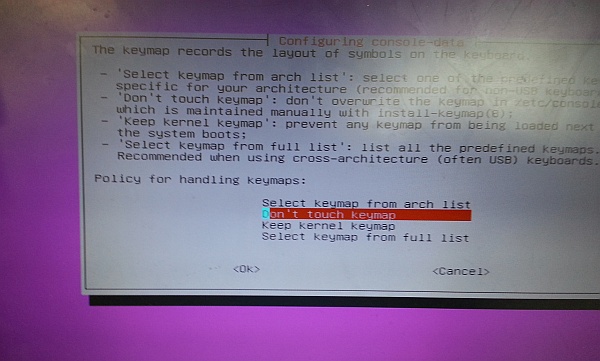
  4. Internationalization options: I’m in the UK, with a UK keyboard layout. It’s not a huge problem since generally I’ll be accessing the Pi via a web interface or service, but I am fussy, so I set everything up to be UK-centric. My correct locale was already selected. In these dialogue boxes, use the spacebar to select/deselect options, tab to move between fields, up and down cursors keys to navigate and enter to select.
  5. Enable camera: do this if you’ve bought the optional camera module (I haven’t).
  6. Add to Rastrack: this puts you on the Rastrack map of Pi installations. Not for me, but you might be interested.
  7. Overclock: if you need to squeeze more juice out of your Raspberry, you can force it into a more frantic mode of operation. I’m not going to do this, at this stage.
  8. Advanced options: Here, I’m going to set the hostname of the Pi and reduce the Pi’s use of GPU memory to 16MB (since we’re not running a graphical desktop). I’m also going to ensure that SSH is enabled (for later remote logon purposes).
  9. Finish and reboot to an ordinary logon prompt.
  10. For demo/proof of concept servers where security is less of a concern, I like to be able to log on as root. You can give the root user a password by logging in, then entering sudo passwd root and following the prompts.

Configure networking

I need this Pi to have a static IP address. You can use a DHCP reservation for this purpose if you like, but I prefer to create a fixed IP address on boot. Like this:

  1. Log in.
  2. If you didn’t log on as root, give yourself an elevated shell: sudo su
  3. Install your favourite console-based text editor. For me this is vim: apt-get --force-yes -y install vim
  4. Use the editor to edit the /etc/network/interfaces file. Replace the line iface eth0 inet dhcp with iface eth0 inet static
    address 192.168.1.11
    netmask 255.255.255.0
    gateway 192.168.1.1

    adjusting the values to match your network as appropriate.
  5. My DNS was already correctly configured, but you may need to check the contents of your /etc/resolv.conf file to ensure DNS is set up. If in doubt, this configuration should work:
    nameserver 8.8.8.8
  6. Save the files then back at the command prompt, enter reboot to restart the Pi with the new network configuration.
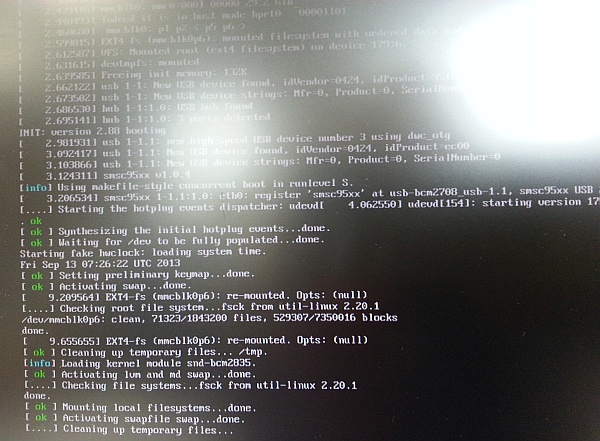
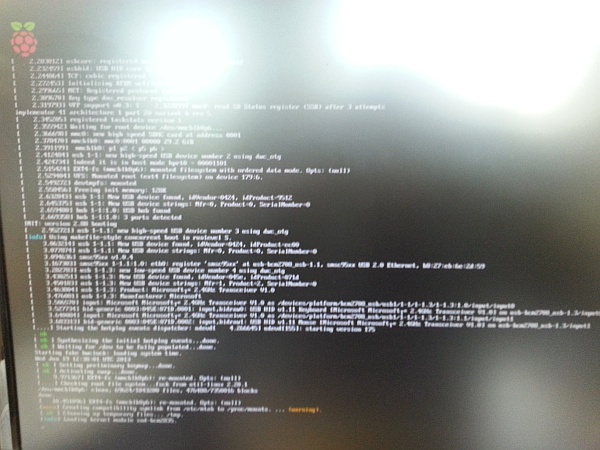
Typical Raspbian bootup messages

Once the Pi is up and running you’ll be able to connect via SSH using your favourite terminal emulation program (mine’s PuTTY).

As you’ll see from the Contents section above, I have a few ideas for things to do next. It’s a good plan to take a snapshot of the Pi in its current state, so we can hit the ground running any time we want to try something different, with a Raspbian base, so this will be the subject of my next how-to. In the meantime, if you have any questions about what we’ve done so far, or if you have any ideas for later tutorials, let us know in the comments!

Until next time. 🙂

How-to: Improve or enhance your website’s SEO

As part-owner of this fledging website, SEO (Search Engine Optimisation) is something that interests me out of necessity. I mean if you create a website, you probably want it to be visited and if you want it to be visited, you need it to appear high in the search engine rankings.

Geek always told me SEO was basically snake oil purveyed largely by people with poor morals and that in any case, it’s a moving target. Search engines constantly change the algorithms they use to rank websites. Taking all this into account I made it my mission to gain a better understanding and then try to use that in the real world, with good old Geek and Dummy, to see if I could improve our ranking.

I’m going to keep this basic because after all, I am just a dummy but hopefully some simple bullet point tips might prevent you losing all hope or from straying into ‘black hat’ SEO territory.

The first thing to be clear about: if you’re relying on search rankings for traffic, then Google is your friend. I say your friend, but unlike a real friend, Google will be extremely intolerant of your transgressions. It won’t understand your foibles and will penalise you mercilessly if you offend its sensitive and ever-changing algorithms. Yeah Google is nothing like your friend, Google’s like your wife!! 😉

You may have heard people allude to the algorithms used by Google. At a basic level they analyse your website in detail and rank it based on a number of mysterious factors. These factors change quite frequently – sometimes drastically. You may also have heard of Panda and Penguin as the names given to recent iterations of Google’s ranking engines.

You can spend forever reading about various aspects of SEO that people claim will affect your search rankings. The truth is however, Google don’t want you to know because to make that public is to give away the tools that more unscrupulous web masters want to use to manipulate the system.

If you find your page ranking plummet overnight, unless you’ve made some changes to your site around the time this happens, usually it’s down to a change made by Google – no anything you’ve done wrong. This site has suffered from that on occasion. After much soul-searching and analysis of what we could possibly have done to upset ‘the wife’, within a few days it went right back to normal. This left us to surmise it was a tweak to Penguin that temporarily affected us.

So that’s a very simple background introduction to SEO. Here are my tips for improving your rankings in Google searches and more importantly, how not to losing that all important front page position.

  1. Number one piece of advice for improving SEO: create a site with integrity. The days of creating a sham site to host links and adverts are gone for all but the most skilled of dark web masters. Google really is in control. Uf you want to get in there then you have to play by the Big Boy’s rules. You can have limited success trying to buck the system but eventually they will find you and punish you.images (1)
  2. As I’ve described, Google can be a fickle creature. Log all your website changes. If your rankings drop suddenly and don’t recover, check for a correlation between changes and the drop.
  3. A day in the life of your website is not enough to gauge a problem. If your rankings drop for a day or even a week that can be normal. If that stretches beyond a week then you have work to do. Go to it Sherlock!
  4. If your rankings have plummeted and not recovered, make sure you haven’t been hacked. I’ve read of sites being hacked by adding links in a hidden div and those links have offended Google!!!!!!
  5. Is your content original and relevant? Don’t underestimate the intelligence of Google. Are you plagiarising someone else’s work? Does your content actually make sense and contain relevant language for the subject? If you’re dropping keywords into sentences but they doesn’t fit the subject, Google’s algorithms can detect it and penalise this. No really, it’s that good!
  6. Use links that are relevant to your content and that are ‘blue chip’ sites. If your posting links into content that take a viewer somewhere undesirable, that site’s offences can be associated to you. Google wants good links and access. You can add depth to your own posts by sharing and linking to other sites, but do so wisely.

The big question I guess is, followed this advice ourselves, what results have we seen?

We started off with very few links in our content but have started to increase these, taking care to keep them relevant and mainstream. As you can see, our content is unique and nothing is plagiarised. We have also gone big on security and our site is clean.

What we have seen as a result in a very short time, is modest viewing figures but figures that have doubled week on week. We have hit page 1 rankings on most of our keyword search targets and this seems to be nice and stable.

The last update to Penguin resulted in the decimation of our viewing figures and not following my own advice, I despaired for days. Our update log revealed no changes. A check of our content, security and links showed nothing nasty. After 4 days we were back to where we started – actually our viewing figures have improved significantly within a week. Panic over, but just goes to show that you need to be aware of the Google update path and avoid jumping to conclusions (something I am very good at).

So there you go, a low-level Dummy guide to SEO but a decent start to give you a back story in the murky world of Search Engine Optimisation.

How-to: Laravel 4 tutorial; part 5 – using databases

[easyreview title=”Complexity rating” icon=”geek” cat1title=”Level of experience required, to follow this how-to.” cat1detail=”There are some difficult concepts here, but you’ll find this is pretty easy in practice.” cat1rating=”3″ overall=”false”]

Laravel Tutorials

layered database

Introduction

At first sight, Laravel offers a dizzying range of ways to interact with your databases. We’ve already seen Migrations and the Schema Builder. There’s also the DB Class with its Query Builder and the Eloquent ORM (Object Relational Mapper) plus no doubt plenty of database plugins for various enterprise and edge-use cases. So where to start?

I’d counsel you to give Eloquent serious consideration – especially if you’ve never previously encountered an ORM. Coming from CodeIgniter which certainly didn’t use to have a built-in ORM, I was amazed how much quicker the Doctrine ORM made it to code database manipulation. And the resulting code was easier to understand and more elegant. Laravel comes with its own built-in ORM, in Eloquent. For me, tight integration with a decent ORM is one of the reasons I turned to Laravel in the first place, so it would take a lot to tempt me away from it to a third-party plug-in. But the great thing about this framework is that it gives you choice – so feel free to disagree. In any event, in this tutorial, Eloquent will be our object of study.

Models

Laravel follows the MVC (Model View Controller) paradigm. If you’re frequently the sole developer on a project, you’ll find that this forces you into almost schizophrenic modes of development. “Today I am a user interface designer, working on views. I know nothing of business logic. Don’t come here with your fancy inheritance and uber_long_function_names().” This is honestly helpful; it forces you into a discipline that results in more easily maintainable code.

Models describe (mostly, but not exclusively) how you interact with your database(s). Really they deal with any data that might be consumed by your application, whether or not it resides in a traditional database. But one step at a time. Here we’ll be looking at Eloquent with a MySQL database. Eloquent is database agnostic though (to a point), so it doesn’t really matter what the underlying engine is.

Unless you have a really good reason not to, it’s best to place your model files under app/models. In the last tutorial, I created (through a migration) a “nodes” table. I mentioned that it was significant that we use a plural noun. Now I’m going to create the corresponding model, which uses the singular form of the noun. The table name should normally be lower case, but it’s preferred to use title case for the class name. My file is app/models/Node.php. Initially, it contains:


The closing "?>" tag is not needed.

Eloquent assumes your table has a primary key called "id". This assumption can be overridden, as can the assumed table name (see the docs).

Now that teeny weeny bit of code has caused all sorts of magic to happen. Head back to the ScrapeController.php file I created in tutorial 2, and look what we can do:

	public function getNode($node) {
		// Top 10 downloads that have at been downloaded at least 50 times
		$nodes = Node::where('downloads', '>', 50)
			->take(10)
			->orderBy('downloads', 'DESC')
			->get();
		$this_node = Node::find($node);
		if($this_node) $data['this_url'] = $this_node->public_url;
		$data['nodes'] = $nodes;
		return View::make('node', $data);
	}

Coming from CodeIgniter, where you had to load each model explicitly, that blew me away. The Eloquent ORM class causes your new Node model to inherit all sorts of useful methods and properties.

  • All rows: $nodes = Node::all();
  • One row (sorted): $top = Node::orderBy('downloads', 'DESC')->first();
  • Max: $max = Node::max('downloads');
  • Unique rows: $uniq = Node::distinct('public_url')->get();
  • Between: $between = Node::whereBetween('downloads', array(20, 50))->get();
  • Joins: $joined = Node::join('mp3metadata', 'mp3metadata.ng_url', '=', 'nodes.public_url')->get();

As you'd expect there are many more methods than I would want to describe here. Just something to bear in mind when reading the official documentation: not only can you use all the methods describe in the Eloquent docs, you can also use all the methods described in the Query Builder docs.

CRUD

At the very least, we need to know how to Create, Read, Update and Delete rows. All the following examples are of logic you'd typically use in a controller.

Create

$new_node = new Node;
$new_node->public_url = 'http://some.url/';
$new_node->blurb = 'blah blah blah';
$new_node->speaker = 'Fred Bloggs';
$new_node->title = 'Great Profundities';
$new_node->date = date('Y-m-d');
$new_node->save();

Note that the created_at and updated_at fields are automatically maintained when you use save().

Read

See the examples above to see how records can be retrieved. Eloquent returns a Collection object, for multi-record results. Collections have a few special methods. I confess I am not clear on their usage, due to lack of working examples. The methods that seems most helpful is each() for iteration. The official docs give a terse example:

$roles = $user->roles->each(function($role)
{

});

Update

// Retrieve and update
$node = Node::find(1);
$node->downloads = 64;
$node->save();

// Using a WHERE clause
$changes = Node::where('downloads', '<', 100)->update(array('downloads' => 100));

Delete

// Several options
$node = Node::find(1);
$node->delete();

Node::destroy(1, 2, 3);
		
$deleted = Node::where('downloads', '<', 100)->delete();

Relationships

There's every chance that you will be working with data where items in one table have a relationship with items in another table. The following relationships are possible:

  • One-to-one
  • One-to-many
  • Many-to-many
  • Polymorphic

I'm not going to dwell too much on the meaning of these, since my objective is not to offer a relational database primer. 😉

For convenience (and because they make sense!) I'm quoting the relationships referenced in the official documentation.

One-to-one
In the User.php model:

class User extends Eloquent {

    public function phone()
    {
        return $this->hasOne('Phone');
    }

}

Eloquent assumes that the foreign key in the phones table is user_id. You could then in a controller do: $phone = User::find(1)->phone;

Relationships can be defined in either direction for convenience, so you can go from the User to the Phone or from the Phone to the user. The reverse relationship here would be defined in Phone.php model file as follows:

class Phone extends Eloquent {

    public function user()
    {
        return $this->belongsTo('User');
    }

}

One-to-many

Forwards:

class Post extends Eloquent {

    public function comments()
    {
        return $this->hasMany('Comment');
    }

}

Reverse:

class Comment extends Eloquent {

    public function post()
    {
        return $this->belongsTo('Post');
    }

}

And in your controller: $comments = Post::find(1)->comments;

Many-to-many

Many-to-many relationships break down into two one-to-many relationships, with an intermediate table. For example, each person may drive multiple cars; conversely each one car may be driven by multiple people. You would define an intermediate people_cars table and set up one-to-many relationships between this table and the two other tables.

Polymorphic

Polymorphic relationships are a little odd. You could define a relationship between multiple tables, when a query to a single model will retrieve results from more than one related table based on similar one-to-many relationships. Maybe I'm not getting it, but personally I would use different types of join to achieve similar results - and I would find that easier to understand, document and maintain. But by all means, read the docs and see if this strategy works for you.

Conclusion

As you'd expect, you can dig a lot deeper with Eloquent. There's enough here to get you started though. If you want to soak up the full benefits of Eloquent, you may wish to consult the API documentation, or read the source code. I'll leave such fun activities for people with bigger brains than mine though. 😉

Layered Database image copyright © Barry Mieny, licensed under Creative Commons. Used with permission.

How-to: Laravel 4 tutorial; part 4 – database management through migrations

[easyreview title=”Complexity rating” icon=”geek” cat1title=”Level of experience required, to follow this how-to.” cat1detail=”There are some difficult concepts here, but you’ll find this is pretty easy in practice.” cat1rating=”3″ overall=”false”]

Laravel Tutorials

AVZ Database

For almost all my previous web design, I’ve used phpMyAdmin to administer the databases. I speak SQL, so that has never been a big deal. But Laravel comes with some excellent tools for administering your databases more intelligently and (most importantly!) with less effort. Migrations offer version control for your application’s database. For each version change, you create a “migration” which provides details on the changes to make and how to roll back those changes. Once you’ve got the hang of it, I reckon you’ll barely touch phpMyAdmin (or other DB admin tools) again.

Background

If you’ve been following this tutorial series, you may have noticed that I keep referring to a web-scraping application I’m going to develop. Now would be a good time to tell you a bit more about that, so you can understand what I’m aiming to achieve. That said, you can safely skip the next two paragraphs and pick up again at “Configure” if you’re itching to get to the code.

Still with me? Cool. My church uses an off-the-shelf content management system to run its website. It creates an RSS feed for podcasts, but unfortunately that feed doesn’t comply with the exacting requirements of the iTunes podcast catalogue. I thought it would be an interesting exercise to produce a compliant feed, based on data scraped from the web site.

We’re assuming here that I don’t have admin access to the web site and I have no other means of picking up the data. Also, the RSS feed, which contains links to each Sunday’s podcast lacks some other features, like accompanying text or images. So I’m going to parse the pages associated to each podcast one by one, pulling out all the interesting bits. Oh, and to make things really interesting, when you look at the code for the web site’s pages, you’ll see that it’s a whole load of nested tables, which will make the scraping really interesting. 😀

Configure

So I’m creating a web application that will produce a podcast feed. When I created the virtual host for this application (the container for the web site), Virtualmin also created my “ngp” (for NorthGate Podcasts) database. I’m going to create a MySQL user with the same name, with full permission to access the new database. Here’s how I do that from a root SSH login:

echo "GRANT ALL ON ngp.* TO 'npg'@localhost IDENTIFIED BY 'newpassword';" | mysql -p

This prompts me for the MySQL root password, then creates a new MySQL user, “ngp” and gives it all privileges associated to the database in question. Next we need to tell Laravel about these credentials. The important lines in the file app/config/database.php are:

 'mysql',

	'connections' => array(

//...

		'mysql' => array(
			'driver'   => 'mysql',
			'host'     => '127.0.0.1',
			'database' => 'ngp',
			'username' => 'ngp',
			'password' => 'newpassword',
			'charset'  => 'utf8',
			'prefix'   => '',
		),

//...

	),

//...

);

Our application will now be able to access the tables and data we create.

Initialise Migrations

The migration environment (essentially the table that contains information about all the changes to your application’s other tables) must be initialised for this application. We do this using Laravel’s command line interface, Artisan. From an SSH login, in the root directory of your Laravel application (the directory that contains the “artisan” script):

php artisan migrate:install

If all is well, you’ll see the response:

Migration table created successfully.

This creates a new table, migrations, which will be used to track changes to your application’s database schema (i.e. structure), going forwards.

First migration

Sometimes the Laravel terminology trips me up a bit. Even though it may seem there’s nothing really to migrate from yet, it’s technically a migration – a migration from ground zero. Migration in this sense means the steps required to get from the “base state” to the “target state”. So our first migration will take us from the base state of a completely empty database (well empty except for the migrations table) to the target state of containing a new table, nodes.

My web-scraping application will have a single table to start with, called “nodes” [Note: it is significant that we’re using a plural word here; I recommend you follow suit.] This table does not yet exist; we will create it using a migration. To kick this off, use the following Artisan command:

php artisan migrate:make create_nodes_table

Artisan should respond along the following lines:

Created Migration: 2013_07_14_154116_create_nodes_table
Generating optimized class loader
Compiling common classes

This script has created a new file 2013_07_14_154116_create_nodes_table.php. under ./app/database/migrations. If, like me, you’re developing remotely, you’ll need to pull this new file into your development environment. In NetBeans, for example, right-click the migrations folder, click “download” and follow the wizard.

You can deduce from the naming of the file that migrations are effectively time-stamped. This is where the life of your application’s database begins. The new migrations file looks like this:


As you can probably guess, in the "up" function, you enter the code necessary to create the new table (to move "up" a migration) and in the "down" function, you do the reverse (to move "down" or to roll back a migration).

Create first table

Your first migration will probably be to create a table (unless you have already created or imported tables via some other method). Naturally, Laravel has a class for this purpose, the Schema class. Here's how you can use it, in your newly-created migrations php file:

	public function up()
	{
		Schema::create('nodes', function($table) {
				$table->increments('id'); // auto-incrementing primary key
				$table->string('public_url', 255)->nullable(); // VARCHAR(255), can be NULL
				$table->text('blurb')->nullable();             // TEXT
				$table->string('image', 255)->nullable();
				$table->string('speaker', 255)->nullable();
				$table->string('title', 255)->nullable();
				$table->string('mp3', 255)->nullable();
				$table->integer('downloads')->nullable();     // INT
				$table->date('date')->nullable();             //DATE
				$table->integer('length')->nullable();
				$table->timestamps(); // special created_at and updated_at timestamp fields
		});
	}

	/**
	 * Revert the changes to the database.
	 *
	 * @return void
	 */
	public function down()
	{
		Schema::drop('nodes');
	}

To run the migration (i.e. to create the table), do the following at your SSH login:

php artisan migrate

This should elicit a response:

Migrated: 2013_07_14_154116_create_nodes_table

If you're feeling nervous, you may wish to use your DB admin program to check the migration has performed as expected:

ngp nodes db

If you want to roll back the migration, performing the actions in the down() function:

php artisan migrate:rollback

Result:

Rolled back: 2013_07_14_154116_create_nodes_table

Take a look at the Schema class documentation, to see how to use future migrations to add or remove fields, create indexes, etc. Next up: how to use databases in your applications.

AVZ Database image copyright © adesigna, licensed under Creative Commons. Used with permission.

How-to: Improve your online privacy – level 2 – encrypted email

1. Introduction

In my last “online privacy” article, I looked at how we can improve our privacy while browsing the web. So far, so good. But what about email? As it happens, email is problematic.

Growing from one of the oldest-established internet standards, email has changed very little from its inception. Email content is sent in plain text, just as it was on day one. Attachments are encoded to facilitate transmission, but any old email program can decode them.

Given the widespread use of email, we might wonder that there is no universally-agreed standard for transmitting messages securely. The big problem here is complexity. Email is used by people from all walks of life and all levels of computing ability. For universal acceptance, the barrier to entry must be kept very low (this is one reason why Dropbox is so successful – it’s easy). But security almost always increases complexity and decreases usability. We have options, but they all make email harder to use (even if that might be just slightly).

2. Simple but limited encryption: SecureGmail

SecureGmailI’ve recently come across a pretty simple option for encrypting email. Unfortunately simplicity comes with limitations. SecureGmail is an extension for the Chrome browser that enables encryption of email between Gmail users. So immediately you can see two limitations: firstly, the sender and recipient must both be using Gmail and secondly, they must both be using Chrome. You can’t use this to send a single email securely to all your contacts (unless they all happen to fit those criteria).

Also, SecureGmail does not encrypt attachments – just the text in the email. Still, you could zip the attachment, encrypting it with a password, and include that password in the secure part of the email.

A further limitation is that SecureGmail uses a single key to encrypt and decrypt the message. This differs from PGP encryption, where the sender uses a recipient’s “public key” to encrypt an email and the recipient uses a “private key” (known to no one else) to decrypt the message. PGP gives you a reasonably high degree of certainty that only the recipent can read the message, assuming the private key is kept safe (everything depends on this).

So there are some sacrifices to be made, in order to use SecureGmail. If you can live with that, it’s a great option – because it’s easy. Head over to SecureGmail and follow the instructions there.

3. Robust encryption: Enigmail

If you want to do this right, you have to use something like PGP encryption. I say “something like”, because although PGP is the standard more people have heard of, it is actually less common than the alternative GPG. Oh, and GPG is an implementation of the OpenPGP standard. Confusing, huh? PGP (“Pretty Good Privacy”) is proprietary and not free for commercial use. GPG (“Gnu Privacy Guard”) and OpenPGP were originally intended to provide a free, open source alternative to PGP. In fact GPG is more secure than PGP, since it uses a better encryption algorithm. Because it’s free and more secure than than PGP, I will focus here on GPG. Also, there are many different ways of skinning this cat, so I’ll just point you in a direction that’s free and one of the easiest ways of doing this. Note that the following instructions are for Windows.

3.1 Setting up your Enigmail environment

You’ll need:

Install Thunderbird. When installing Gpg4Win, you don’t need any of the optional extras, but you may install them if you wish. When you get to the “Define trustable root certificates” dialogue, you can select “Root certificate defined or skip configuration” and click “Next”.

If you’re using Firefox as your browser, make sure you right-click and save Enigmail, otherwise Firefox will try to install the extension. All other browsers will normally just download the file.

Run Thunderbird and click the menu (triple horizontal lines icon, top right), then Add-ons. Then click the cog icon (near the search box, top right) and “Install add-on from file”. Locate and install the Enigmail add-on you downloaded previously. You will need to restart Thunderbird to complete the installation. Then, if you’ve not already set up your email account in Thunderbird, do so now.

Add-ons Manager - Mozilla Thunderbird

Go to Thunderbird’s menu –> OpenPGP

Enigmail

–> Key Management

Enigmail_02

In the OpenPGP Key Management window, click Generate –> New Key Pair.

Enigmail_03

Choose and enter a secure passphrase. This should be hard for anyone else to guess. I tend to pick a line from a song. Yes, it takes a while to type, but it’s highly unlikely that anyone will ever crack it through brute force. Bear in mind though that if you forget the phrase, you’re stuck.

Back in the Key Management window, if you check the box “Display All Keys by Default”, you’ll see your new key along with its 8 character identifier.

Enigmail_04

Next click the key, then Keyserver –> Upload Public Keys. This permanently publishes the “public” part of your key (which people use to encrypt messages to you). Accept the default keyserver when prompted.

Enigmail_06

3.2 Key exchange with Enigmail

In order to send and receive emails securely, both you and your correspondent must have a public/private key pair. Whoever you’re writing to, they’ll need to have gone through the steps above (or something similar). Once you’re ready, you need to pass to each other your public keys.

Sometimes this public/private thing confuses people. But it’s pretty easy to remember what to do with each key. Your public key – well that’s public. Give it away as much as you like. There’s no shame in it. 😉 Your private key? Guard it with your life. Hopefully you will have chosen a secure passphrase, which will make it difficult for anyone else to use your private key, but you don’t want to weaken your two-factor authentication at any time (something you have – the private key, and something you know – the passphrase) by letting go of the “something you have” part.

Anyway, you don’t really need to know or understand how this works. Just make sure you and your correspondent have both published your keys to a key server. Next, tell each other your key ids (remember the 8 character code generated with the key?) and/or email addresses. Import a public key like this:
Go to Thunderbird’s menu –> OpenPGP

Enigmail

–> Key Management

Enigmail_02

In the OpenPGP Key Management window, click Keyserver –> Search for Keys.

Enigmail_08

You can search by email address or by key id. If you’re searching by id, it must always start with “0x” (that just indicates that the key is in hexadecimal).

Enigmail_09

You should see your correspondent’s key in the next dialogue. Click “OK” to import it. This places your correspondent’s public key in a data store that is colloquially referred to as your “keyring”.

3.3 Sending encrypted email with Enigmail

You can only send encrypted email to someone whose public key is on your keyring. See the previous step for details. We use the public key to encrypt the contents of the email, meaning that only someone with access to the corresponding private key can decrypt and read the email. This gives you a high degree of certainty that no one other than your correspondent can see your message.

Compose your message in plain text. You can send in HTML, but it’s much harder to encrypt correctly.

Remember that while the contents of the email will be encrypted, the subject will not be. Before sending it, you need to tell Thunderbird to encrypt the email. There are three easy ways of doing this.

  1. Click OpenPGP –> Encrypt Message.
  2. Press Ctrl-Shift-E.
  3. Click the key icon, bottom right.

Enigmail_11

Enigmail will search for the public key that corresponds to your recipient’s address. If you don’t have the correct public key on your keyring (or you’ve typed the address incorrectly or whatever), you will be warned that there was no match.

Enigmail_12

If you’ve forgotten to compose in plain text, you will be warned about the problems of using HTML.

Enigmail_13

I would recommend configuring Thunderbird to use plain text by default, at least for your fellow users of encrypted email. In Account Settings under Composition & Addressing, just uncheck “Compose messages in HTML format”.

When your correspondent receives the encrypted message, it can only be read by using the correspondent’s private key. Until the message has been decrypted, it will look something like this:

-----BEGIN PGP MESSAGE-----
Charset: ISO-8859-1
Version: GnuPG v2.0.20 (MingW32)
Comment: Using GnuPG with Thunderbird - http://www.enigmail.net/

hQEMA/dOFDapHX5yAQf/YbYJz+vm2AnzWDn08sOP66gVVoCBh/qnbcAcdSYkCTA2
WjuWfV3ZSFVwV+lYyr/VqgcHl607a7KIJEQh251RSQEJmNg56gC/JYNtj9frhaIT
Ay46xhyz2Ebj8EjcvSX+wcUh8Qd/YPMqZDFB/wBNnA48JxkwuxXBU0AFLYw2Osc2
gvUttSZfN/Dn3Mq0fMxqr2s+YZA9qZebfzzjfVIfDWvbtqTFo1HhWKkuCqgPbYQ2
SuinDVtzlQRSTbbygvWVltd7miKsb19hZS9KQRda5XpaaWC3FHrLBeeUf9FvhIIq
kzF53oXv/Tp/fcbnujp5A4cyy8Bkw8RFi6xbQ9Baw4UBCwOnkycIVlt3QQEH+JKi
HB4VqC6i/N8sL7stR063yE0RYcIn18th+zDbZtTt2QlaSyzoCHwDqYo4R8o8VXAo
oe68jO2N9c/FyX7iSzYpKVKW26UL2SaWk0yd40Gae1XoEfHozZ8lmz7c4cO/ionU
81MYqcMdqdIg948OE6if2yb3Cl65p70jOQ/Ep6h9tw33Iu+ukj8r7MCPYRNPxIGh
EvrwktK0Ej1qbDP296i+C6QgJxsV9qDeGbPIs5q54Bni60qnMeSV1ttxit7bOgMF
xCQR3XbwXU1qeLvfWa1sdhqBq0zbEXxWeBT/9Gq3EJ8ca8JXeaTAV4Ry26oHL5Cf
ZrH+kIMrYo6g0Agg2dJ2AYjfvS2bDRoOsvlNoUQj8X+VIlyR9XqiLTnyEeanzL0f
79dH5Rfk0yPURl1pqOT6Dv5ioHyQjtJuF1qt+pO6NSbVwuE9xeoU4KhdmnMAkeIX
y7adNBCKr6zhpElhdkt1kfWDeW0mqyshYU/aetFDbW0l3XzIcQ==
=w5DD
-----END PGP MESSAGE-----

Following decryption, the content of the message will be visible as usual. A padlock icon indicates that this message was encrypted before transmission.

Enigmail_14

3.4 Enigmail – conclusion

So this is all you need, to send and receive email securely. Not even the mighty PRISM can unlock the treasures in your encrypted email. And this solution isn’t merely limited to users of Thunderbird. The Gpg4Win project referred to above has a plugin for Outlook, which covers the vast majority of corporate users.

All is not sweetness and light however. Due to security limitations of browsers, there isn’t really a solution for webmail users. And there aren’t any bulletproof solutions for mobile users. To start with, Apple’s terms of use are incompatible with open source (GPL) software, so GnuPG is automatically excluded. There will probably never be a solution for a non-jailbroken iPhone or iPad.

With Android, you do have some options, using Android Privacy Guard and K-9 Mail. The end user experience is not perfect though and you’re still left with a fundamental problem: you have to put your private key on your mobile device. The private key is the one thing you really don’t want to risk losing, so is this a good idea anyway?

Personally, I would say if the email is so sensitive that you need to encrypt it, you probably should wait to read it, until you have access to your desktop/laptop and your secure email environment. But then that decreases usability of encrypted email, which is the main reason this has not yet gained significant traction.
As you can see, there do remain some technical and social obstacles to overcome before we see encrypted email in widespread use. But as long as you understand its limitations, and if you care about keeping your email private, the GPG/Enigmail proposition is really very compelling.