
[easyreview title=”Complexity rating” icon=”geek” cat1title=”Level of experience required, to follow this how-to.” cat1detail=”You’ll need to keep your wits about you!” cat1rating=”4″ overall=”false”]
Contents
- Part 1: Getting started with the Raspberry Pi
- Part 2: Creating/restoring an image of the Pi’s SD card
- Part 3: Using the Raspbery Pi to host multiple web sites and as a file server
- Coming up – Part 4: Creating a Dropbox replacement from a Raspberry Pi
- Coming up – Part 5: Using a Raspberry Pi as a thin (or remote desktop) client
Right, so our basic Raspberry Pi is set up and ready to go. You’ve got the Pi, you’ve got the case
and you’ve got a decent SD card
. What next? How about turning it into a low-powered file server and web host?
To do this, we’re going to install Webmin (a web-based server management application) and Virtualmin (a virtual hosting platform that sits on Webmin). This will leave us with a convenient graphical interface for managing the Pi and a full blown web hosting environment.
Prepare the Pi
I’ll assume for the purposes of this exercise, that we’re picking up from where we left off, from tutorials 1 and 2. That is, you have the Rasbian operating system installed on your Pi, and a backup to revert to if it all goes horribly wrong.
Next step: we need to install a few packages that Webmin and Virtualmin depend on, plus the services we’ll be managing. From a root SSH shell, issue the following commands:
apt-get update

apt-get -y upgrade

apt-get -y install apache2 apache2-suexec-custom libnet-ssleay-perl libauthen-pam-perl libio-pty-perl apt-show-versions samba bind9 webalizer locate mysql-server
Due to the Pi’s limited power, you may find these operations take a while. I’m installing locate for my own convenience – it’s handy for tracking down obscure files on your system. You can install PostgreSQL instead of MySQL if you prefer.
Install Webmin
![]()
According to the official site:
Webmin is a web-based interface for system administration for Unix. Using any modern web browser, you can setup user accounts, Apache, DNS, file sharing and much more. Webmin removes the need to manually edit Unix configuration files like /etc/passwd, and lets you manage a system from the console or remotely…
When I install packages that I’ve downloaded (rather than directly through a package manager), I like to keep them in one place, so I can keep track of what’s installed. I’ve formed the habit of keeping these packages in a directory belonging to root. So, to get Webmin, whilst logged in as root:
cd

mkdir installed-packages

cd installed-packages

wget http://prdownloads.sourceforge.net/webadmin/webmin_1.660_all.deb
That last command downloads Webmin’s package. The version number will inevitably change – you can make sure you have the latest version by browsing to the official Webmin website and looking for the “Debian Package” link on the left hand side of the page.
Install Webmin with:
dpkg -i webmin_1.660_all.deb
Again, this is fairly intense for the Pi, so be patient! Once complete, you should be rewarded with a response like:
Webmin install complete. You can now login to https://my-pi:10000/

as root with your root password, or as any user who can use sudo

to run commands as root.
Connect to the relevant page with a web browser, accept the SSL certificate warning and you should see something like the following:
For some reason when I logged in, it wouldn’t accept the root password. Webmin actually tracks the root password separately from the Linux password database. If like me you find you can’t log on as root, you can fix this by running the following command:
/usr/share/webmin/changepass.pl /etc/webmin root [new password]
Configure Apache
![]()
Earlier, we installed the apache2-suexec-custom module. This allows us to run Apache websites securely for multiple users, under a directory other than /var/www. Using your favourite text editor, load up the file /etc/apache2/suexec/www-data. Change the first line from /var/www to /home.
Enable some modules that Virtualmin will need, and restart Apache:
a2enmod suexec

a2enmod actions

service apache2 restart
If you see an error message “Could not reliably determine the server’s fully qualified domain name, using 127.0.1.1 for ServerName”, you can safely ignore this. It doesn’t matter, for the correct functioning of Virtualmin.
Install Virtualmin
![]()
At the official site, you’ll read:
It is a Webmin module for managing multiple virtual hosts through a single interface, like Plesk or Cpanel. It supports the creation and management of Apache virtual hosts, BIND DNS domains, MySQL databases, and mailboxes and aliases with Sendmail or Postfix. It makes use of the existing Webmin modules for these servers, and so should work with any existing system configuration, rather than needing it’s [sic] own mail server, web server and so on.
You can install Virtualmin from within Webmin. Proceed like this:
- Log in to Webmin
- From the Virtualmin download page, find the link entitled “Virtualmin module in Webmin format”. Copy the link (it will end in “.wbm.gz”).
- In Webmin, go to Webmin–>Webmin Configuration–>Webmin Modules. Select the radio button next to “From ftp or http URL” and paste the link you copied into the field. Then click “Install Module”.
- Do the same for the link for the “Virtualmin theme in Webmin format”. You’ll find the necessary link on the Webmin site, called “Virtualmin theme in Webmin format (for FreeBSD, MacOS and Solaris)”. The link will end in “.wbt.gz”, this time.
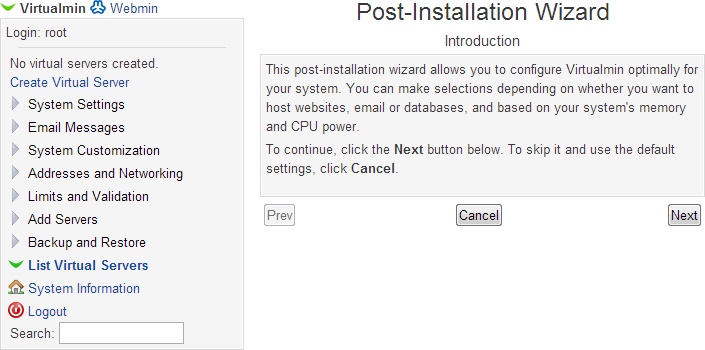
- To activate this theme, go to Webmin–>Webmin Configuration–>Webmin Themes. From the drop-down box, choose “Virtualmin Framed Theme” and click “Change”. Ignore the “Post-Installation Wizard” for now, and hit F5 to refresh your browser and use the Virtualmin theme for Webmin. You should arrive at a screen like this:
- Click Next, to arrive at the “Memory Use” screen. My guess is that for most cases, it would be best to answer “No” here (don’t pre-load Virtualmin). Click Next.
- The next choice is database servers. This is up to you, but I switch MySQL on and PostgreSQL off. Click Next.
- You’ll see a message “MySQL has been enabled, but cannot be used by Virtualmin. Use the MySQL Database module to fix the problem.”. Click the “MySQL Database” link.
- Enter your root username/password combination for MySQL (you will have been asked this when you installed MySQL via apt). After saving this, hit F5 to refresh and return to the Post Installation Wizard.
- Proceed through the wizard up to where we left off (just after database server selection).
- Leave the MySQL password unchanged and click Next.
- I would suggest setting MySQL memory usage to 256M and clicking Next.
- In the DNS config screen, check the box “Skip check for resolvability” and click Next.
- Set password storage mode to “Store plain-text passwords” and click Next.
- At the “All done” screen, click Next. We’re not all done, by the way!
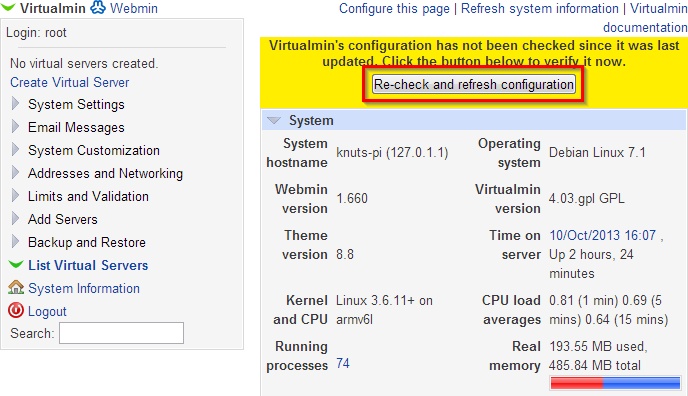
- You’re now at the main Virtualmin screen. Click the “Re-check and refresh configuration” button.
- You’ll see a complaint about DNS. Click the link “list of DNS servers”. Enter 127.0.0.1 as the first DNS server, make sure the hostname is a fully qualified domain name and click Save. Then hit F5 to go back to Virtualmin.
- Click the “Re-check and refresh configuration” button again.
- The next complaint is about email. I’m not planning to use the Pi as an email server, so we can just disable that Virtualmin module. Go to Virtualmin->Systems Settings->Features and Plugins. Uncheck the “Mail for domain” module, slick Save, then hit F5.
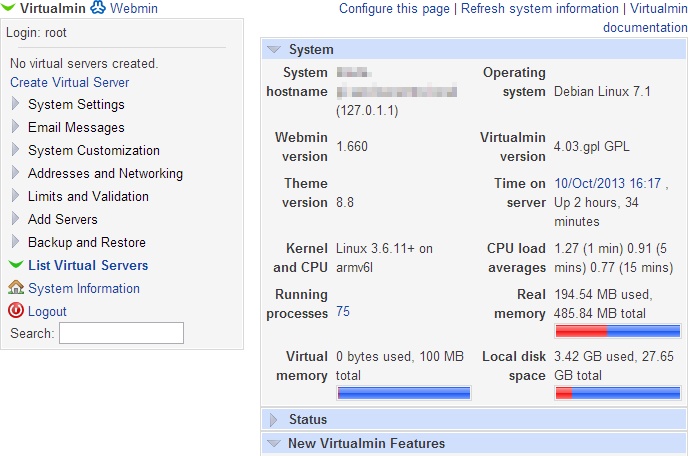
- If your screen now looks basically like this, you’re good to start hosting websites (using the “Create Virtual Server” link).
Setting up virtual hosting is a big subject and beyond the scope of this tutorial, but that’s the basic platform in place. Have a read of the official Virtualmin documentation for pointers. If you happen to browse to your Raspberry Pi’s IP address or DNS name, you’ll be rewarded with a very simple test page:

Running a file server
With Webmin and Virtualmin up and running, you can now start creating file shares. How you approach this depends a bit on how you want to use the server. Probably (!) this will be a personal/hobby server. In that case, I would suggest creating a new virtual server for each user first. That creates all the initial Virtualmin linkage for hosting websites and databases. Then having done that, you can create a fileshare for the user(s) by browsing to Webmin->Servers->Samba Windows File Sharing.
Again, the specific details are best not discussed here, because there are so many possible different configurations. You are however ready to start customising your file/web server to your heart’s content. So now would be a perfect time to take a snapshot of your Pi, so you have a good restore point.
Happy hosting!

The virtual min section doesn’t seem to work ..
webmin 1.670
Followed instructions. Module appears to install ok. Theme installs. After that nothing shows up.
Have you tried refreshing with Ctrl-F5?
Yep tried all of that didn’t make any difference so shelved it for now and will try and work out what broke later on 😉
Oh what a pity. 🙁
This might be a memory issue. The Pi is pretty small, and Virtualmin may cache modules and such (though if you used the install script it’ll disables this caching on small memory machines). You can turn off this caching by following this guide for Virtualmin on low memory systems: http://www.virtualmin.com/documentation/system/low-memory
Feel free to holler at us on the Virtualmin.com forums, if problems persist. It should work fine on even a very small system, especially if you’re just needing web services (mail is often the biggest resource hog on a Virtualmin system, due to large clamav and spamassassin processes).
Thanks for the input!
Hello, thankyou for the tutorial !
I am having issues with step 17 … when I set the dns adress to 127.0.0.1 and save, then I lose remote access to the raspberry pi. I can still connect to virtualmin locally via the adress https://127.0.0.1:10000, but I can’t acess it from another computer remotely. I also lose acess to internet on the raspberry pi.
What do you think I did wrong ?
I’d have to say it looks like you also changed the IP address at the same time, or maybe disabled networking altogether. If you have a monitor attached to the Pi, from a command prompt, run
ifconfigand see if the output looks right. If you’re missing a network interface, tryifup eth0to bring it back.Great guide, thanks. Everything worked fine up to Virtualmin. With the latest virtualmin 4.05.gpl, I had to comment out the ‘SetHandler’ lines in /etc/apache2/mods-enabled/php5.conf, because virtualmin couldn’t turn off the mail server without doing so. Found here http://www.virtualmin.com/node/20646.
Great Ken, thanks for the update. It’s hard to keep how-tos like this up to date!
hi i have done everything how it is written, if I add a server here, I get the error 403 – forbidden access is denied does anyone know what is going wrong? Yours sincerely charro
I’m afraid there are many, many things that might have failed. Unless you’re sure you followed everything to the letter, I’d have to suggest nuking and trying again. That’s not necessarily a bad thing. Every time we work through a procedure, we tend to see things we missed the first time round.
Did You Put An index.html file in the folder for Public_html?
Thank you very much for this GOOD tutorial!
You’re very welcome!