How-to: Put Licensed Version of Memory-Map on your Samsung Note (Android)

[easyreview title=”Complexity rating” icon=”dummy” cat1title=”Level of experience required, to follow this how-to.” cat1detail=”It all make perfect sense and it’s very easy to do. Why Memory Map just don’t share this with us all, no idea!” cat1rating=”1″ overall=”false”]

I do a lot of off road driving in my spare time and navigating using OS maps is essential. So imagine my excitement when the Samsung Galaxy Note tablet hit my radar claiming to have inbuilt GPS. So no more cumbersome laptop with a separate GPS unit and instead a much more portable tablet. Then when I checked with Memory-Map, Android is fully supported and I thought this was going to be a foolproof installation.

I have used Memory-Map on the iPad before and it has always been a pain to set up. I have to say that the support of it as a product is complete comedy. I would have thought that with every half-decent tablet that emerged on the market, Memory-Map would be looking to investigate and provide detailed instructions. That can only aid their sales of their mapping product, surely? But oh no, that’s too much work for them. Instead I was wading through half-baked, inaccurate ReadMe files before I finally gave in and asked Geek to help me out.

So then, without further ado, how do you put a licensed copy of Memory-Map on your Samsung Galaxy Note 10.1 tablet?

Firstly, you will need your own licensed copy of the software (which has come down a lot in price of late) and that will need to be installed and registered on your PC. Happily the instructions for that are very simple. Just create a Memory-Map account and hey presto you have access to whatever number of licenses are allocated with your version, one of which will be dedicated to your PC.

Directory MM

Next you need to connect your Samsung tablet to your PC via the usual USB lead and go to the Memory-Map site’s mobile downloads section and download the Android app.

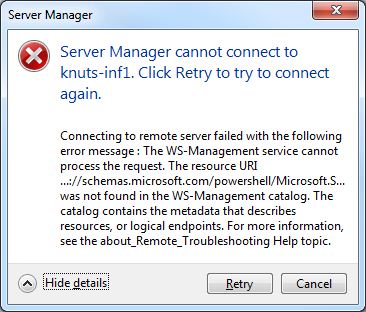
It’s here that you can sometimes stumble at the first fence. The mobile install appears to be designed to encourage people to buy the rights to chunks of OS map via your Memory-Map account. Doing this puts a file on your system called a .DMS, which has the effect of signalling to your tablet that all map content is currently unlicensed. I guess I can understand why Memory-Map doesn’t go into detail with that but to be honest in the majority of cases if you don’t know about that and remove it, it’s never going to work! For now, don’t worry about that aspect.

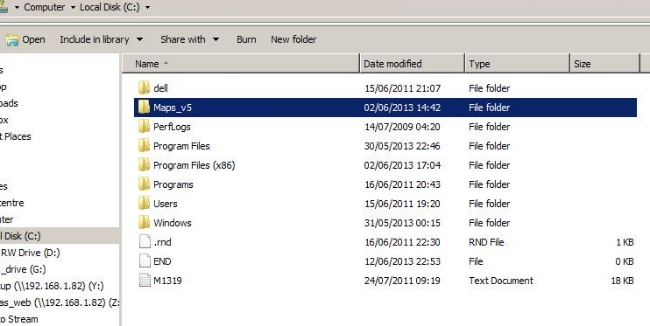
Copy all content from os_50 or whatever your Memory-Map program folder is called. There will usually be 4 files in here. Memory-Map says just to copy the .qc3 file, which doesn’t work. Even if you copy the .qc3 and .qct files, the place name search function wont work. Better to get them all.So far so good. Now what you should find is that you can browse to your Samsung tablet via your PC. In the download directory there will be a Memory-Map folder and very probably a .DMS file. On your PC you will have a Memory-Map folder in your Programs directory from the install I discussed previously. The name of it can vary depending on what Memory-Map service you have bought, usually prefixed with os. Mine is os50. From here its a matter of a step by step approach.

MM dir to copy

  1. Next paste them into a directory on your Samsung tablet where the Memory-Map software can see them. The correct location to copy the files is /Download/Memory-Map. You must be precise about this. No sub-directories. The software will only check that directory for content.
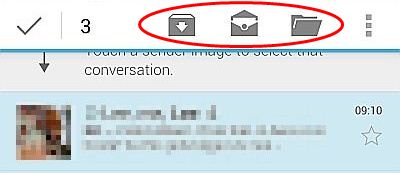
  2. Check for the presence of a DMS file. In some cases (I’m not completely sure how but probably linked to accessing the digital map store or original Android download), the system will have created a “DMS” sub-folder under Memory-Map.  Within that, files indicate you have not paid for any of the OS maps, so it wont show you unscrambled OS maps but will prompt you to pay for them.
  3. If this folder has found its way onto your tablet, you will need to remove it.

That should be it. All files loaded in the correct place with no restrictions.

If you open MM on your tablet and select Menu then More Maps you should now see your OS map listed. Just select it and the software should check your online licence and add this device to your account using a further licence.

Now why can’t Memory-Map include these simple bits of advice. I mean rocket science it is not!!

How-to: Make your Browser Open on Start-up and Auto Open Your Frequently Used Sites

[easyreview title=”Complexity rating” icon=”dummy” cat1title=”Level of experience required, to follow this how-to.” cat1detail=”The Geek had this info in his back pocket but I managed to complete it and get it running after a 2 minute conversation. Seriously, if I can do it your granny can!” cat1rating=”1″ overall=”false”]

Here is an interesting little How-to. Well I thought it was. Geek, who put me onto it just laughed and said it was obvious stuff but he is a geek after all.

My issue was that whenever I powered up my PC I found myself going through the same old ritual of starting a browser session, opening up a tab for each of the websites I use or regularly monitor during the day. A tab for my AdSense account, YouTube and Gmail. Then another for my banking, Bendifroot website and good old Geek & Dummy and another for my 4×4 club, the Lowrangers. All a bit of a pain. A right pain if I inadvertently closed my browser session and had to open each one again.

So, I wanted something that when I fired up my PC, automatically opened Chrome and all of these sessions. Even better, something that could be kicked off again subsequently without any major headache.

Okay, the Startup menu folder can be used to open individual programs on login, but I wanted something more controlled and flexible. Geek explained it was very easy to create a batch script in Notepad that listed the actions you required to be completed on login. Sounded like witchcraft to me but it’s actually very simple.

First thing: open up Notepad. Whichever version of Windows you’re running, it will probably be in your Start menu under Accessories/Notepad. This is a very rudimentary text editor that has none of the MS Word type formatting options.

There’s some very basic syntax. I’m assuming you use Chrome (because I do) but the concept works equally well with other browsers.

start chrome --new-window

This does exactly what you would think. Opens Chrome in a new window. After that it’s a simple matter of listing what tabbed sessions you want Cchrome to load for you.
Here’s an example of my own:


Now the key part: you need to save this as a .bat file. Call it what you like. I call mine “internet.bat”. Then save it into your Startup folder. This can be in slightly different places depending on your user profile settings but most likely Windows/Start Menu/Startup.


I also create a shortcut to the .bat file on my desktop. If I inadvertently close my browser session, I can start it all again with a double-click.

And there you go; simples. A nice easy way of creating a batch script your PC automatically runs, and you can manually run too. I bet you feel like a computer programmer now don’t you?!

News: PRISM scandal – tech giants flatly deny allowing NSA direct access to servers

I read this story with interest. So a highly secretive branch of the American government has been snooping on our emails, messages and calls using a sophisticated bit of software and the big tech giants may be complicit?!? Surely that’s not really a surprise to anyone is it?

It seems there are various disapproving camps forming around this.

First: a band of technophobes, incredulous at the thought that a government organisation would be able to spy on them in this way. I mean come on get real. Yes, conspiracy theory nuts have raved on about this for decades. But we the public, know that phone bugging can be done legally under a warrant; why would we think this has any limit?

The second camp is on a corporate witch hunt. How could Google and Microsoft not have known about this? Or worse, how dare they allow the government to put its sticky paws on our private correspondence?

You’ve seen Will Smith on the silver screen battling shadowy branches of American government ably assisted by Gene Hackman, a master of tech surveillance. It transpires that this shadowy branch has gone rogue and is targeting innocent members of the public. Is there anything unbelievable about this? The fact that the technology exists to allow this surveillance or that a government organisation can go rogue? (Or worse, conduct the surveillance without legal approval but with state support.)

It may sound like science fiction but the technology exists. Once that’s accepted I have my own view on its existence and use. A government organisation going rogue? The conspiracy theorists will be screaming at me but it is pretty implausible in this age of information and accountability.

For a start, why think that what you are saying and doing online is so interesting to the NSA? Let’s take that thought a stage further: if you are saying something that interests the NSA, I’d suggest I want you to be secretly monitored by them.

I know this will be at odds with many of you technically savvy people in this brave new I.T. world but I personally feel that I am willing to sacrifice a little bit of privacy for the greater good. I mean how do you think the security services in the UK foil terrorist attacks and keep us safe in our beds? Information and the control of it is the secret war no one likes to tell us about.

But do you know what, when I stand back and look at this again from a more suspicious angle I find myself asking a number of left-field questions that make me doubt the whole story.

If this technology does exist and is being used, why would an organisation like the NSA (arguably the most secure organisation in the world) allow the Guardian to learn of its existence and so make it redundant. I mean, any self-respecting terrorist would read this and not use the internet again, right? Lets remember the information regarding its existence was anonymously leaked and the online message boards are already full of anti-American rhetoric raving about Prism and civil liberties.

Whether the technology exists or not, don’t expect the Googles of this world to admit they let the NSA trawl through their servers. I guess I may be in the minority in not caring if they did. But if they stood up and said, ‘Yeah we share your data with the NSA,’ I think the shareholders would be none too pleased.

We know Google already mines internet usage to target users with appropriate adverts. For example, if I insert an advert from Google’s AdSense below this paragraph you should see adverts popping up relevant to things you searched or shopped for recently. Shame on you if Tracy, a single and very friendly lady is offering to visit!! 😉

This is all feels a bit like PR spin to me. On one hand I think we all know our internet usage is being monitored in some way by someone. I’m ambivalent to that fact. It being drawn to the public’s attention in this way has the smack of an opposition group attempting to stir up ill will against ‘Big Brother’.

On the flip side, come on tech giants, don’t treat us like fools. You obviously mine our data for your own purposes and as it suits you. Its not a huge leap to assume you’d allow selected organisations to do the same for the “greater good”.

So a sensational headline but really, is any of it big news or really that shocking or are we all just kidding ourselves about our personal internet privacy?

(Hint: we’re kidding ourselves. But don’t worry – Geek is here to help improve our online privacy: read on.)

How-to: Reinstate the delete button in Android Gmail app

Google’s development philosophy is a process called “evergreening”. Make sure your business profile is always new, always interesting. This is one reason why Google Doodles are actually a big deal for the company. It is also a reason why ultra conservative companies struggle to integrate Google Apps into their I.T. infrastructure. Constant change is unsettling, especially when you need to support end users who are not particularly tech-savvy.

So, Google has done it again. The latest update to the Android Gmail app changes a few things and, most irritatingly, moves the delete button off to a menu. Now, when you select an email, you have three buttons – archive, mark unread and move to folder:

Gmail_01

You can delete, but you need to tap the menu, then select “Delete”. Who has time for that?!

Fortunately, there’s a solution; the delete button can be reinstated through a configurable setting. Go to Settings then “General Settings”:

Gmail_02

Choose “Archive & delete actions”:

Gmail_03


Select “Show archive & delete”:

Gmail_04

Breathe a contented sigh of relief:

Gmail_05

Note to Google: Please think before you release gratuitous changes in future. This busy Geek doesn’t have time to be undoing all your mistakes!

Review: Kodak PlaySport ZX3 & ZX5 Action Camera – Waterproof & Shockproof

One of my intentions when creating Geek & Dummy was to review cutting edge and newly emerging tech but every now and again, I hit on an old favourite that just does its job so well it deserves to be re-visited.

Let me set the scene for my requirements in an action camera. I am an avid off-roader. I want a camera that can be bashed by branches, submersed in water and generally shaken to within an inch of its life. Through all that it still needs to shoot images of sufficient quality to edit into films.

I’ve tried numerous budget options where picture quality is laughable, especially in low light. I’ve also toyed with the high end GoPro range that, whilst capable, has so many drawbacks and reliability issues for such a high price tag, I struggle to see why they are the go-to answer for most professionals wanting an action camera.

So step up the Kodak PlaySport ZX3 and more recently the updated ZX5 variant. The action camera that makes the lofty claim of being shockproof, waterproof with in-built image stabilisation and HD quality images. Many action cameras claim it but is it true of the Kodak?

Kodak Playsport ZX3

The camera itself is mobile phone size (approx 55mm x 115mm) with a rubberised finish and feels comfy in the hand. It has only 5 buttons and the main control is a 5-way rubberised button, positioned ergonomically for its operation. On first inspectio,n given the shape of the camera when compared with a GoPro, you could be forgiven for making the assumption it simply won’t be up to the job. This camera is nothing short of astonishing, however. It has the standard 1/4” threaded adaptor on its base so, unlike the GoPro, your mounting options are cheap and varied.

The compartments that house the battery, SD memory card and charge points are all positioned under water tight sliding compartments. Having fully submerged this camera on a number of occasions, Kodak’s claim of a waterproof design is completely true. And I haven’t just dipped this in a pool or the bath. This camera has been through rivers of mud at speed and still come out smiling!

Here’s a short demo of the cameras size and compartments and some examples of a few of the knocks and dips it’s taken.

Pretty cool, right?

The image clarity is fantastic although I find full 1080p too detailed for the action footage I shoot. 720 at 60 fps gives a perfect balance between file size and quality. The in-built image stabilisation means it’s easy to mount on say a Land Rover bonnet and still get a relatively stable image as the car bounces all over the road.

Sure there are some trade-offs. There is no option for an external mic. The built-in mic is sufficient for close up action though. In my extensive testing and editing of the footage, the PlaySport takes better quality images than cameras costing triple the price.

Kodak has gone for the middle ground in firmware, falling between the idiot-proof Flip and the overcomplicated Toshiba Camileo, with simple and obvious operation. It still has everything it needs to be an action camera – even a decent zoom feature.

So after I’ve ticked the boxes for rugged build, quality image, waterproof and shockproof, what else is essential in an action camera? Battery life! It’s this area where all action cameras seem to be weak. I remember being particularly fed up with the GoPro because not only did the battery give me only 45 minutes of continuous video, it was a pain to open the waterproof housing and replace or charge the battery. And the battery cost silly money. Again the Kodak excels in this area. I get between an hour and 2 hours of continuous use, depending on the conditions. Then when it is time to change the battery it’s simplicity itself; the waterproofing is built into the camera and replacement batteries slot in easily. Considering the PlaySport’s battery is a standard 3.6V camera battery and can be bought anywhere for a few pounds this camera, on the market for 3 years now, is shaping up to be a Go-Pro killer!

I stumbled on this camera by accident but I’m so glad I did. I’ve spent hundreds of pounds on handhelds, Go-Pros and everything in-between. In the end this little £80 marvel stands out in every area and puts far more expensive models to shame.

You’ll be buying this camera for its rugged and waterproof claims, and in those points the camera performs in a class of its own.

[easyreview title=”Dummy rating” icon=”dummy” cat1title=”Ease of use” cat1detail=”Fairly simple, point and shoot for good results” cat1rating=”4.5″ cat2title=”Features” cat2detail=”Almost everything it needs as an action camera” cat2rating=”4″ cat3title=”Value for money” cat3detail=”Considering what other action cameras sell for, its a snip” cat3rating=”4.5″ cat4title=”Build quality” cat4detail=”I literally haven’t been able to break one yet!” cat4rating=”5″ summary=”You can still buy these on Amazon but they are getting rare. If you see one then snap it up because they are amazing.”]


How-to: Administer Active Directory/Windows Server remotely using a privileged account

[easyreview title=”Complexity rating” icon=”geek” cat1title=”Level of experience required, to follow this how-to.” cat1detail=”Though this wasn’t easy to work out, hopefully the how-to is easy-peasy to follow. You may need to do a little research if your platform differs much from mine (Windows 7/Server 2008).” cat1rating=”1.5″ overall=”false”]Oh my, how hard did Microsoft make this?

The scenario: like all good domain administrators, I have a day-to-day non-privileged account, for normal access and a domain account for use as and when I need it.

The objective: use an MMC (Microsoft Management Console) to administer the domain from my normal workstation, with my domain admin account.

This should be easy, right? Fire up the MMC, type in your domain administrator credentials and you’re away? Wrong. What you actually need to do is something like this. This is to administer AD running on Windows Server 2008 from a Windows 7 workstation:

Step 1: Install Remote Server Administration Tools

Install the Administration Tools Pack for the server[s] you intend to administer. For Windows 7, this pack is amongst the features you can install for the o/s. There are however some caveats and you would do well to read the comments on this Technet article, if you get stuck.

Step 2: Configure WinRM

If you want to manage a server such as Windows Server 2008 remotely (not just Active Directory), you’ll need to configure WinRM (Windows Remote Management) on the remote server. Until you do, your attempts to connect may result in error messages like “Server Manager cannot connect to Server1. Click Retry to try to connect again”. Certainly, this is what happened for me:

07 Server Manager cannot connect

On the remote server, in an elevated command prompt:

C:\Users\rob.admin>winrm quickconfig
WinRM already is set up to receive requests on this machine.
WinRM is not set up to allow remote access to this machine for management.
The following changes must be made:

Create a WinRM listener on HTTP://* to accept WS-Man requests to any IP on this machine.
Enable the WinRM firewall exception.

Make these changes [y/n]? y

WinRM has been updated for remote management.

Created a WinRM listener on HTTP://* to accept WS-Man requests to any IP
on this machine. WinRM firewall exception enabled.


That alone, might not be enough. The next hurdle I encountered was similar, but this time the issue concerned the WS-Management catalog (whatever that is):

08 The resource URI was not found in the WS-Management catalog

For Windows Server 2008, you also need to install a feature called “WinRM IIS Extension”. In Server Manager –> Add Features:

09 Add WinRM IIS extension

This feature installation takes forever (well, quarter of an hour, for me). Why? Who knows.

You still might not be able to connect to a Server 2008 box after this. Try installing version 3 of the Windows Management Framework. You can download that here. Note: this depends on Service Pack 2 of Windows Server 2008, the previous version of Windows Management Framework (which gives you PowerShell 2.0) and .NET 4.

If you still can’t connect, shrug your shoulders and just accept the fact that Remote Management is one of the things that Microsoft improved dramatically in R2 of Server 2008. You will still be able to use many MMC snap-ins, but some (like the “Server Manager” snap-in, ironically) will just fail.

Step 3: Create your MMC

I’ll just use a simple example here. First: Start –> Run –> mmc.

Within the console, Add/Remove Snap-in:

01_Add_Remove_Snap-in

Choose your desired snap-in (e.g. AD Users and Computers):

02_Choose_desired_snap-in

Click “Add >”. The snap-in will appear on the right. Continue for all the snap-ins you’ll want to use, then click “OK”.

Save your custom MMC. I would recommend putting it somewhere where you’re not going to be hit by UAC problems – i.e. not in the root of your C: drive, not under C:\Windows, etc.

Step 4: Create a shortcut to your MMC

You can’t directly run the MMC. Don’t try. Create a shortcut. You can put this shortcut on your Desktop, or wherever you like. So, for example, right-click the Desktop and click New –> Shortcut.

You need to specify the shortcut as C:\Windows\System32\runas.exe /netonly /user:your-domain-admin-user@your-domain "mmc C:\Path\To\MMC\DomainAdmin.msc":

04_Create_shortcut

Having created your shortcut, set it always to run as Administrator. Right-click –> Properties –> Advanced:

03_Run_shortcut_elevated

Step 5: Run the shortcut

When you run the shortcut, you should now see a UAC prompt and after that a command prompt, asking you for your domain admin password:

05_Credentials_prompt

For me, it’s not instant, but eventually, the MMC loads and runs as intended:

06_MMC_running

Happy days. No more RDP. 🙂

Review: Sinjimoru Sync Stand for Apple iPhone 5 Dock, Cradle Holder

£19.99 from Amazon.

I’ve long been an Apple fan (well a fan of the core devices they produce – not of the way they extort loyal customers with ridiculous prices for add on-consumer products). So when I got my iPhone 5 on the day it was released to the UK, my plan was to hang fire for a month or two and wait to see what the world of eBay and Amazon would deliver in the way of gimmicky add-ons. In particular, I always like a second charger and a dock station so I can charge and view my phone at my desk. Months after the iPhone 5 release nothing has been officially produced by Apple and the Lightning cable is still very expensive but I found this nicely designed dock that claimed to tick all my boxes.

iPhone 5 dock

Initially I was attracted by the design and the fact it worked by integrating my existing Lightning cable. It looked to be a good bet, especially if you were to believe the Amazon reviews.

On opening the dock, I was pleasantly surprised by its quality and feel. It appears to have been machined from aluminium and then plasti-coated. It is a solid and compact little design and looks as good on my desk as it did in the pictures on Amazon. It comes with a couple of adaptors to allow either the new Lightning or the older pin charger to be threaded through the dock and mounted. In this way, the phone can (theoretically) sit on the dock and over the charging point, with the cable inserted into the phone. I’ve only tested this with my Lightning-cabled iPhone 5, and it’s here that I started to have problems.


iPhone adaptors

The connection is unreliable at best. The Lightning cable pushes through a transparent base plate and the thickness of this base plate seems to affect the quality of the connection into the phone. Don’t get me wrong, if you wiggle it about a bit it eventually, sometimes connects but that’s not really what I want from a dock on my desk. I want something solid and easy to click in, which brings me to my next point. The way the dock seats the phone means it’s almost entirely supported by the Lightning cable’s connector. When this was the older style pin that might have been ok, because it was wide and robust but with the Lightning pin: recipe for disaster.

iPhone 5 docking station

For me, this has become a (very!) expensive stand for my phone that doesn’t charge or sync my phone. I have no idea where the other reviews came from on Amazon because it just doesn’t work. I’ll give it 1/2 simply because it looks pretty!

[easyreview title=”Dummy rating” icon=”dummy” cat1title=”Ease of use” cat1detail=”Well, it only works as an expensive stand” cat1rating=”0.5″ cat2title=”Features” cat2detail=”Simply doesn’t work as described for the iPhone 5″ cat2rating=”0″ cat3title=”Value for money” cat3detail=”Mmmmmm!! Feel like I’ve been conned on this purchase” cat3rating=”0″ cat4title=”Build Quality” cat4detail=”It’s a shame it doesn’t work. It’s very nicely built” cat4rating=”4″ summary=”I’d seriously avoid this if you are after an iPhone 5 dock. It’s useless.”]

This slideshow requires JavaScript.

Review: Nook Simple Touch eReader from Barnes & Noble

UPDATE: If you’re looking for a super-cheap, colour, Android tablet, you might like to know that Amazon has recently slashed the price of the 7″ Kindle Fire to £99. Find out more here.

So then, the Nook Simple Touch eReader from US book retailer Barnes& Noble has become their loss-leading attempt at getting a toehold in the UK/European market. Geek, the tight-wad  wouldn’t shell out for a proper tablet, but when the Nook was slashed to £29, he couldn’t resist. And then I stole it off him for a play.

nook Simple Touch eReader

The first thing I notice when I take it out of its packaging is how tactile it is and how light. On the reverse, there are two parallel ridges that conform nicely to my grip and it feels comfortable to hold. It has a slightly rubberised feel to it, which also adds to that tactile feel.

It has a nice quick guide pre-installed and four buttons where your thumbs naturally locate on the front frame, which are additional navigation guides for turning pages. It took me a while to realise these were buttons and they need to be pressed hard to get them to work and as you can turn a page by swiping the screen, a bit redundant I think!

Usage wise, I quite like it, largely due to the very tactile feel. The size was just right for my style of reading although I can imagine it might be a bit on the small side for some people. I did read it on occasion under office LED lighting and found that some flat angles reflected that kind of light quite badly but I had to struggle to find such a position and overall the Nook was easily readable in all usual lighting conditions and gave me no kind of eye strain problems after long periods of reading.nook Simple Touch eReader

One issue I can foresee is the fact that it doesn’t link into the Amazon Bookstore but rather Barnes & Noble’s own store, which whilst adequate, isn’t quite as good.

A further little irritation for me was the screen transition and the way it seemed to flicker when refreshing. It wasn’t as fluid as a Kindle but then it doesn’t cost Kindle money!

Battery life appears to be everything claimed and having used the Nook for 3 or 4 days, the battery level indicator has not moved at all. The wireless connectivity has been switched on during this time although not heavily used.

The WiFi connectivity appeared faultless and it immediately connected or could see all of the wireless networks that my iPhone 5 could see.

Everything about it is just pick up and go or plug in and go. epub books can be put in the Books folder via a mini USB connector from your PC or via the MicroSD card with a simple cut & paste action. I did find the SD card slot to be poorly labelled and the compartment flap seems a bit flimsy.nook Simple Touch eReader

At £29 there’s really no excuse for not owning one. As a basic entry level eReader, especially when I line it up against a Kindle, considering the bargain price of the Nook, it has to be a solid competitor.

Now the Geek tells me it’s possible to “root” this and turn it into a whole different beast but to be honest that’s beyond me so I’ll leave him to look into that.

I’d recommended the Nook pretty highly. The market is crowded but it does what it says on the tin at less than the right price.

[easyreview title=”Dummy rating” icon=”dummy” cat1title=”Ease of use” cat1detail=”Downloading ebooks is a breeze. Basic eReading functions are intuitive.” cat1rating=”4″ cat2title=”Features” cat2detail=”It really has everything a good eReader should have and a few besides.” cat2rating=”4″ cat3title=”Value for money” cat3detail=”At the current price of £29 it is probably the best value for money eReader out there.” cat3rating=”4″ cat4title=”Build Quality” cat4detail=”I think it’s great. I love the tactile feel of it.” cat4rating=”4.5″ summary=”A very good value for money product that makes an excellent entry level to eReading if you were thinking of giving it a go.”]


How-to: Merge multiple RTF files into a single PDF

[easyreview title=”Complexity rating” icon=”geek” cat1title=”Level of experience required, to follow this how-to.” cat1detail=”Linux only. And newbies may find this tricky.” cat1rating=”3.5″ overall=”false”]

I recently needed to generate a large quantity of forms automatically (around 2,500 of them) and printing them. I was using PHP as the generator – it’s great at processing and transforming text. And my base (template) file was originally created as a Word document, converted to RTF for ease of processing.

There is no easy and free way of printing out 2,500 RTF files from Windows, not that I’ve been able to find. It didn’t make sense to pay for a £200 application for something that I do so infrequently. So here is my (free) approach.

Make Linux do the hard work

I’m using an Ubuntu virtual machine for this how-to, but you can use almost any distribution, with a little modification of the steps below. When it comes to command line or scripted activities (which this tutorial lends itself to), Linux/Unix is simply more mature than Windows. This means that someone, somewhere has probably already created a tool for whatever activity you’re thinking of and moreover, made that tool free.

Converting to PDF: Ted

Ted is a fairly full-featured text processor for Linux. We’ll just be using some of Ted’s command line wizardry today.

Installing Ted

Ted logoYou can download a Ted package here. I’m installing this on an Ubuntu 12.04.1 machine so I chose this package: ubuntu12041:ted-2.23-amd64.deb.

I keep all third party packages I install in a directory, /root/installed-packages, for future reference. So this is what I did, from a command line (SSH connection). First, I know that Ted has some dependencies, so I dealt with those:

apt-get update
apt-get install libxpm4 libtiff4 libgtk2.0-0 libpaper1
apt-get -f install

Then downloaded and install Ted:

wget http://ftp.nluug.nl/pub/editors/ted/ubuntu12041:ted-2.23-amd64.deb
dpkg -i ubuntu12041\:ted-2.23-amd64.deb

Combining files: pdfmerge

Abiding by the principle of “do one thing well”, guess what pdfmerge does?

Installing pdfmerge

If you’re using a RedHat-derived distribution, you’re in luck, there’s a pre-built package. If you’re using Ubuntu though, here goes. Download the source [iwrtooltip title=”a compressed archive of files”]tarball[/iwrtooltip] from here. Again, I’m starting in my directory /root/installed-packages.

wget http://dmaphy.github.com/pdfmerge/pdfmerge-1.0.4.tar.bz2
tar jxf pdfmerge-1.0.4.tar.bz2
cp pdfmerge-1.0.4/pdfmerge /usr/local/bin
rm -rf pdfmerge-1.0.4

Put it all together

Now the utilities are installed, you can run the following simple bash script to convert your individual RTF files into PDFs, then merge them all into a single PDF. I put the RTF files in one directory, then the PDF into the directory above it in the directory tree. We use a script that is bundled with Ted – you may need to check the precise location.

for filename in ./*.rtf
do
/usr/share/Ted/examples/rtf2pdf.sh $filename
done;
pdfmerge *.pdf ../all.pdf

Acknowledgements

Thanks to Mark de Does for Ted and to Dominic Hopf for pdfmerge.

Review: SoundWave SW100 Portable Bluetooth Speaker

As for many other people, my phone has become my go-to device for all my mobile entertainment needs. I currently have a Samsung Galaxy Note 2 (yeah, the one with the ludicrously large screen), so it’s great for anything from internet browsing to watching films in HD quality. I also use it as an MP3 player and for listening to podcasts and audiobooks.

I recently started looking around for a portable speaker that I could take on my occasional travels and, not to put too fine a point on it, use in the bathroom. Surely I’m not the only one that likes to listen to audio books while I shower?

The Note 2 isn’t, er, noted for its high quality speakers. Very few smartphone manufacturers have been able to complete with Apple on this front. But even the mighty built-in speakers of an iPhone struggle to compete with the noise of my geyser-like shower or electric shaver.

As Dummy will tell you, I’m a bit of a tightwad when it comes to my technology purchases, so I was looking for a device that could combine the impossible requirements of sound quality, power and cheapness. I wanted the convenience of connecting by Bluetooth, with the option of a 3.5mm socket for greater flexibility.

Having considered many products and read a lot of reviews, the device I settled for was this, the SoundWave SW100:

Rear view
Rear view

Here are some vital statistics:

  • Small – about three inches tall
  • Reasonably light – I haven’t put it on the scales, but it feels about the same weight as my Note 2 + case
  • Loud – I can’t find any official information on wattage, but when I turned it up to max in my small kitchen, it was louder than I could tolerate; at that point, there was some mild distortion
  • Built-in microphone – theoretically you can therefore use this device for conference calls; I have not tried this, but for the sound alone it can only be better than putting your phone into speaker mode
  • A claimed 10 hours music/talk time
  • A claimed 800 hours standby time – I’m not sure what use this figure is though; I’ll either be using it or charging it

Out of the box, the speaker was fully charged in less than an hour. It comes with a microUSB cable for this purpose. For my first trial, I took it into my company’s noisy server room. About 80% volume was sufficient to hear music clearly and without distortion, over the cacophony of fans and aircon.

It paired over Bluetooth without fuss. I have noticed the occasional blip when playing through Bluetooth, but I think this is more likely to be down to the phone (of which I demand a lot!) than to the speaker. In any event, you can use a 3.5mm audio cable (supplied) if you prefer.

SoundWave SW100 and matThe speaker has a non-slip base, great for most surfaces. The manufacturers have thoughtfully included an additional non-slip mat, making the speaker very unlikely to budge during normal usage. The non-slip mat also slightly neutralises the effect of resonance transmitted through the surface on which you place the speaker. Unless you’re an audiophile (I confess I’m not), this probably won’t mean a lot, but for some, it will be important.

For the size of the speaker, I was impressed by the bass response. In fact this was one of the reasons I bought the speaker – to improve bass experience, without having to lug around a sub woofer and without having to spend thousands on a high-end miniaturised speaker system.

Build quality is good. The case is mainly brushed aluminium, and not unattractive. It passed the spouse test; no exclamations of,”Oh how hideous! What horrendous technological monstrosity is that?!”

SoundWave SW100 mic and buttonThere are two controls. First, there’s a button labelled with a phone symbol, for answering calls and setting up the initial pairing. Secondly there’s an on-off switch. There’s an LED to indicate connection status and charging status and there’s a microphone port along with the USB charging port and 3.5mm audio socket.

I paid £20 for the speaker. Although at one time it was available for less, it is still a bargain at this price. It receives favourable reviews (wherever you look) and I can only confirm what other reviewers are saying. Well worth the money, especially when you consider you can pay four times the price for a product that may have a pretty label but is otherwise no better.

Entirely up to you, but you can pick one up from Amazon here, or from eBay,
[easyreview title=”Geek rating” icon=”geek” cat1title=”Ease of use” cat1detail=”BlueTooth synced very easily. There’s an off/off switch. Simples.” cat1rating=”5″ cat2title=”Features” cat2detail=”It has no on-board track control buttons and lacks the ability to daisy-chain other speakers. Higher-quality speakers may handle bass better, but that’s being very nitpicking.” cat2rating=”3.5″ cat3title=”Value for money” cat3detail=”It competes well with speakers three times its price.” cat3rating=”4.5″ cat4title=”Build Quality” cat4detail=”Very solid. Has survived several downward lunges!” cat4rating=”4.5″ summary=”If you want a portable speaker, on the go, don’t mind that the output is mono, and don’t expect the sound to fill a concert hall, this is the device for you. Highly recommended.”]