Review: Giotto’s Rocket-air Super Blower AA 1900

Dusty computerAnyone who’s pulled a computer apart will know how much dust, crud and miniature wildlife can take up residence within your machine’s delicate circuitry. This build-up is bad for your computer. In particular, it makes fans and heat sinks less efficient and causes everything to warm up.

At best, this is a nuisance. Many power-regulating computers will simply slow down to allow the system to cool off. At worst, though, the excess heat in a power supply for example can set your computer – and your house or office – on fire. Clearly this is not A Good Thing.

Periodically then, it’s a good idea to take an “air duster” to your computer’s innards. Air dusters usually consist of cans of compressed air, with a straw-like nozzle to direct the air flow. They’re designed to create enough pressure to remove dirt but not so much as to cause damage.

Where I work, we used to get through a ton of these cans of air. The problem was, just when you really needed the air duster, you’d look on the shelf and there’d just be an empty can. Harrumph. How inconsiderate.

Giotto’s Rocket-air Super Blower AA 1900
So looking around for a better solution to the problem, I came across this fellow, the “Rocket-air Super Blower” by the Chinese/Taiwanese Company, Giotto’s Industrial Inc. (Beware of the annoying noisy Flash animation that plays whenever you visit the site.)

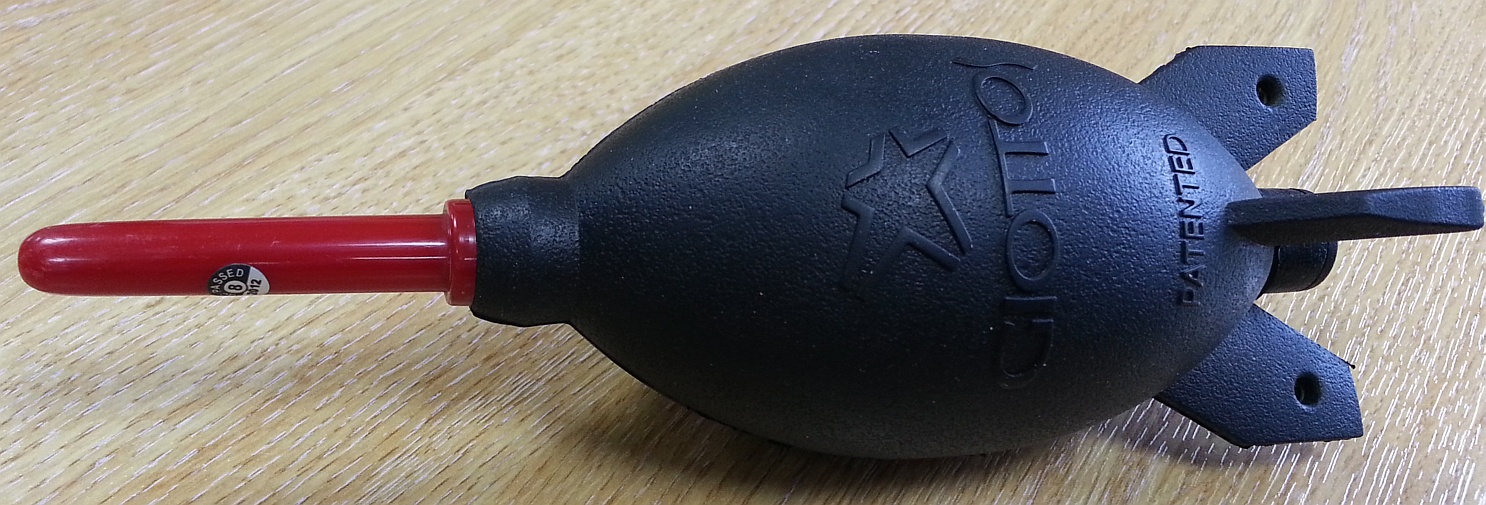
The Rocket-air has a thick flexible rubber body and a solid plastic nozzle. Squeeze firmly and you get a blast of air not dissimilar to that from a can of compressed air. It’s not hard work to operate and of course the best part is that you have an unlimited supply of air at your disposal (at least until some thieving, envious toe-rag runs off with it).

It’s theoretically available in a few different colours. I’ve only seen it in the UK in the red/black regalia, not that it matters: I didn’t buy it for its looks. Mind you, as looks go, it’s a fairly funky tool and was surprisingly quite a conversation piece when it first arrived.

Speaking of design, you have to love the attention to detail here. Giotto’s makes camera equipment, so the Rocket-air’s primary function is to blow dust from delicate camera lenses (the fact that we can bend it to other uses is a big bonus). On the opposite side to the nozzle, there’s a fast air inlet valve. This means that when you release the blower, rather than sucking dust back in through its nozzle, it pulls in (hopefully) clean air from the other side.

Oh, and the “rocket fins” on the base of the blower enable it to stand up stably. Not massively important, just a nice bit of design. On two of these fins there are holes punched so that you can thread a lanyard through. Great for hanging it from your neck should you be so inclined. People will give you funny looks though.

So it’s well made, durable, moderately attractive, great at its job – there’s got to be a catch, right? The price. Amazon has it on sale for £8.99 at the moment. I don’t know about you, but my first thought was, “That’s a bit expensive for a glorified executive stress toy.” But then if you think about it, you can’t really buy a can of compressed air for less than £3 or £4. So the Rocket-air pays for itself pretty quickly – I would expect it to last as long as a hundred cans of compressed air. When you put it that way, it’s a bit of a bargain.

This slideshow requires JavaScript.

[easyreview title=”Geek rating” icon=”geek” cat1title=”Ease of use” cat1detail=”Short of poking it in your own eye, I’m not sure you can get this wrong.” cat1rating=”5″ cat2title=”Features” cat2detail=”Does everything you expect of it. I suspect it could be made slightly more powerful, but otherwise, there’s little to criticise.” cat2rating=”4.5″ cat3title=”Value for money” cat3detail=”When you compare it with the alternatives, it’s pretty near the cheapest solution to our dusty problems.” cat3rating=”4.5″ cat4title=”Build Quality” cat4detail=”Great attention to detail. Some slightly annoying slivers of rubber haven’t quite been removed after it came out of its mould. But otherwise, really well made. Feels like it will last forever – or at least until I retire (which is much the same thing).” cat4rating=”4.5″ summary=”Great solution to the problem of safely cleaning dust and dirt out of computers and fans. As a bonus, you can use it on your camera too. Can’t really recommend it any more highly.”]

“Dusty Shuttle” image copyright © Dave Kirkham, licensed under Creative Commons. Used with permission.

16GB Class 10 MicroSD card head-to-head shootout: SanDisk vs Kingston vs Transcend vs Samsung vs Toshiba

Fight!  Fight!  Fight!  Fight!
Fight! Fight! Fight! Fight!
There’s a lot of information and misinformation concerning SD technology, on the Internet. I’ve read a few conflicting theories about how many different companies actually manufacture SD cards and how many re-badge other companies’ kit. For your average consumer (and by this, I mean Dummy) though, this is all a bit of a red herring. Dummy wants to know (a) which card is fastest and (b) which card is best value for money. End of.

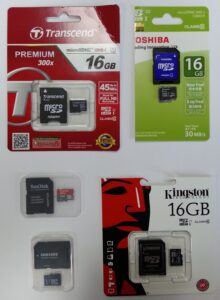
In order to separate the wheat from the chaff, we’ve picked 16GB Class 10 MicroSD cards (with full size adapters) from the top five brands out there: SanDisk, Transcend, Kingston, Toshiba and Samsung. We’re not too concerned with who made ’em; we just want to see which is the best package overall. To that end, we’ve benchmarked the cards in two different environments: firstly using a MicroSD card USB reader on a Windows PC and secondly on an Android mobile device. This gives us a really good idea of how these five cards perform in real-world scenarios.

MicroSD cards - the contenders
MicroSD cards – the contenders

If you can’t be bothered with all the stats and just want the summary (and we can’t blame you!), click here.

Test rig

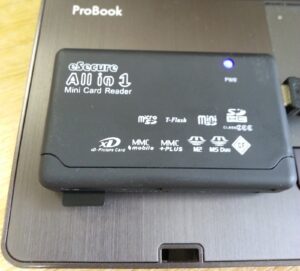
eSecure All-in-1 USB card reader connected to HP Probook
Our Windows 7-based test rig consisted of an eSecure All-in-1 card reader connected to an excellent HP ProBook 6560b. The 6560b isn’t available any more by the way, but the 6570b is a worthy successor. Our test software was the venerable and well-respected CrystalDiskMark.

Our mobile device test rig consisted of the brilliant Samsung Galaxy Note 2 (replaced by the even more incredible Note 3). Using this phone we ran the handy app A1 SD Bench. It’s less comprehensive than CrystalDiskMark, but gives you a good feel for how the card performs in one of its most likely use cases – plugged into a smartphone or tablet.

The Tests

For our tests, we ran five passes of the benchmarks on each card. When a test run contained anomalous results (which could be down to processor blips or other irrelevant causes), we discarded the test and ran again. We then averaged the scores from the five clean passes. We think this gives us a pretty bulletproof set of scores.

We ran three distinct batteries of tests:

  1. 5 passes of CrystalDiskMark with the file size set to 1000MB
  2. 5 passes of CrystalDiskMark with the file size set to 50MB
  3. 5 passes of A1 SD Bench

The results are summarised in this image (click to enlarge):

SD Card Benchmark Analysis

This is worthy of some explanation! The bottom row of the table shows the “standard deviation”. You don’t need to understand statistics to get the point: if there’s not a lot of difference between the cards, you’ll see a small figure on this row. So for example in the sequential read tests, there’s very little difference between the cards (standard deviations of 0.12 and 0.18). In the case of a 50MB file written randomly in 512k chunks, there’s a huge variation – 5.97. If you look more closely at the column, you’ll see that the Samsung card clocked in at 15.2MB/s in this test, which is very good, while the Toshiba managed a paltry 1.3MB/s.

The bar chart overlays are fairly easy to follow, we hope. For each column, the card that has the biggest bar achieved the best speeds. This is most noticeable on columns with the largest deviation (512K random writes).

The price column is colour-coded going from red to green; expensive to cheap. “Expensive” is a relative term – there’s only £3.50 difference between the most expensive and least expensive cards here. Mind you, that means that the pricy SanDisk is over 40% more expensive than the modest Toshiba.

SanDisk MicroSD card - overpriced and over here
SanDisk MicroSD card – overpriced and over here
Let’s look at the SanDisk card for a moment. It’s considerably more expensive than the cheaper cards on test, so what do you get for your money? Well it actually performs worst on one of the tests (1000MB sequential write). If you’re working with video, that is going to be noticeable. The story’s better with random writes, but that seems to us to be a fairly “edge” scenario. It also does worst when being written to in an Android environment. All in all, not good. It certainly hasn’t justified its high price ticket. We were expecting a lot better from such a well known and respected manufacturer.

With generally narrow deviations, it’s hard to pick out an outstanding card, but if you can managed to stare at the figures a bit without your eyes glazing over, we do think a hero emerges.

Look at that Samsung card. Best at the 1000M sequential read. Best at the 1000MB sequential write. Second best at the 1000MB/512K random write and leading the pack for the 50MB/512K random write. In almost every test, it achieves consistently good results. It’s top dog when it comes to writing data and no slouch at reading it. All this and it’s the second cheapest.

Conclusion

Samsung MicroSD card - the winner
Samsung MicroSD card – the winner
If you’d like to mine the data we collected, you can download it here as a zipped Excel spreadsheet – this contains the raw data from all our tests – no less than 450 data points! Whatever you do, we think you’ll agree with us that in this class, the best value MicroSD card by far is the Samsung 16GB Class 10 MicroSD. There isn’t even a runner up in this contest; the remaining contenders are either too slow or too expensive.

Light sabre duel image copyright © Sean Dreilinger, licensed under Creative Commons. Used with permission.

How-to: Using WhatsApp on a Windows PC

TelegramUPDATE 2: WhatsApp has finally bowed to pressure and created a web interface for desktop usage.

UPDATE: We’ve been blown away recently by new-instant-messenger-on-the-block, Telegram. Unlike WhatsApp, it’s free forever. It’s more secure than WhatsApp, it has desktop apps, chats are synchronised across all devices (at least the normal chats not marked as “secret” anyway) and best of all, it’s not owned by Facebook. Find out more here.

WhatsApp logoWow, so this is a popular search on Google! And sadly, most of the results you find are riddled with either viruses, bad advice or broken English.

As you almost certainly know if you’ve found this page, WhatsApp is a massively popular (over 7 million downloads on Android alone) app for instant messaging. Its distinguishing feature is that it relies on a user’s mobile phone number, rather than any dedicated username/password combination. The idea is that you use it as a drop-in replacement for SMS and MMS messaging. You can also use it instead of your favourite instant messaging client, on the basis that almost everyone has a mobile phone number these days.

Linking the product to a mobile phone number is also one of this product’s weaknesses – you may want to use WhatsApp from your desktop PC or laptop, but WhatsApp doesn’t provide PC (or Mac) software. The good news is that it can be done! The bad news is this process depends on you having a Google account – sorry, Apple/iOS users. The REALLY bad news is that you can’t link a single mobile phone number on two different devices. Because WhatsApp associates to a mobile phone number, this means that you can’t synchronise your chats across more than one device. If you try to link two different devices to the same mobile number, one of the devices will disconnect and you’ll be greeted with the following message:

I don't want to reverify!
I don’t want to reverify!

So this piece of information can’t be stressed enough: you can’t run WhatsApp in two places simultaneously using the same mobile phone number. If you want the convenience of being able to input messages via your computer, you need to look at some form of remote control program for your mobile device (VNC, for example). That’s beyond the scope of this How-to.

The remainder of this guide assumes you’re going to be associating your mobile phone number to WhatsApp and using it only on your PC. If that’s what you want to do – good news! It’s entirely possible.

BlueStacks Android Emulator

The easiest way to get started is to install the BlueStacks Android emulator. BlueStacks is in beta at the moment and free to use. We imagine this will change at some point in the future. There will still be other possibilities, but one of the beauties of BlueStacks is its simplicity.

It’s worth mentioning at this point that whenever you’re going to emulate one operating system on another, you’re well advised to ensure your computer is up to the job. I’m using an Acer Veriton M6610G which is more than up to the job. (It has since been replaced with the M6630G series – very competent and expandable PCs.)

Visit the BlueStacks web site and download and install the emulator. We’re doing this on a Windows PC, but I suspect it would also work on a Mac. (Any Mac users out there that have an Android phone? I suppose it could happen…)

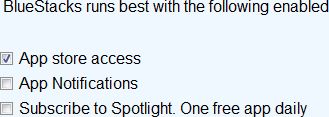
During the installation, you’ll be presented with a set of three options – App store access, App Notifications, and Spotlight. I’d suggest you only select the first of these. The installation can take a fair few minutes.

BlueStacks options

If you’re prompted to update your graphics drivers, you’ll need to allow this, for BlueStacks to run. As always, make sure System Restore is working, in case something goes wrong when installing the drivers.

Set up BlueStacks

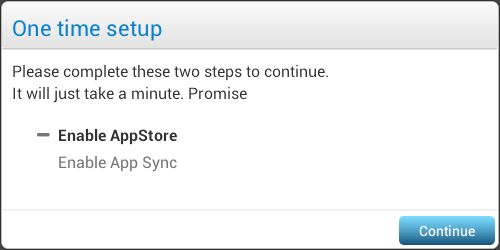
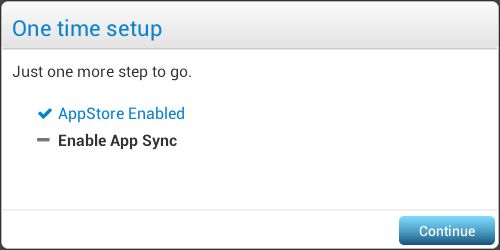
When you first load BlueStacks, you’ll be taken though a setup wizard. Click “Continue”:

BlueStacks setup step 01

You need to connect BlueStacks to a Google Account for two reasons: first, to download the app from the Google Play Store. Secondly, so you have access to your address book. It’s best to link BlueStacks to an existing Google account, so you have the benefit of your Google address book. Choose “Existing”:

BlueStacks setup step 02

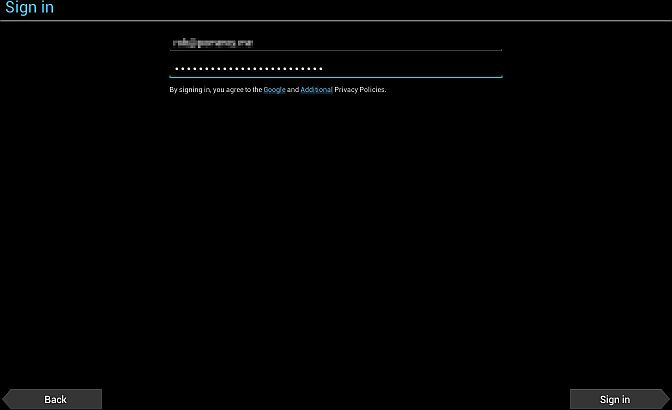
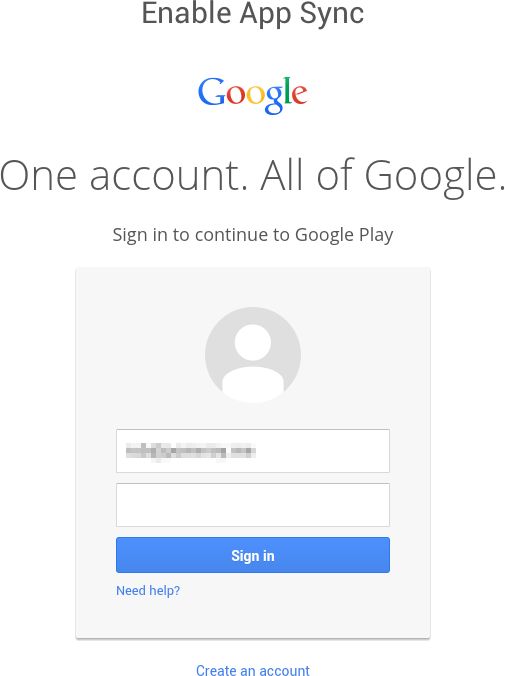
Enter your Google credentials and click “Sign in”:

BlueStacks setup step 03

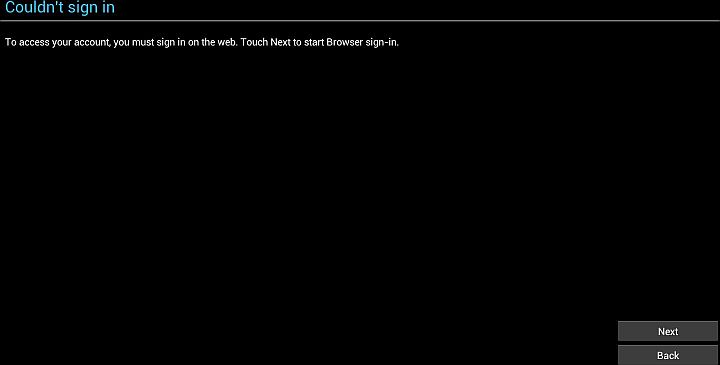
If, like me, you use Google’s two-factor authentication, you’ll now be taken through a web-based login process (still within the BlueStacks emulator). Click “Next”:

BlueStacks setup step 04

Re-enter your credentials and click “Sign in”:

BlueStacks setup step 05

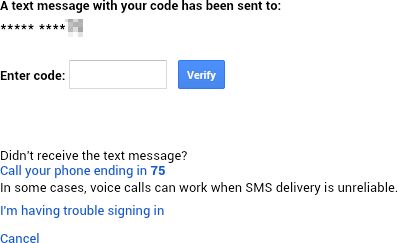
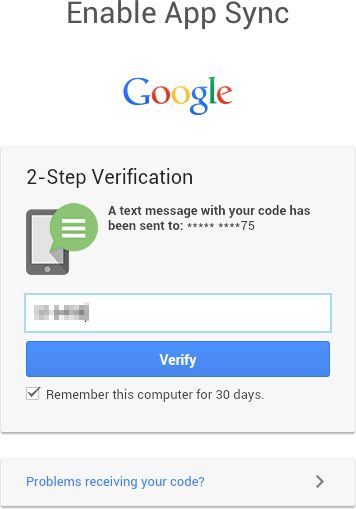
Again, this is only if you’ve enabled two-factor authentication (which you should, by the way). A code will be sent to your mobile phone number. Enter it here and click “Verify”:

BlueStacks setup step 06

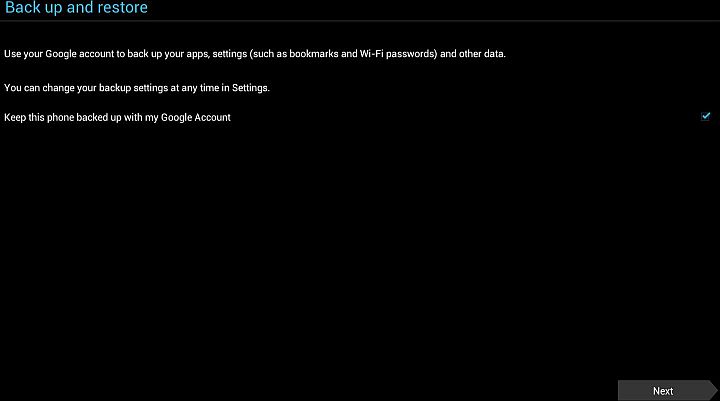
The “Back up and restore” section – what you choose here is up to you. Click “Next”:

BlueStacks setup step 07

You’ll be taken back to the BlueStacks wizard. Click “Continue”:

BlueStacks setup step 08

Re-enter your Google account details (yawn):

BlueStacks setup step 09

Do you want your password to be remembered? Your choice:

BlueStacks setup step 10

Again, leap through the two-step verification hoop if it applies to you:

BlueStacks setup step 11

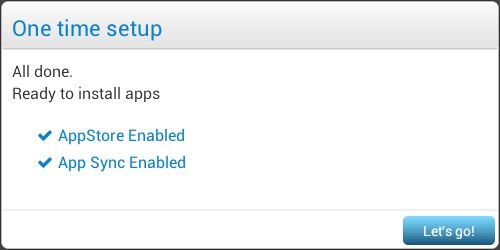
The Google Play store will now be available. Click “Let’s go!”:

BlueStacks setup step 12

Finally, accept the Terms of Service. I suggest leaving the “opt-in” unchecked:

BlueStacks setup step 13

Installing WhatsApp

Immediately after setting up BlueStacks, you’ll be taken to the Play Store:

Install WhatsApp step 01

From there, search for WhatsApp:

Install WhatsApp step 02

Click “Install”:

Install WhatsApp step 03

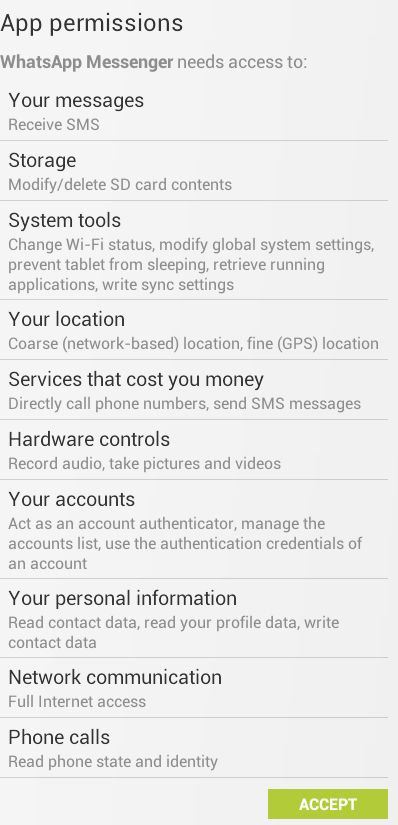
Accept the permissions:

Install WhatsApp step 04

WhatsApp will now install:

Install WhatsApp step 05

Once installed, click “Open”:

Install WhatsApp step 06

Agree to the WhatsApp terms:

Install WhatsApp step 07

Enter the mobile number that you’re going to link to this installation of WhatsApp (remember, one mobile phone number per device) and click “OK”:

Install WhatsApp step 08

Double-check and click “OK”:

Install WhatsApp step 09

WhatsApp tries to send and detect an SMS. The SMS message will go to your phone of course, not BlueStacks, so this detection will fail (you’ll need to wait for this):

Install WhatsApp step 10

Instead, click “Call me” and be ready to enter the verification code:

Install WhatsApp step 11

An automated message will tell you the code you need to enter into WhatsApp on BlueStacks:

Install WhatsApp step 12

Verify your profile:

Install WhatsApp step 13

WhatsApp will spend some time initialising:

Install WhatsApp step 14

Once it’s done, the “Continue” button appears. Click it:

Install WhatsApp step 15

That’s it; you’re in. From now on, you can run WhatsApp from the Home screen:

Run WhatsApp from Home screen

You should see your list of contacts from your Google address book:

Browse contacts

If you have any chat history from using WhatsApp on a different device, this will not be pulled across to BlueStacks – history is not saved on WhatsApps’ servers.

So there we are; it has its limitations, but if you’re happy to use WhatsApp on your computer instead of your phone or tablet, this is probably the easiest way to do it. Having said that, I will personally carry on using WhatsApp on my Galaxy Note phone or tablet, both of which I’m more likely to have with me than my computer!