[easyreview title=”Complexity rating” icon=”geek” cat1title=”Level of experience required, to follow this how-to.” cat1detail=”Your granny could do it. :-)” cat1rating=”1″ overall=”false”]
Introduction to Tor
It seems that not a day goes by now without reading some news about this or that government’s ability to scrutinise your internet activity. Our very own Dummy blogged about PRISM not so long ago. He concluded that at some level, we probably already suspected our every online move was being tracked. It’s just that we’re now sure of it. The worst that’s happened is we’ve sacrificed the illusion of privacy for the illusion of security, right?
The thing that’s making me distinctly uncomfortable though is that my data seems to be available to foreign powers. I am not a citizen of the U.S., but with vast quantities of my email sat on Google or Microsoft’s servers, it seems that for U.S. intelligence agencies, it’s open season on Geek’s mailbox. Now I can probably wrap my head around that, but what about other governments – governments with poor track records when it comes to human rights and civil liberties? If the U.S. can see my data, why not them too? It’s worrying because I have absolutely no doubt that some of my views would be viewed as offensive and immoral by those states. No names no pack drill, but the feeling is mutual.
 So is there anything we can do to reclaim some of our privacy? Turns out that there is. There are a few options in fact. Today I’m going to look at just one such option: boosting your online privacy through the anonymising network, Tor.
Say what now?
Tor used to stand for “The Onion Ring [network]”. Like an onion, Tor provides layers between you and the web sites you’re visiting. Within those layers, your activity is scrambled, redirected and encrypted.
To explain this in simple terms: your web browser sits within the Tor network. All communication within the network is secured. When you browse to a web site, your web traffic is sent to an exit point from the Tor network – any one of several thousand relays – which talks to the internet on your behalf.
Think of it like a middleman who never reveals who he’s working for, but hands messages to and fro. That’s oversimplified, because what actually happens is more like several middlemen between you and the final web site, none of whom know quite who the original “client” is, nor what the message is that the middleman is relaying on behalf of the client. It’s these layers of security and encryption that led to the onion metaphor.
Tor Quick Start
By far the easiest way to get going with Tor is to download the “Browser Bundle”. This includes a specially configured web browser that will send all traffic via the Tor network. Yes, that’s right: Tor cannot magically make all your internet activity private. You have to use tools that know how to make use of the network. The Tor Browser is a version of Firefox that has been configured to use the Tor network. I’m going to assume that you’re using Windows, for the purposes of this tutorial, but there are bundles available for Mac and Linux too.
Download and run the Tor Browser Bundle. Tor isn’t installed as such – you won’t find a link in your Start Menu after this. It extracts all its files wherever you direct and you run it from there. This means that you can put the files (less than 100MB) on a USB thumb drive and take it with you from computer to computer.
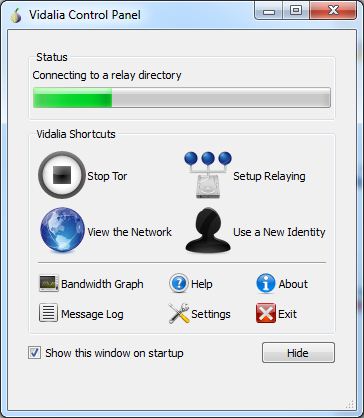
Within the “Tor Browser” folder, you’ll find a program called “Start Tor Browser”. When you run that, your system will be initialised to run Tor:
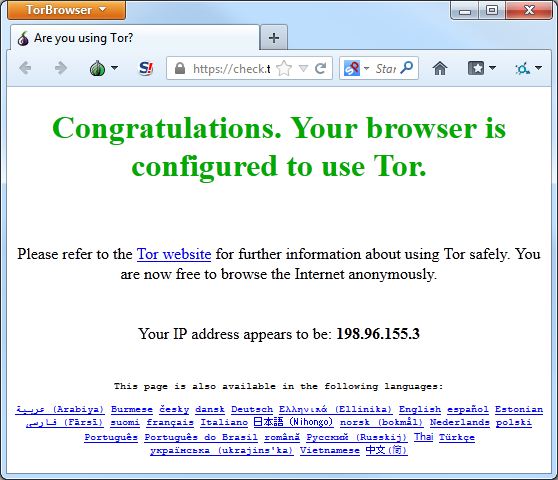
Once you’re connected, the Tor Browser will load:
After that, you can browse the web almost as normal. Web browsing will inevitably be slower than you’re used to; privacy in this case comes with a price. Traversing all those layers of encryption and randomisation takes time, but while you’re waiting for your page to load during that brief delay enjoy the warm sense of anonymised well-being.
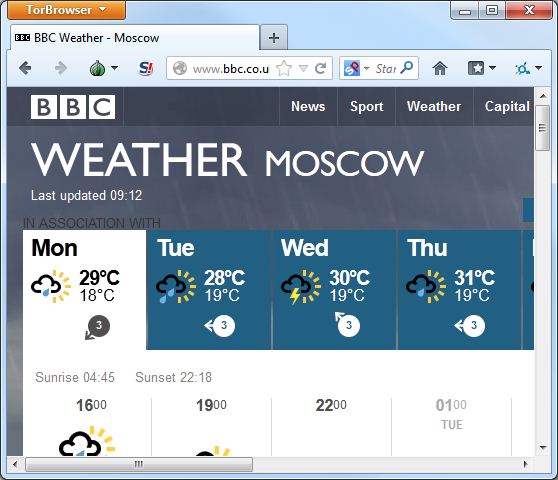
Note: web sites will not always function as they do outside the Tor network. This is a by-product of anonymity and safety. See the FAQ to understand some of the issues you may encounter.
Caveats
You need to be aware that Tor is not a panacea. If you wish to prioritise privacy, you may need to change some of your browsing habits. From the Tor’s download page:
Want Tor to really work?
- Use the Tor Browser
Tor does not protect all of your computer’s Internet traffic when you run it. Tor only protects your applications that are properly configured to send their Internet traffic through Tor. To avoid problems with Tor configuration, we strongly recommend you use the Tor Browser Bundle. It is pre-configured to protect your privacy and anonymity on the web as long as you’re browsing with the Tor Browser itself. Almost any other web browser configuration is likely to be unsafe to use with Tor.- Don’t enable or install browser plugins
The Tor Browser will block browser plugins such as Flash, RealPlayer, Quicktime, and others: they can be manipulated into revealing your IP address. Similarly, we do not recommend installing additional addons or plugins into the Tor Browser, as these may bypass Tor or otherwise harm your anonymity and privacy. The lack of plugins means that Youtube videos are blocked by default, but Youtube does provide an experimental opt-in feature (enable it here) that works for some videos.- Use HTTPS versions of websites
Tor will encrypt your traffic to and within the Tor network, but the encryption of your traffic to the final destination website depends upon on that website. To help ensure private encryption to websites, the Tor Browser Bundle includes HTTPS Everywhere to force the use of HTTPS encryption with major websites that support it. However, you should still watch the browser URL bar to ensure that websites you provide sensitive information to display a blue or green URL bar button, include https:// in the URL, and display the proper expected name for the website.- Don’t open documents downloaded through Tor while online
The Tor Browser will warn you before automatically opening documents that are handled by external applications. DO NOT IGNORE THIS WARNING. You should be very careful when downloading documents via Tor (especially DOC and PDF files) as these documents can contain Internet resources that will be downloaded outside of Tor by the application that opens them. This will reveal your non-Tor IP address. If you must work with DOC and/or PDF files, we strongly recommend either using a disconnected computer, downloading the free VirtualBox and using it with a virtual machine image with networking disabled, or using Tails. Under no circumstances is it safe to use BitTorrent and Tor together, however.- Use bridges and/or find company
Tor tries to prevent attackers from learning what destination websites you connect to. However, by default, it does not prevent somebody watching your Internet traffic from learning that you’re using Tor. If this matters to you, you can reduce this risk by configuring Tor to use a Tor bridge relay rather than connecting directly to the public Tor network. Ultimately the best protection is a social approach: the more Tor users there are near you and the more diverse their interests, the less dangerous it will be that you are one of them. Convince other people to use Tor, too!
Additional point: there’s some anecdotal evidence that using Tor can cause issues for PayPal and eBay.
Bonus: Use Tor with mobile devices
That’s all well and good for desktops and laptops, but what about my phone and my tablet? Good news: you can also use Tor on Android and iOS. For Android, you have the free Orbot, which you can couple with the browser Orweb (also free). You do not need to have rooted your phone to use these, though there are some advantages if you do.
For iOS folks, there’s Onion Browser, which is cheap, but not free.
At the moment, I’m not aware of any Tor packages for BlackBerry or Windows Phone.
Safe browsing
Please remember that no amount of encryption or obfuscation can guarantee your privacy or safety. Nor does it absolve you of moral accountability. Stay safe and keep your nose clean.

