Easily host your own web sites | part 1: hardware

Contents


Web serversThere is no shortage of cheap web hosting companies, offering packages from pennies per month. If you’re looking for more control and flexibility and you’re not planning to host a mission-critical eCommerce website though, self-hosting is quite rewarding and not as difficult as it sounds.

This is the first in a series of posts where I outline some options for becoming a small-time web host. In this article, I discuss the hardware you’re going to need.


You’re best off coming to terms with the idea that you’ll be leaving your new web server switched on 24 hours a day. Whether we admit it or not, ultimately we’re hoping that whatever websites we host will become popular and reach a worldwide audience. That means your server must theoretically be available and reachable round the clock. In my view, as a bare minimum you should have:

  • A computer. Doesn’t need to be fancy or modern. Preferably less than five years old, but it won’t be a deal breaker, if not. We’ll call this box “the server”. It won’t need a monitor, keyboard and mouse attached full-time. You’ll only need to borrow these for the initial setup. We’ll be connecting to the server remotely as soon as possible and from that point onwards, we can run this server “headless” (i.e. with nothing attached other than the UPS).
  • An uninterruptible power supply (UPS). Your UPS protects your server from the vagaries of your household power supply. It doesn’t do a server much good to lose power suddenly. A UPS is a battery backup which can enable your server to shut down gracefully in the event of a power cut. The better UPSes also clean the incoming power, protecting the server from “bucks” and “boosts”.
  • A router capable of port forwarding. Shouldn’t be too much of a problem – most routers can do this. I’m assuming here that you’re on some kind of “always on” internet connection like broadband or cable.

The server

Unless you’re hosting a lot of websites, getting a lot of traffic, or building very complex websites, this machine won’t need much power. And it doesn’t need to break the bank. You could consider using a Raspberry Pi for example (although that will be harder to set up than an ordinary PC). I’ve used second-hand computers, old laptops and all sorts to host web sites. Currently I have an old IBM xSeries tower server in my loft, but you probably don’t need that kind of power or resilience when you start out with web hosting. You could even just use a virtual machine on your home computer, if you’re happy to leave that switched on all the time. I’m going to assume that you’re using a dedicated machine though. I’m also going to assume that we’ll be using typical PC hardware; you can self-host with Mac hardware quite easily, but that’s not where the majority of my experience lies.

The UPS

We’re going to be running Linux on this server, so the primary requirement is that your UPS is supported by Linux. APC UPSes used to be supported under Linux by the apcupsd program (a so-called ‘daemon’, which runs continuously on the server). In recent years however, APC short-sightedly changed their UPS range so they could no longer communicate with apcupsd (to the considerable anguish of the Linux community). Your best bet is either to source an old APC UPS – you can still easily find the replacement batteries – or buy any Eaton UPS. Eaton UPSes are supported by the Network UPS Tools daemon and I know that Eaton is commercially committed to the Linux platform for the foreseeable future.

The router

As long as your router supports port forwarding, you’ll be okay. A lot of routers are capable of being upgraded with aftermarket “firmwares” to provide previously unavailable capabilities. This is a good way of obtaining a near enterprise-class router on the cheap. Probably the most famous of these firmwares is DD-WRT. Have a look on that website for a list of supported routers if you want to go down this route (ahem).


So that’s it for this post. Short and sweet. While you’re off sourcing your hardware, I’ll be hard at work thinking about part 2, in which we’ll start to set up your new server’s operating system and supporting applications. See you soon!

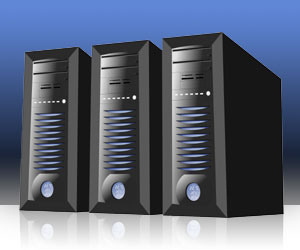
Servers image copyright © Widjaya Ivan, licensed under Creative Commons. Used with permission.

Connecting to Windows/MSSQL 2008 from Linux/CodeIgniter/PHP

Update: I’ve written a new article, covering CodeIgniter 3 and Ubuntu 14/16. Read it here.

Microsoft SQL Connecting to Microsoft SQL Express 2008 from Linux/PHP is a lot trickier than I expected. These notes are really for my own benefit so I can reproduce the setup, but maybe they’ll help you too. One of the problems is that many existing PHP drivers for MS SQL have difficulty talking to SQL 2008. Here’s a workaround using FreeTDS and ODBC.
My web application is built using CodeIgniter, the PHP application framework. It resides on an Ubuntu Server box, running Apache. Prerequisites on that Ubuntu Server (which I installed using Aptitude, but your favourite package manager will do):

  • unixODBC
  • FreeTDS
  • FreeTDS development package/(header files and libraries)

To my freetds.conf file (in /etc/freetds on my server) I added a section that looks something like this:

[my-server]
host = my.server.local
port = 1433
tds version = 9.0

Note: TDS version 9.0 should work with SQL 2008.

In /etc/odbcinst.ini, add the following ODBC driver (32-bit):

[TDS]
Driver = /usr/lib/odbc/libtdsodbc.so
Description = FreeTDS driver
Setup = /usr/lib/odbc/libtdsS.so

or 64-bit:

[TDS]
Driver = /usr/lib64/libtdsodbc.so
Description = FreeTDS driver
Setup = /usr/lib64/libtdsS.so

(You may need to check the precise location of the driver and setup files.)

And to /etc/odbc.ini, I inserted a DSN similar to the following:

[my-server]
Driver = TDS
Description = My Server
ServerName = my-server
Database = my-db

Generally within CodeIgniter, I am connecting to MySQL databases and that’s how my default connection is configured. I therefore added a second configuration to my database.php configuration file, like this:

$db['my_server']['hostname'] = "dsn=my-server;uid=myusername;pwd=mypassword";
$db['my_server']['username'] = '';
$db['my_server']['password'] = '';
$db['my_server']['database'] = '';
$db['my_server']['dbdriver'] = 'odbc';
$db['my_server']['dbprefix'] = '';
$db['my_server']['pconnect'] = TRUE;
$db['my_server']['db_debug'] = TRUE;
$db['my_server']['cache_on'] = FALSE;
$db['my_server']['cachedir'] = '';
$db['my_server']['char_set'] = 'utf8';
$db['my_server']['dbcollat'] = 'utf8_general_ci';

Now the ODBC driver within CodeIgniter can produce queries that MS SQL doesn’t like. We can fix this with a hack. You really REALLY shouldn’t do it this way (!) but to get things working and as described >here<, I edited the CodeIgniter core file system/database/drivers/odbc_driver.php. The function _from_tables() has a line reading:

return '('.implode(', ', $tables).')';

I changed it to this:

return implode(', ', $tables);

(In other words, we’re removing the spurious parentheses.)

I created a database method m_my_server.php like this:

/**
 * NOTE: We're using a feature-incomplete driver here.  Don't attempt to use
 * CodeIgniter's ActiveRecord Class or num_rows().  Use bare queries instead.
 */
class M_my_server extends Model {

  var $my_server;

  function M_my_server() {
      parent::Model();
      $this->my_server = $this->load->database('my_server', TRUE);
  }

  function get() {
    $query = $this->my_server->query('SELECT TOP(100) * FROM dbo.tblUserSummary');
    $result = $query->result_array();  // note ->num_rows() doesn't work with this driver
    if(count($result) > 0) {
      return $result;
    } else {
      return false;
    }

  }
}

/* End of file m_my_server.php */
/* Location: ./application/models/m_my_server.php */

At the SQL Server end, I set up a new standard SQL user (myusername/mypassword) rather than attempting to get Windows authentication to work (I bet it wouldn’t).

My SQL instance wasn’t listening to TCP/IP connections by default. I fired up SQL Server Configuration Manager and browsed to SQL Server Network Configuration –> Protocols for [my db instance]. Then you have to right-click TCP/IP and click Enable.

With all that in place, the following controller produces successful results:

  function SQLtest() {
    $this->load->model('m_my_server');
    $result = $this->m_my_server->get();
    if($result) {
      print_r($result);
    } else {
      echo 'nada';
    }
    exit;
  }

It’s not ideal; for one thing, bare SQL queries involve learning Microsoft’s particular dialect of SQL (whereas I’m used to MySQL). The tables I’m querying are generated by Microsoft Forefront TMG though, so I’m basically stuck with MSSQL. At least now I can query those tables from my favourite PHP application framework.

Image copyright © Microsoft. Used with permission from Microsoft.

Linux on a Toshiba Portege 3300CT

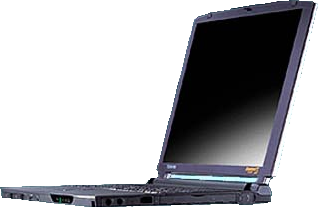
3300 A colleague at work passed an old laptop to the department – the intention being that we put it with the other Waste Electrical and Electronic Equipment for disposal. It’s an old Toshiba Portégé 3300CT which would originally have been supplied with Windows 95 but which was now running Windows 98. “Running” like a three-legged dog. It’s a sweet little laptop though and I couldn’t quite bring myself to consign it to the scrap heap, particularly when it seemed to be fully functional. “It needs Linux!” I thought to myself.

I’ve installed Linux on a few older machines, to drag a bit more life out of them. VectorLinux has been my distribution of choice in the past, but on this occasion I really struggled to get it to install. There were a few problems:

  • The laptop has limited ports and no docking station. We’re stuck with PCMCIA, a single USB 1 port, a modem, a proprietary floppy drive port and not much else.
  • There is an external PCMCIA CD-ROM drive. Eventually I discovered that you can boot from this if you hold down “C” during startup. Unfortunately driver support for this CD-ROM drive is limited. During the VectorLinux install, it could boot from the CD but subsequently could not find the CD in the installation process.
  • It is possible to boot from floppies. Tracking down a floppy-initiated install for VectorLinux is a challenge, but I found that some of the archived Slackware distributions have a three-disk set floppy boot process that loads sufficient drivers to enable installation to continue from an ISO image stored on the existing Windows partition.
  • Unfortunately, the VectorLinux install didn’t seem to recognise any of the PCMCIA or USB network cards I threw at the laptop. I searched for manually installable drivers (and indeed found some – source code only) but the Linux environment was unable to make the drivers.

In my wrangling with VectorLinux, I removed as much bloat as possible from Windows 98. Having installed a USB network card I was able to transfer an ISO image for the install onto the Windows partition. I then shrank this using FIPS (you have to restart in DOS mode). VectorLinux is able to install from an ISO image on the hard drive, once you’ve got the kernel and ram disk loaded up.

Because VL didn’t recognise any network card, I started to cast my eye wider – tried booting from a Knoppix Live CD (no dice) and finally settled on attempting a Debian install. I’ve had good results with Debian in the past, particularly with hardware support, but I didn’t consider it to start with because I think of it more as a “full blown” distribution – not necessarily one best suited to older, slower hardware.

To give Debian “room to breathe”, I thought it best to place the ISO image (for CD 1) on a partition more or less on its own. To do this, I removed the hard drive from the laptop (a bit of a fiddly job, but do-able). I popped it into a USB hard drive caddy and then used another PC to clear out and defrag the Windows partition and copy across the ISO, Linux and initrd images. Having done that, I attached the USB caddy to a laptop, booted the laptop with a GParted CD and resized the Windows partition leaving just a little bit more space than the ISO required. That done, I returned the laptop drive to its normal location.

Using a Windows 98 boot floppy (DOS wouldn’t work since the parition was FAT32) I copied loadlin and the Windows 98 “system files” onto the hard drive – it could now be booted from again.

Finally, I booted from the hard drive and issued the command “loadlin vmlinuz /dev/ram rw initrd=initrd.gz”. The installer fired up, found my ISO image and most importantly recognised my USB network card. The system is now fully installed and up and running.

I’m not quite sure what I’m going to use it for – possibly as a network monitoring system or for some web development testing work. For sure, it’s not going in the bin – just yet.

Feel free to comment if you would like me to expand on any of the points above.

Image copyright © Inverse Net. All rights acknowledged.