How-to: Laravel 4 tutorial; part 6 – virtualised development environment – Laravel Homestead

[easyreview title=”Complexity rating” icon=”geek” cat1title=”Level of experience required, to follow this how-to.” cat1detail=”We’re pulling together a few sophisticated components here, but keep your eye on the ball and you’ll be okay.” cat1rating=”4″ overall=”false”]

Laravel Tutorials

Introduction

It has been a while since I have had time to work on Laravel development or indeed write a tutorial. And since then, I have decommissioned my main web development server in favour of a Synology NAS. Dummy and I use a third party hosting service for hosting our clients’ web sites and our own. This shared hosting service comes with limitations that make it impossible to install Laravel through conventional means

So instead, I’m setting up a virtual development environment, that will run on the same laptop that I use for code development. Once development is complete, I can upload the whole thing to the shared hosting service. Getting this set up is surprisingly complicated, but once you’ve worked through all these steps, you’ll have a flexible and easy-to-use environment for developing and testing your Laravel websites. This article assumes we’re running Windows.

Components

  • virtualbox_iconVirtualBox enables you to run other operating systems on existing hardware, without wiping anything out. Your computer can run Windows and then through VirtualBox, it can run one or more other systems at the same time. A computer within a computer. Or in this case, a server within a computer. Download VirtualBox here and install it.
  • vagrant_iconVagrant enables the automation of much of the process of creating these “virtual computers” (usually called virtual machines). Download Vagrant here and install it.
  • git_iconGit for Windows. If you’re a developer, chances are you know a bit about Git, so I’ll not go into detail here. Suffice it to say that you’ll need Git for Windows for this project: here.
  • PuTTY_iconPuTTY comes with an SSH key pair generator, which you’ll need if you don’t already have a public/private key pair. Grab the installer here.
  • php_iconPHP for Windows. This is not used for powering your websites, but is used by Composer (next step). I suggest downloading the “VC11 x86 Thread Safe” zip file from here. Extract all files to C:\php. There’s no setup file for this. Rename the file php.ini-development to php.ini and remove the semicolon from the line ;extension=php_openssl.dll. Find a line containing “;extension_dir” and change it to extension_dir = "ext"
  • composer_iconComposer for Windows. Composer is a kind of software component manager for PHP and we use it to install and set up Laravel. Download the Windows installer here and install.

SSH key pair

You’ll need an SSH key pair later in this tutorial. If you don’t already have this, generate as follows:

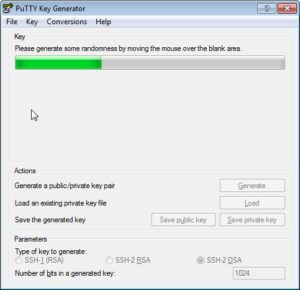
  1. Start PuTTY Key Generator. (It may be called “PuTTYgen” in your Start Menu.)
  2. I would suggest accepting the defaults of a 2048-bit SSH-2 RSA key pair. Click “Generate” and move your mouse around as directed by the program.
    PuTTY key generation
  3. You can optionally give the key a passphrase. If you leave the passphrase blank, you can ultimately use your key for password-less logins. The drawback is that if your private key ever falls into the wrong hands, an intruder can use the key in the same way. Make your decision, then save the public and private keys. You should always protect your private key. If you left the passphrase blank, treat it like a plain text password. I tend to save my key pairs in a directory .ssh, under my user folder.
  4. Use the “Save private key” button to save your public key (I call it id_rsa).
  5. Don’t use the “Save public key” button – that produces a key that won’t work well in a Linux/Unix environment (which your virtual development box will be). Instead, copy the text from the “Key” box, under where it says “Public key for pasting into OpenSSH authorized_keys file:”. Save this into a new text file. I call my public key file “id_rsa.pub”.

Install the Laravel Installer (sounds clumsy, huh?!)
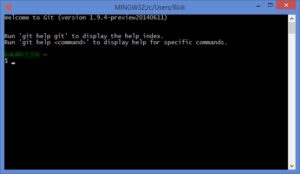
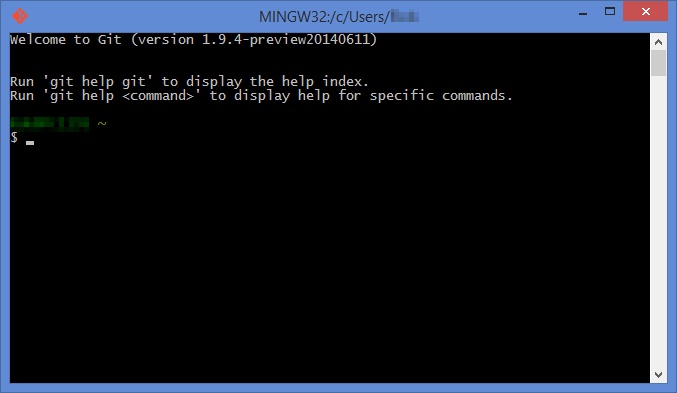
  1. Load Git Bash.
    Git Bash window
  2. Download the Laravel installer with this command: 
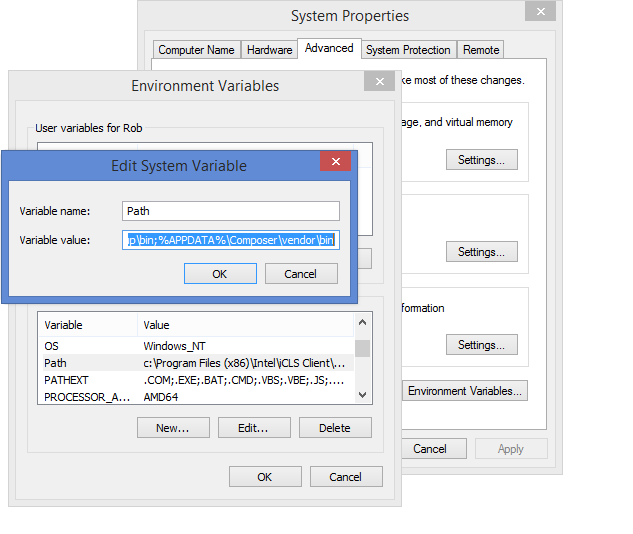
composer global require "laravel/installer=~1.1". This will take a few minutes, depending on the speed of your connection.
  3. Ideally, you want the Laravel executable in your system path. On Windows 7/8, from Windows/File Explorer, right-click “My Computer”/”This PC”, then click Properties. Click Advanced System Settings. Click the Environment Variables button. Clik Path in the System variables section (lower half of the dialogue) then click Edit. At the very end of the Variable value field, add “;%APPDATA%\Composer\vendor\bin”.
    Set PATH
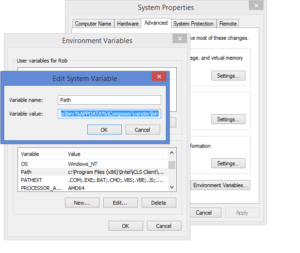
    Click OK as needed to save changes. Git Bash won’t have access to that new PATH variable until you’ve exited and restarted.

Create Laravel Project

All your Laravel projects will be contained and edited within your Windows file system. I use NetBeans for development and tend to keep my development sites under (e.g.): C:\Users\Geek\Documents\NetBeansProjects\Project World Domination. Create this project as follows:

  1. Fire up Git Bash. This makes sure everything happens in the right place. The remaining commands shown below are from this shell.
  2. Change to the directory above wherever you want the new project to be created.
    cd ~/NetBeansProjects
  3. Install Laravel:
    laravel new "Project World Domination"
    Note: if the directory “Project World Domination” already exists, this command will fail with an obscure error.
  4. That’s it for this stage. Were you expecting something more complicated?

Laravel Homestead

Homestead is a pre-built development environment, consisting of Ubuntu, a web server, PHP, MySQL and a few other bits and bobs. It’s a place to host your Laravel websites while you’re testing them locally. Follow these steps to get it up and running:

  1. From a Git Bash prompt, change to your user folder. Make sure this location has sufficient space for storing virtual machines (800MB+ free).
    cd ~
  2. Make the Homestead Vagrant “box” available to your system.
    vagrant box add laravel/homestead
    This downloads 800MB or so and may take a while.
  3. Clone the Homestead repository into your user folder.
    git clone https://github.com/laravel/homestead.git Homestead
    This should be pretty quick and results in a new Homestead folder containing various scripts and configuration items for the Homestead virtual machine.
  4. Edit the Homestead.yaml file inside the Homestead directory. In the section “authorize”, enter the path to your public SSH key (see above). Similarly, enter the path to your private key in the “keys” section.
  5. Vagrant can easily synchronise files between your PC and the virtual machine. Any changes in one place instantly appear in the other. So you could for example in the “folders” section, map C:\Users\Fred\Code (on your Windows machine) to /home/vagrant/code (on the virtual machine). In my case, I’ve got this:
    folders:
    - map: ~/Documents/NetBeansProjects
    to: /home/vagrant/Projects
  6. We’re going to create a fake domain name for each project. Do something like this in the Homestead.yaml file:
    sites:
    - map: pwd.localdev
    to: /home/vagrant/Projects/Project World Domination/public

    Of course, if you put “http://pwd.localdev” in your browser, it will have no idea where to go. See the next section “Acrylic DNS proxy” for the clever trick that will make this all possible.
  7. To fire up the Homestead virtual environment, issue the command vagrant up from the Homestead directory. This can take a while and may provoke a few security popups.

Here’s the complete Homestead.yaml file:

---
ip: "192.168.10.10"
memory: 2048
cpus: 1

authorize: ~/.ssh/id_rsa.pub

keys:
- ~/.ssh/id_rsa

folders:
- map: ~/Documents/NetBeansProjects
to: /home/vagrant/Projects

sites:
- map: pwd.localdev
to: /home/vagrant/Projects/Project World Domination/public

variables:
- key: APP_ENV
value: local

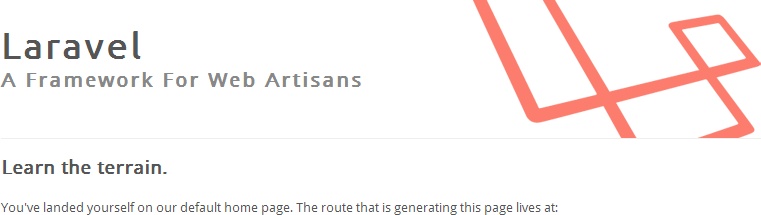
At this point, you should be able to point your browser to http://127.0.0.1:8000. If you have created a Laravel project as above, and everything has gone well, you’ll see the standard Laravel “you have arrived” message. The Homestead virtual machine runs the Nginx webserver and that webserver will by default give you the first-mentioned web site if you connect by IP address.

Laravel landing page

VirtualBox is configured to forward port 8000 on your computer to port 80 (the normal port for web browsing) on the virtual machine. In most cases, you can connect directly to your virtual machine instead of via port forwarding. You’ll see in the Homestead.yaml file that the virtual machine’s IP address is set to 192.168.10.10. So generally (if there are no firewall rules in the way), you can browse to http://127.0.0.1:8000 or http://192.168.10.10 (the port number 80 is assumed, if omitted). Both should work. Personally I prefer the latter.

Acrylic DNS proxy

Of course we want to be able to host multiple development websites on this virtual machine. To do this, you need to be able to connect to the web server by DNS name (www.geekanddummy.com), not just by IP address. Many tutorials on Homestead suggest editing the native Windows hosts file, but to be honest that can be a bit of a pain. Why? Because you can’t use wildcards. So your hosts file ends up looking something like this:


127.0.0.1 pwd.local
127.0.0.1 some.other.site
127.0.0.1 override.com
127.0.0.1 webapp1.local
127.0.0.1 webapp2.local

(If you’re using 192.168.10.10, just replace 127.0.0.1 in the above example.) So this can go on and on, if you’re developing a load of different sites/apps on the same Vagrant box. Wouldn’t it be nice if you could just put a single line, 127.0.0.1 *.local? This simply doesn’t work in a Windows hosts file.

And this is where the Acrylic DNS proxy server comes in. It has many other great features, but the one I’m particularly interested in is the ability to deal with wildcard entries. All DNS requests go through Acrylic and any it can’t respond to, it sends out to whichever other DNS servers you configure. So it sits transparently between your computer and whatever other DNS servers you normally use.

The Acrylic website has instructions for Windows OSes – you have to configure your network to use Acrylic instead of any other DNS server. Having followed those instructions, we’re now most interested in is the Acrylic hosts file. You should have an entry in your Start menu saying “Edit Acrylic hosts file”. Click that link to open the file.

Into that file, I add a couple of lines (for both scenarios, port forwarding and direct connection, so that both work):

127.0.0.1 *.localdev
192.168.10.10 *.localdev

I prefer using *.localdev, rather than *.local for technical reasons (.local has some peculiarities).

This now means that I can now put in my Homestead.yaml file the following:

sites:
- map: site1.localdev
to: /home/vagrant/Projects/site1/public
- map: site2.localdev
to: /home/vagrant/Projects/site2/public
- map: site3.localdev
to: /home/vagrant/Projects/site3/public
- map: site4.localdev
to: /home/vagrant/Projects/site4/public
- map: site5.localdev
to: /home/vagrant/Projects/site5/public
- map: site6.localdev
to: /home/vagrant/Projects/site6/public
- map: site7.localdev
to: /home/vagrant/Projects/site7/public

and they will all work. No need to add a corresponding hosts file entry for each web site. Just create your Laravel project at each of those directories.

Managing MySQL databases

I would recommend managing your databases by running software on your laptop that communicates with the MySQL server on the virtual machine. Personally I would use MySQL Workbench, but some people find HeidiSQL easier to use. HeidiSQL can manage PostgreSQL and Microsoft SQL databases too. You can connect via a forwarded port. If you wish to connect directly to the virtual machine, you’ll need to reconfigure MySQL in the virtual machine, as follows:

  1. Start the Git Bash prompt
  2. Open a shell on the virtual machine by issuing the command vagrant ssh
  3. Assuming you know how to use vi/vim, type vim /etc/my.cnf. If you’re not familiar with vim, try nano, which displays help (keystrokes) at the bottom of the terminal: nano /etc/my.cnf
  4. Look for the line bind-address = 10.0.2.15 and change it to bind-address = *
  5. Save my.cnf and exit the editor.
  6. Issue the command service mysql restart
  7. You can now connect to MySQL using the VM’s normal MySQL port. Exit the shell with Ctrl-D or exit.

Okay, okay, why go to all this trouble? I just prefer it. So sue me.

Forwarded port Direct to VM
Port: 33060
Host: 127.0.0.1
User name: homestead
Password: secret
Port: 3306
Host: 192.168.10.10
User name: homestead
Password: secret

Managing your environment

Each time you change the Homestead.yaml file, run the command vagrant provision from the Homestead directory, to push the changes through to the virtual machine. And once you’ve finished your development session, run vagrant suspend, to pause the virtual machine. (vagrant up starts it again.) If you want to tear the thing apart and start again, run the command vagrant destroy followed by vagrant up.

How-to: Raspberry Pi tutorial part 2: SD card backup/restore

[easyreview title=”Complexity rating” icon=”geek” cat1title=”Level of experience required, to follow this how-to.” cat1detail=”This is wizard-driven. Very simple. You’ll need to be able to burn a CD, nothing more taxing than that.” cat1rating=”1″ overall=”false”]

Contents

In my last Raspberry Pi tutorial (the first in this series), I mentioned that we can take a snapshot of the Raspberry Pi’s SD card at any time. This will give us a “restore point”, so we can skip a few installation steps if we want to wipe the Pi and start again. Quite a few Raspberry Pi projects will require that we start with a working installation of Raspbian so that’s the snapshot I’m going to take. You can of course take a snapshot whenever you like. If you’ve honed and polished your Rasbmc box, it would make sense to take a snapshot in case it becomes horribly corrupted at some point or melts.

There are many different ways of skinning this cat (or squashing this ‘berry), but my preferred method is the tried and tested customised Linux distribution, Clonezilla. I’ve been using CloneZilla personally and professionally for years and persuaded many colleagues of its merits (besides the obvious, that it’s free). It can be a bit intimidating with all the options it presents. If this is your first experience of CloneZilla, following this tutorial will also give you a gentle introduction to this powerful toolkit.

What you’ll need

  • A copy of Clonezilla, burned to disc.
  • A computer (desktop or laptop) configured to boot from CD.
  • An external hard drive, with enough space to store the image (you’ll only need a few gigabytes spare).
  • A USB reader for your SD card. You can buy one here.

Some of your Clonezilla kit

Take a snapshot

  1. Power down your Pi, with the command halt, shutdown or poweroff.
  2. Boot your PC from the Clonezilla disc. You will arrive at a simple menu/boot screen. It will boot automatically within 30 seconds – you can hit enter at any time, to proceed.
    Snapshot step 01
  3. You’ll be treated to rows and rows of gibberish while Clonezilla boots up.
    Snapshot step 02
  4. Choose your language and keyboard setting.
    Snapshot step 03
  5. Hit enter to start Clonezilla (yeah, you thought it had already started, didn’t you).
    Snapshot step 04
  6. Insert your Raspberry Pi’s card, in its reader.
    Snapshot step 05
  7. Choose “local_dev”.
    Snapshot step 06
  8. A screen prompt will tell you to insert your external hard drive.
    Snapshot step 07
  9. Insert the external drive and then wait for 5 seconds or so.
    Snapshot step 08
  10. A few lines will indicate that Clonezilla has registered the presence of the drive.
    Snapshot step 09
  11. Hit enter and Clonezilla will mount the various partitions now available to it.
    Snapshot step 10
  12. Select the external hard drive as the drive to which we’re copying the snapshot (in my case, the largest partition on the list).
    Snapshot step 11
  13. Hit enter. If the drive wasn’t cleanly dismounted before (oopsie), Clonezilla will check and fix as required.
    Snapshot step 12
  14. Choose a directory to store the SD card image and hit enter.
    Snapshot step 13
  15. Clonezilla will spit some more gibberish at you. Ignore it and hit enter.
    Snapshot step 14
  16. Though it makes me feel a little silly, choose Beginner mode.
    Snapshot step 15
  17. Choose “savedisk”.
    Snapshot step 16
  18. Give your disk image a meaningful name.
    Snapshot step 17
  19. Select the SD card, to save the image. You use cursor keys and the space bar here.
    Snapshot step 18
  20. Select Ok to continue.
    Snapshot step 19
  21. If you’re confident your SD card is in good shape, you can skip checking it.
    Snapshot step 20
  22. I’d recommend checking the saved image though. It doesn’t take long and gives you peace of mind that you should be able to restore from this image.
    Snapshot step 21
  23. Clonezilla will helpfully point out that you can do all this from the command line (yeah, right).
    Snapshot step 22
  24. Press Y and enter to continue.
    Snapshot step 23
  25. Shouldn’t take too long.
    Snapshot step 24
  26. When it’s all done, it’ll report progress. Press enter.
    Snapshot step 25
  27. Enter 0 to power off (or whatever you prefer) followed by enter.
    Snapshot step 26
  28. Clonezilla will eject the disc. Hit enter to carry on.
    Snapshot step 27

You should now have an image (consisting of several files) on your external hard drive, which you can later use for restoration. Job done.

Restore a snapshot

In this scenario, we’re starting with everything powered off, ready to begin.

  1. Boot your PC from the Clonezilla disc. You will arrive at a simple menu/boot screen. It will boot automatically within 30 seconds – you can hit enter at any time, to proceed.
    Restore step 01
  2. I’ve got to say, this screen full of strange foreign characters is pretty unnerving. But don’t worry. It’ll pass.
    Restore step 02
  3. Choose your language.
    Restore step 03
  4. I’ve never found I’ve had keyboard problems, even though I use a UK keyboard…
    Restore step 04
  5. Hit enter to begin.
    Restore step 05
  6. Insert the SD card/reader. Some nonsense will appear on screen. Don’t worry – just hit enter.
    Restore step 06
  7. Select “local_dev” and hit enter.
    Restore step 07
  8. Insert your external hard drive and wait 5 seconds or so for it to be recognised.
    Restore step 08
  9. It’ll detect the drive – hit enter.
    Restore step 09
  10. Next, it will mount your various partitions.
    Restore step 10
  11. You may have a few…
    Restore step 11
  12. Choose the external drive from the list then hit enter.
    Restore step 12
  13. Clonezilla will check the drive.
    Restore step 13
  14. Choose the directory where your saved image is stored and hit enter.
    Restore step 14
  15. Clonezilla will give you an overview of its file systems. You will be thrilled. Hit enter.
    Restore step 15
  16. Choose “Beginner”, no matter how patronised you may feel.
    Restore step 16
  17. Choose “restoredisk”.
    Restore step 17
  18. Select the previously saved image.
    Restore step 18
  19. Choose the SD card. Hit enter.
    Restore step 19
  20. Clonezilla reckons you really want to do this at the command line. Hit enter.
    Restore step 20
  21. This is a destructive operation and will wipe your SD card. Press Y then enter.
    Restore step 21
  22. Clonezilla doesn’t trust your judgment. Hit Y and enter again.
    Restore step 22
  23. There are two partitions to restore to this card. You’ll get a progress report for each restoration.
    Restore step 23
    Restore step 24
  24. Clonezilla will let you know once it’s done.
    Restore step 25
  25. Press enter to continue.
    Restore step 26
  26. Choose 1 to reboot (or whatever you prefer) then hit enter.
    Restore step 27
  27. Once the CD is ejected, you can also disconnect the SD card and hard drive. Hit enter.
    Restore step 28
  28. Witness the majesty of the Linux death rattle.
    Restore step 29

If all went well, you can now install this SD card back in your Pi, boot up and continue.

How-to: Raspberry Pi tutorial part 1: Getting started

[easyreview title=”Complexity rating” icon=”geek” cat1title=”Level of experience required, to follow this how-to.” cat1detail=”The geek factor is quite high here, but this process is not particularly taxing.” cat1rating=”2.5″ overall=”false”]

Contents

In the line of my work, I’ve recently had cause to become better acquainted with every geek’s favourite cheap computer, the Raspberry Pi. At the time of writing, you can pick up a Pi for an extremely reasonable £30, but the first thing I discovered was that this is only half the story. For a workable system, you need all the necessary cables, some storage and a case. Here’s my shopping list:

The Pi plus extra bits, in all their glory

So my total is £69.95 – over twice the price of buying just the Pi. But still pretty cheap, considering. You’ll also need a USB mouse/keyboard for initial input. I’m going to run my Pi headless (no screen or input devices needed, just a network connection), so I’m borrowing my Microsoft Natural wireless desktop for this purpose, which the Pi detected without issue.

Hardware installation

This may well be the easiest hardware installation you ever perform. The case has a couple of punch outs that you need to remove for the model B Pi. I forgot to photograph them I’m afraid, but it will be obvious – when you try and put the Pi in the case, it won’t fit without these pieces removed (e.g. for the ethernet port).

Pi and case

Put the Pi in the case.

Pi case installation

Put the case together and fasten the screws. Make sure you put the VESA mount between the screws and the case, if you’re going to monitor-mount the Pi.

Pi case and VESA mount

That’s it.

What to do, what to do…

There are lots of potential uses for your Pi. It has limited processing power and memory but apart from that, the only real limit is your imagination. I have no imagination to speak of, so I’m going to do what I do with every other gadget: put Linux on it and set it up as a home web/file server. I’ll cover the web/file server setup in a subsequent tutorial.

Here’s the plan:

  • Install Rasbian (a Pi-centric version of the venerable Debian GNU/Linux distribution).
  • Set up Webmin/Virtualmin for management of the server/web sites.
  • Install OwnCloud and create my own Dropbox replacement.
  • Experiment with using the Pi as a remote desktop client or thin/fat terminal.

In the process, I’m looking for any major issues or gotchas – things you might want to be aware of if you’re thinking of getting into Pis in a big way.

Prepare the SD card

For this step, you’ll need an SD card reader. If you don’t have a laptop/computer with a built-in reader, you can buy an external reader here. Note: my laptop’s built-in card reader was not supported by the SD Formatter program (see below) so I used an external reader.

  1. From the SD Association’s official website, download and install the SD Formatter.
  2. Format the SD card using SD Formatter:
    SD Formatter
  3. Download NOOBS (“New Out of Box Software” – chortle) from the official Raspberry Pi website. This file is currently over 1GB. I tried the direct download and it was pretty slow, so I’d recommend using the torrent if you’re so equipped. NOOBS gives us a choice of different operating systems to install on the Pi.
    NOOBS
  4. Extract the contents of the NOOBS zip file onto the newly formatted SD card.
    NOOBS files

Whack the SD card into the Pi and connect everything up (power last of all, since there’s no power switch). If at this point you don’t see any output, the chances are that your SD card has not been recognised. I’m using a Class 10, but I’ve read that some people have had problems with Class 10 cards and better results with Class 6. If your card is recognised, you should be rewarded with a few pretty lights when powered up.

Pi plumbed in

Install and configure Raspbian

At the NOOBS screen, choose Rasbian and click Install OS, then Yes. Go grab yourself a quick coffee.

Raspbian installation

The install will take a few minutes (the speed of your SD card is a factor here). Once it’s done, you’ll see a message “Image applied successfully”. Click Okay to reboot the Pi with your new OS.

Raspbian installation progress

raspi-config will launch with some initial setup options. I’ll work through them one by one.

raspi-config

  1. Expand the filesystem: You can skip this, because this option isn’t needed for NOOBS-based installations. Otherwise, this ensures you’re using the whole of the SD card.
  2. Change the password for the “pi” user. The default password is “raspberry”. Improve on that.
  3. Enable/disable boot to desktop: I’m not planning to use a desktop system with this Pi. X Windows is such a resource hog that we definitely want to set this to “No”. Of course if you want to use the Pi as a desktop system, you’ll select “Yes” here.
  4. Internationalization options: I’m in the UK, with a UK keyboard layout. It’s not a huge problem since generally I’ll be accessing the Pi via a web interface or service, but I am fussy, so I set everything up to be UK-centric. My correct locale was already selected. In these dialogue boxes, use the spacebar to select/deselect options, tab to move between fields, up and down cursors keys to navigate and enter to select.
  5. Enable camera: do this if you’ve bought the optional camera module (I haven’t).
  6. Add to Rastrack: this puts you on the Rastrack map of Pi installations. Not for me, but you might be interested.
  7. Overclock: if you need to squeeze more juice out of your Raspberry, you can force it into a more frantic mode of operation. I’m not going to do this, at this stage.
  8. Advanced options: Here, I’m going to set the hostname of the Pi and reduce the Pi’s use of GPU memory to 16MB (since we’re not running a graphical desktop). I’m also going to ensure that SSH is enabled (for later remote logon purposes).
  9. Finish and reboot to an ordinary logon prompt.
  10. For demo/proof of concept servers where security is less of a concern, I like to be able to log on as root. You can give the root user a password by logging in, then entering sudo passwd root and following the prompts.

Configure networking

I need this Pi to have a static IP address. You can use a DHCP reservation for this purpose if you like, but I prefer to create a fixed IP address on boot. Like this:

  1. Log in.
  2. If you didn’t log on as root, give yourself an elevated shell: sudo su
  3. Install your favourite console-based text editor. For me this is vim: apt-get --force-yes -y install vim
  4. Use the editor to edit the /etc/network/interfaces file. Replace the line iface eth0 inet dhcp with iface eth0 inet static
    address 192.168.1.11
    netmask 255.255.255.0
    gateway 192.168.1.1

    adjusting the values to match your network as appropriate.
  5. My DNS was already correctly configured, but you may need to check the contents of your /etc/resolv.conf file to ensure DNS is set up. If in doubt, this configuration should work:
    nameserver 8.8.8.8
  6. Save the files then back at the command prompt, enter reboot to restart the Pi with the new network configuration.
Typical Raspbian bootup messages

Once the Pi is up and running you’ll be able to connect via SSH using your favourite terminal emulation program (mine’s PuTTY).

As you’ll see from the Contents section above, I have a few ideas for things to do next. It’s a good plan to take a snapshot of the Pi in its current state, so we can hit the ground running any time we want to try something different, with a Raspbian base, so this will be the subject of my next how-to. In the meantime, if you have any questions about what we’ve done so far, or if you have any ideas for later tutorials, let us know in the comments!

Until next time. 🙂

From CodeIgniter to Laravel | part 4: managing databases

UPDATE: I have re-written this article for the new Laravel 4. You’ll find the updated article over at Geek & Dummy.

Contents


AVZ DatabaseFor almost all my previous web design, I’ve used phpMyAdmin to administer the databases. I speak SQL, so that has never been a big deal. But Laravel comes with some excellent tools for administering your databases more intelligently and (most importantly!) with less effort. Migrations offer version control for your application’s database. For each version change, you create a “migration” which provides details on the changes to make and how to roll back those changes. Once you’ve got the hang of it, I reckon you’ll barely touch phpMyAdmin again.

Configuration

So let’s assume that I’m creating a new website about ducks. When I created the virtual host, Virtualmin also created my “ducks” database. I’m going to create a MySQL user with the same name, with full permission to access the new database. Here’s how I do that from a root SSH login:

echo "GRANT ALL ON ducks.* TO 'ducks'@localhost IDENTIFIED BY 'newpassword';" | mysql -p
Enter password:[root MySQL password]

This creates a new MySQL user, “ducks” and gives it all privileges associated to the database in question. Next we need to tell Laravel about these credentials. The important lines in the file application/config/database.php are:

<?php
return array(

//...

	'default' => 'mysql',

	'connections' => array(

//...

		'mysql' => array(
			'driver'   => 'mysql',
			'host'     => '127.0.0.1',
			'database' => 'ducks',
			'username' => 'ducks',
			'password' => 'newpassword',
			'charset'  => 'utf8',
			'prefix'   => '',
		),

//...

	),

//...

);

Initialise Migrations

The migration environment must be initialised for this application. We do this using Laravel’s command line interface, Artisan. From an SSH login:

php artisan migrate:install
Migration table created successfully.

This creates a new table, laravel_migrations, which will be used to track changes to your database schema (i.e. structure), going forwards.

My ducks application will have a single table to start with, called “ducks” [Note: it is significant that we’re using a plural word here; I recommend you follow suit]. This table does not yet exist; we will create it using a migration. To kick this off, use the following Artisan command:

php artisan migrate:make create_ducks_table
Great! New migration created!

This will create a new file named something like “2013_04_15_085356_create_ducks_table.php”. If, like me, you’re developing remotely, you’ll need to pull this new file into your development environment. In NetBeans, for example, right-click the migrations folder, click “download” and follow the wizard.

You can deduce from the naming of the file that migrations are effectively time-stamped. This is where the life of your applications database begins. The migrations file will look a bit like this:

<?php

class Create_Ducks_Table {

	/**
	 * Make changes to the database.
	 *
	 * @return void
	 */
	public function up()
	{
		//
	}

	/**
	 * Revert the changes to the database.
	 *
	 * @return void
	 */
	public function down()
	{
		//
	}

}&#91;/php&#93;

As you can probably guess, in the "up" function, you enter the code necessary to create the new table (to move "up" a migration) and in the "down" function, you do the reverse (to move "down" or to roll back a migration).

<h1>Create first table</h1>

Your first migration will probably be to create a table (unless you have already created or imported tables via some other method).  Naturally, Laravel has a class for this purpose, the <a href="http://laravel.com/docs/database/schema" target="_blank">Schema class</a>.  Here's how you can use it, in your newly-created migrations php file:

[php]<?php

class Create_Ducks_Table {

	/**
	 * Make changes to the database.
	 *
	 * @return void
	 */
	public function up()
	{
		Schema::create('ducks', function($table) {
				$table->increments('id');              // auto-incrementing primary key
				$table->string('name', 255);           // varchar field; length 255 characters
				$table->date('birthdate')->nullable(); // can be empty
				$table->boolean('can_fly')->default(TRUE);
				$table->integer('children')->unsigned();
				$table->text('biography');
				$table->timestamps(); // special created_at and updated_at timestamp fields
		});	
	}

	/**
	 * Revert the changes to the database.
	 *
	 * @return void
	 */
	public function down()
	{
		Schema::drop('ducks');
	}

}

To run the migration (i.e. to create the table), do the following at your SSH login:

php artisan migrate
Migrated: application/2013_04_15_085356_create_ducks_table

That creates the table, as described. And if you need to roll back:

php artisan migrate:rollback
Rolled back: application/2013_04_15_085356_create_ducks_table

This removes the table.

By examining the Schema class documentation, you’ll see how you can use future migrations to add or remove fields, create indexes, etc. In my next tutorial, I’ll have a look at using databases in your application.

AVZ Database image copyright © adesigna, licensed under Creative Commons. Used with permission.

From CodeIgniter to Laravel | part 3: installing external libraries

UPDATE: I have re-written this article for the new Laravel 4. You’ll find the updated article over at Geek & Dummy.

Contents


LibraryAs a fan of CodeIgniter, I was very pleased when the Sparks project came on the scene, offering a relatively easy way to integrate third-party libraries/classes into your project. Laravel has a similar and arguably more feature-rich analog in Bundles. With a bit of luck, the third-party library you require has already been converted to a Laravel bundle, making installation a snip.

Let’s say, for example, we’re going to build a web-scraping application. The first two libraries I’d consider adding to the project would be the Requests HTTP library and the PHP Simple HTML DOM Parser.

From an SSH login, at the root of your project, issue the following command:

php artisan bundle:install requests phpsimplehtmldom

You should be greeted with the following results:

Fetching [requests]...done! Bundle installed.
Fetching [phpsimplehtmldom]...done! Bundle installed.

The file application/bundles.php will probably contain code along the following lines:

<?php

/*
 &#91;...various comments...&#93;
*/

return array(

	'docs' => array('handles' => 'docs'),

);

Register the new libraries like this:

return array(

	'docs' => array('handles' => 'docs'),
	'requests' => array('auto' => TRUE),
	'phpsimplehtmldom' => array('auto' => TRUE),

);

And use like this:

		$HDM = IoC::resolve('HtmlDomParser'); // Give us a hook into the library; Requests doesn't need this

		// Request the HTML page
		//$headers = array('Accept' => 'application/html');
		$headers = array();
		//$options = array('auth' => array('user', 'pass'));
		$options = array();
		$request = Requests::get('http://some.domain/some/page', $headers, $options);
		if($request->status_code != 200) {
			// Handle error retrieving page
		}

		$dom = $HDM::str_get_html($request->body);

		// Options
		$options = $dom->find('#somediv option');
		foreach($options as $option) {
			echo $option->value.' | '.$option->innertext."<br />";
		}

There’s a lot more to this IoC thing than meets the eye. To be frank, it’s above my head. I’m also not convinced I fully understand registering bundles. But, like CodeIgniter, learning is a process of immersion in the framework. I’m pretty sure than in a couple of years I’ll laugh at the code above. So all I ask is please be gentle in the comments. 😉

Library image copyright © Janne Moren, licensed under Creative Commons. Used with permission.

From CodeIgniter to Laravel | part 2: orientation

UPDATE: I have re-written this article for the new Laravel 4. You’ll find the updated article over at Geek & Dummy.

Contents


Signpost at North Point, Barbados, Feb.1998I’ve used CodeIgniter for many years, but I have always, I confess, proceeded knowing just enough to get by. So forgive me if my approach seems a little clunky. I have never, for example, used CodeIgniter’s routes. I like my web application files nicely categorised into Model, View, Controller, Library and, if absolutely necessary, Helper.

Controllers

So for now, I want to carry on using Controllers, if that’s okay with you. Controllers are stored under application/controllers. Sound familiar?

Here’s a sample controller:

<?php

// application/controllers/news.php
class News_Controller extends Base_Controller {

	public function action_index() {
		echo "News index page.";
	}

	public function action_item($item) {
		echo "News item $item.";
	}

}
?>

In CodeIgniter, that’s all you would have needed to do, due to automatic routing. In Laravel, you need also to add the following to application/routes.php:

Route::controller('news');

To view these pages, you just visit yourdomain/news (/index is implied) and yourdomain/news/item/x (where x will probably refer to a specific news item, possibly by data id).

Note the naming of the functions – action_item, etc. The part after the underscore represents a “method” or page of your web site. Laravel’s routing magic makes sure you get the correct function. If you’re creating a RESTful API, you can use additional function names beginning get_, post_, etc. Check the Laravel documentation for more.

Views

Views are pretty straightforward and similar to CodeIgniter. Place them in application/views. Extending the example above, our controller could now look like this:

<?php

// application/controllers/new.php
class News_Controller extends Base_Controller {

	public function action_index() {
		echo "News index page.";
	}

	public function action_item($id) {
		$data = array('id' => $id);
		return View::make('results', $data);
	}

}

?>

Note that data can also be passed through to a view like this:

	public function action_item($id) {
		return View::make('item', $data)
		    ->with('id' => $id);
	}

And then your view (application/views/item.php) could be like this:

<h1>News flash</h1>
<p>This is news item <?php echo $id; ?>.</p>

Obviously your real views will be more syntactically complete.

Models

Models are created under application/models. Unlike CodeIgniter, Laravel comes with its own object relational mapper. In case you’ve not encountered the concept before, an ORM gives you a convenient way of dealing with database tables as objects, rather than merely thinking in terms of SQL queries. CodeIgniter has plenty of ORMs, by the way, it just doesn’t ship with one as standard.

Laravel’s built-in ORM is called “Eloquent”. If you choose to use it (there are others available), when creating a model, you extend the Eloquent class. Eloquent makes some assumptions:

  • Each table contains a primary key called id.
  • Each Eloquent model is named in the singular, while the corresponding table is named in the plural. E.g. table name “newsItems”; Eloquent model name “newsItem”.

You can override this behaviour if you like, it just makes things a bit more convenient in many cases.

Example model application/models/newsItem.php:

<?php
class NewsItem extends Eloquent {

}

(You can omit the closing ?> tag.)

Because the Eloquent class already contains a lot of methods, you do not necessarily need to do more than this. In your controllers, you could for example now do this:

$items = NewsItem::all();

foreach ($items as $item) {
  // Do stuff here
}

This is barely scratching the surface. Head on over to the official Laravel documentation for much more on all this.

Signposts image copyright © Andrea_44, licensed under Creative Commons. Used with permission.

From CodeIgniter to Laravel | part 1: installation

UPDATE: I have re-written this article for the new Laravel 4. You’ll find the updated article over at Geek & Dummy.

Contents


Laravel logoIn my final “how-to” guide on self-hosted web design, I gave a special mention to a relatively new PHP framework, Laravel. I’m very familiar with CodeIgniter, but due to some of its limitations (including concerns over licensing, going forward), many developers have been moving to Laravel. Laravel has been on my “must try it out” list for some time. In this article, I’ll take you through initial installation and some of the issues I faced.

Prerequisites

Since this “how-to” follows my DIY web hosting series, I’m going to assume we’re starting with a similar setup: a virtual web site powered by Apache and PHP on Linux. Other environments work too. See the Laravel documentation for more details.

Installation

The Laravel setup guide is a little unclear about the correct location for its files. Here’s what I’ve found to work. This guide is for Laravel 3.2, but I suspect it will also hold true for later versions in due course. (At the time of writing, 4.0 is still in beta.)

If you’ve created a virtual web site with Virtualmin, you’ll have a new public_html directory at, for example, /home/fred.bloggs/domains/my.funky.site/public_html. Change to the directory above public_html (e.g. /home/fred.bloggs/domains/my.funky.site and proceed as follows, from an SSH login. Make sure you perform these steps as the web site owner (e.g. su fred.bloggs):

wget http://laravel.com/download -O laravel.zip
unzip laravel
rm laravel.zip
mv laravel-laravel-*/* .
mv laravel-laravel-*/.[gt]* .
rmdir laravel-laravel-*
mv public/* public_html/
mv public/.h* public_html/
rmdir public
chmod -R ug+w storage/views

If you read the Laravel installation instructions linearly, you’ll see that you need to make a change to application/config/application.php. It contains a line like:

'key' => 'YourSecretKeyGoesHere!',

The recommendation is that you insert 32+ random characters in place of YourSecretKeyGoesHere!. There’s another way of doing this, if (and only if) the key field is blank. Laravel comes with a CLI (command line interface) called Artisan. If you issue the command php artisan key:generate, a random key will be generated for you automatically and inserted into the file.

To remove “index.php” from your URLs, edit that same file (application/config/application.php). Find the line 'index' => 'index.php', and change it to 'index' => '',. Laravel comes with a .htaccess file in the public directory, which contains the necessary Apache magic to make this all work.

Having done the above, fire up your web browser and point it at your new site. You should arrive at a default introductory Laravel page:

laravel_default

Other frameworks

Now would be a good time put to put Twitter’s Bootstrap and jQuery in place, if you’re planning to use them. Check the download URLs are current before you do this:


wget http://twitter.github.com/bootstrap/assets/bootstrap.zip
unzip bootstrap
rm bootstrap.zip
mv bootstrap/css/* public_html/css/
mv bootstrap/js/* public_html/js/
mv bootstrap/img/* public_html/img/
rm -rf bootstrap
cd public_html/js
wget http://code.jquery.com/jquery-1.9.1.min.js

Configure your development environment

I use NetBeans for development. If you don’t already have a preferred IDE (integrated development environment), I recommend you check it out. Another favourite is Eclipse. You could use an ordinary text editor, but then you’d be missing out on a lot of things that can make your coding more comfortable and efficient.

Having installed Laravel and the other frameworks on my web server, next I use NetBeans to pull the code across to my development environment. Before you do this, still in your SSH shell, you may wish to delete some of the typical directories that Virtualmin creates but which you don’t really need:

rmdir cgi-bin/ homes/

In the NetBeans “New Project” wizard, select the option “PHP Application from Remote Server”. In the remote configuration, ensure that you choose as your “upload directory”, the directory above public_html, since that contains the private (non-web-accessible) Laravel directories, which we will also be playing with.

Once the code has copied across, you’ll want to exclude a couple of Virtualmin-generated directories from further synchronisation. In the project’s properties, go to “Ignored folders”. Add there /logs and /public_html/stats.

Where next

I’m slowly writing additional tutorials, while I take time to learn the framework. See the contents list above for other posts in this series. I also recommend you check out Dayle Rees’ tutorials. Happy coding!